



| Here is a complete guide for Mega Man Zero. Choose the tab you want in order to view its content. |

|
Release
Date: |
Developer: |
|
Systems: |
Genre: |
Intro: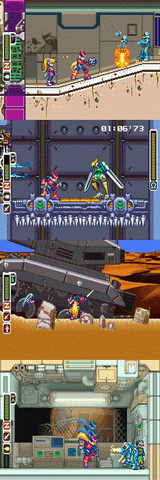
Introducing the second Mega Man series onto the Game Boy Advance after the
Battle Network series, MegaMan Zero brings 32-bit graphics, gorgeous sound and
intriguing gameplay to a new portable level, as well as all the enjoyment and
challenge from the X series.
Game Specs:
You'll be taking control of Zero for his first solo mission, taking the
Resistance fighter's fate into your own hands while battling the armies of Neo
Arcadia in over 10 missions packed with action and adventure. Equipped with his
Z-Buster and Z-Saber, Zero will learn new techniques after gaining experience,
as well as gaining new weapons and abilities. Using new Cyber-Elf technology,
you can enhance Zero's powers and defenses to maximum heights. Facing hordes of
enemies, Zero will gain help from the many reploids hoping for peace, but after
100 years of sleep, Zero will have to shake of the hibernation effects as
although the Mavericks are gone forever, this new evil threat will prove to be
far more dangerous and more capable of destruction than the Mavericks ever
were,and their leader in particular is waiting for the final moment to meet
Zero, when he can match his powers to Zero's immense abilities...



Zero:
Zero is a legendary Hunter that has fought countless times against the
Mavericks in an effort to bring peace between humans and Reploids. Since his
last battles against Sigma alongside X, Zero felt that the best way to rid
himself of the original Maverick Virus contained in his body was to seal
himself away for 100 years. That time has past, Zero's mind is still in
balance but his memories of the past are scratchy, and the new threat of the
corrupt Neo Arcadia has Zero fighting for justice more so than ever, as he
will continue to believe in fighting for good, despite his creator's
original intentions. With the Maverick threat finally gone, Zero's abilities
will increase throughout this adventure, but his mind and skill will be put
to the ultimate test when he confronts the leader of Neo Arcadia's massive
army.

Ciel:
Ciel is the brilliant human scientist who discovers Zero and pleads for
his help in the war against Neo Arcadia. Her abilities and fighting
spirit have made her one of the most vital assets to the Resistance
movement, her role in the war will be crucial for the downfall of Neo
Arcadia. Throughout Zero's adventure, Ciel will be constantly briefing
him on new missions and objectives, she'll also give him hints along the
way to further his progress. Without Ciel, the Resistance wouldn't have
a chance, so Zero must trust her in every situation, although not all of
her secrets will be known to Zero straight away...

Resistance Reploids:
These Reploids make up most of the Resistance's fighters, engineers
and medics. As they usually don't stand a chance against the titan
Neo Arcadia fighter Reploids, they're always grateful for any help
Zero can offer, but they'll be willing to back him up in any event.
Be sure to talk to all the Reploids in the Resistance base, as
they'll all be willing to give Zero hints and tips, as well as new
weapons.

Unknown X:
This unknown spirit will make more than one appearance in the
game. Zero, neither Ciel, have no idea what this spirit is or
it's purpose, but Zero will soon quickly realize that it is not
something to fear, and could be a possible ally against Neo
Arcadia. This being will watch over Zero's progress, but it will
only reveal it's true identity once Zero rights the wrongs of
Neo Arcadia.

Master X's
Guardians:
X's four Guardians exist to do his bidding. Harpuia, Fefnir,
Phantom and Leviathan go about enforcing X's evil laws and
fear, while their followers continue to shut down innocent
Reploids they believe to be Maverick. Vastly powerful, the
Guardians are always on the lookout for a worthy opponent,
but little do they know that their greatest challenge is
about to appear in the form of Zero, and in legacy of Sigma
and the Mavericks, the Guardians will underestimate Zero
powers, not knowing of the unlimited energy contained within
Zero's body.

Master X:
Master X is the leader and dictator of Neo Arcadia.
Using his vast army and four Guardians, he has managed
to take control of most governments while ruling with an
iron fist. Although his core intentions may be noble by
attempting to bring peace for humans, his method of
ruling by use of fear and destroying innocent Reploids
has given his cause and empire an evil nature. No one
knows why he believes Mavericks still exist as the last
of the Mavericks were wiped out years ago, and now that
Zero's body no longer contains the original virus, the
Mavericks are gone forever. Despite this, Master X
continues to cause evil without a second thought. Zero
believes that Master X was the same Mega Man X that
fought alongside him against the Mavericks, but Zero is
willing to destroy X to restore peace and bring true
happiness between humans and Reploids.
Intro Stage:
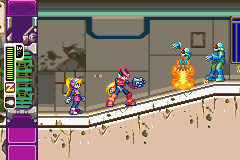
This is a pretty straightforward mission, you'll need to reach the Trans
Server at the far end of the Underground Lab. Once Ciel releases Zero from
his hibernation, head right. You'll encounter a load of blue soldiers, blast
them before they hit you or Ciel. Beyond you'll move through large hallways
filled with a multitude of spider-like robots. Make sure Ciel keeps up with
you, and blast any spiders you encounter. Whenever you see a large white
spider nest, destroy it as more spiders will continue to pour out of them.
You'll soon encounter more blue soldiers, this time equipped with small
electro poles. Stay away from them to avoid taking damage.
If you see a
small red ball hovering in the air, shoot it from afar as it'll blow and
cause a large explosion once hit. Once you reach the end of the hallway,
Ciel will fall through the floor as Zero catches her. You'll drop down a
huge hole, head right once you land to face the Golem boss.
Disposal Center:
This mission will have you venturing into the Disposal Center with the
intention to shut down the facility to stop innocent Reploids from being
destroyed there. Once you begin, head right and be careful of the spiked
balls rolling towards you often. Use the Z-Buster to pick them off
quickly before they roll into Zero. Take down any blue soldiers on the
way, then once you reach a large wall climb up the ruined crane to reach
the top. You'll notice that it'll begin to rain. When the rain comes
down on an angle, it'll push you in one direction, so you'll need to
find and destroy the large floating devices to stop the rain falling at
angles. Drop down the other side of the wall and continue on.
When
you reach the large spiked pillar that rises up out of the ground,
destroy the three main blocks of the pillar to push it back down.
Continue on and watch out for the spiked trap. You'll eventually reach
another large wall, scale the ladders and hack the blue soldiers above.
Jump down the other side of the wall and move on. Keep going right and
you'll reach a crashed vehicle. Jump up to the entrance on the right to
find the Disposal Center and to confront Aztec Falcon.
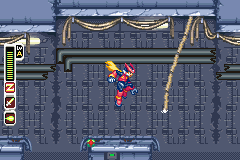
Destroy Train:
In this mission you'll have to locate and destroy the enemy train
docked in the subway. Once you begin, head down the ladder and go
right. Throughout this large hallway you'll find a range of enemies,
including ones that fly towards Zero, hack at them before they hit
you. You'll also encounter gun turrets on the roof and small robots
wheeling around the ground. Be careful of the large holes and don't
get hit as you jump over them otherwise you'll fall in. When you
reach the long wires hanging from the ceiling, hack at them to knock
them down and avoid touching the ends of them. Eventually you'll
reach a large door. Head through to face a large robot with a
shield.
Jump up and hit the top of the robot to reveal it's weak
point, the large orange capsule near the bottom of it. Hack away at
the capsule before the robot rises back up, but when it does stand
back as it'll launch out a spiked ball on a chain. It might also
fire out several energy bolts. Once you destroy it grab the
Cyber-elf that appears and head right to find the train. Once you
jump on the train it'll begin to move and you'll have 3 minutes to
rescue the captured Cyber-elf. Jump up to the top of the train and
head right. Be careful as there'll be strong blue soldiers on the
train as well as the jetpack ones, quickly hack away at them and
jump if they dash towards you. Once you reach the next carriage,
jump down into it to find a full health refill capsule. Jump to the
next carriage and head right. Watch out for the flying robots and
the missiles they fire, and be careful of the robots with the large
spiked balls. Once you reach the final carriage head through the
door to find the train's Engine Core.
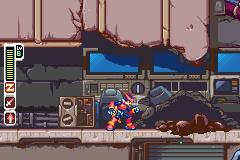
Retrieve Data:
This mission will involve heading back to where Ciel found Zero,
you'll need to retrieve data from that area. You'll start out at
the Trans Server in the Underground Lab, heading back to the
room where the game started won't be too difficult, you'll just
have to get past more enemies than before. As you climb up the
large shaft ahead, you'll notice a round robot that rotates
around with two electric beams extended. You can't destroy these
robots, so you'll just have to time it right to avoid the beams.
You can use these robots to raise your weapon levels quite
quickly, as they can't be destroyed and you can go on hitting
them for as long as you like.
You'll encounter more blue
soldiers along the way, but once you make it back to the Zero's
hibernation room you'll confront Maha Ganeshariff. Once you
defeat Maha, you'll need to get back to the Trans Server as
quickly as possible, as massive blocks will begin falling from
the ceiling, sealing off the entire area. Once you gain control
of Zero again dash back to the right, have the Z-Saber equipped
and get ready to break down any doors that close up on you.
Don't worry about confronting any enemies along the way, just
keep going as fast as you can and hack down the doors. Once you
reach the large shaft leading down you'll complete the mission.
Head into the Trans Server to return to base.
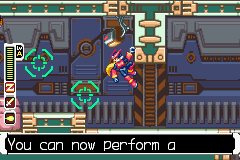
Occupy Factory:
Here you'll have to make your way through the factory and
find the boss guarding the main control room. You'll begin
outside the main entrance, so head right to enter the
factory. If you want to find a secret room full of crystals,
and extra life and a Cyber-elf, jump up to the raised
platforms and head left to reach the top of the large silos.
Head right across them to find the hidden room. If you go
into the main entrance of the factory, you'll have to avoid
being detected by large sensors otherwise a huge door will
begin to close further inside. If a sensor spots you,
quickly get up to the elevator before the door closes fully.
You'll eventually reach the elevator, hit the switch on the
right wall to activate the elevator, then ride it down the
shaft and go right.
Climb up the ladder ahead and go over
to the huge hole. Here you'll have to ride across moving
platforms, but as you go along watch out for the metal
welders moving back and forth ahead. Try to stay back or
rush ahead as they rise, but make sure you don't get hit or
you might fall off. You can also jump over the welders, you
won't take damage unless you hit the spark at the end of
them. Hack the spiders along the way, and try to remember
where the platforms rise up from, as you'll be coming back
here in a later mission. Once you reach a ladder, climb up
and go left. Be careful of the laser traps ahead, go through
when they stop firing. Keep going until you reach another
ladder leading up, climb up and head right to face the Hydra
Mechaniloid.
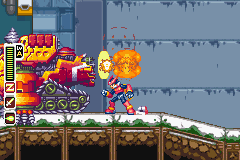
Find Shuttle:
This mission involves a trek across the desert to find a
crashed shuttle and any surviving Reploids. You'll just
have to proceed left over the desert over fairly easy
terrain while facing a horde of enemies. Slash the
dragon heads that pop up out of the ground before they
fire bombs, and be careful of the vultures that swoop
down often. One swing should finish the vultures easily.
When you reach the sand pits, destroy the rotating
devices at the bottom to stop the sand from moving, but
be careful of all the bear-traps lying about, hack away
at them from the side to destroy them easily (the Flame
Chip burns them well). It's a good idea to destroy all
the rotating devices in the sand pits as you'll be
leading an injured Reploid back through them soon.
When you encounter large tornadoes, use the Z-Buster to
destroy the robots at the center of them from afar.
After clearing a number of sand pits and ruined
structures you'll reach the clearing before the shuttle
where you'll face Anubis Necromancess III. Once you beat
Anubis, head left to find the shuttle and the only
survivor. The Reploid will follow you back to the entry
point, head right to the main entrance of the desert,
just make sure the Reploid doesn't get hit too much from
enemies and make sure he keeps up with you. Once you
make it back to the entrance you'll complete the
mission.
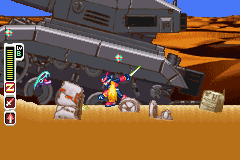
Defend the Base:
This emergency mission will involve defending the
base from a huge mechaniloid attack. You'll start
off at the Trans Server in the Disposal Center, so
head left and exit the building. Once outside, jump
on top of the crashed vehicle against the wall and
the huge mechaniloid will drop down out of the sky.
It'll slowly charge forward over the terrain, intent
on reaching the main gate of the base where it will
self-destruct. You have to destroy it before it can
reach the gate. There's three main weak points on
the mechaniloid that you'll have to destroy, a small
cone-shaped section on the back that deploys small
land mines, a missile-launching section on the top
and another section that launches flying reploids.
Just hack away at the weak sections with the
Z-Saber, but be careful of the spiked traps along
the way, and try to avoid the projectiles the tank
fires. The Z-Buster also comes in handy when trying
to hit the top part of the tank. If you want to find
a hidden Cyber-elf later on, when the tank begins
plowing through the large wall near the base, wait
for it to open up the hole near the start of the
wall, then finish it off. Do your very best to blow
off all three parts before it reaches the base, once
they're all gone the tank will explode and you'll
have completed the mission. Be careful though as
sometimes blue soldiers will pop up out of the tank
once the three sections are gone, one will fire
several shots at Zero, while another fires a small
trap that immobilizes Zero, if you're caught hack
away at the restraints to break free. A third
soldier will throw two small bombs out, hack at them
before they hit the ground. Hack away at the blue
soldiers then once you defeat them the tank will
blow.
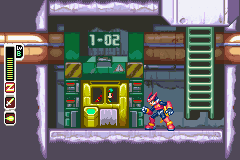
Find Hidden
Base:
In this mission, you'll have to infiltrate a
hidden enemy base buried under the desert.
You'll need to locate six captured Reploids and
set them free. Once you begin, head left until
you reach the first sand pit. Destroy the
rotating device at the bottom to reveal a large
tunnel leading down. Drop right down to the
bottom to find the secret base. Once Ciel opens
up the electric barriers, head right and drop
down the next shaft. Head down, but be careful
of the spikes on the roof sections and ledges.
Once you reach the bottom you'll be in a large
cavern. Head left and whenever you see large
stalactites (rocks hanging from the ceiling)
shoot them down to provide platforms for
crossing over the dangerous areas.
Blast the
red balls that float about without getting too
close. Keep going left and you'll eventually
reach a huge cavern with a frozen lake. Go left
and watch out for the large green robots that
fire out missiles, hack away at them before they
hit you. You can go all the way to the left to
find an extra life and health, but once you're
ready, climb up the ladders about halfway down
the frozen lake and go right through the large
door to find the inner base where the hostages
are. You'll have to find and release seven
Reploids before you can leave, but as you go
through the corridors watch out for the range of
blue and green soldiers patrolling, some of them
have red sensor beams that set an alarm off if
they see you. Blast them from a distance or hit
them from behind to avoid setting the alarm off,
as if it goes off all the prison doors will
activate electric beams blocking access. There
are three levels of cell rooms, 1-01, 2-01, 3-01
etc. Go up and down all the ladders to find the
cells, but be careful as some cells contain blue
soldiers for some reason. Hack the door locks by
the doors to open each cell. Once you rescue all
seven Reploids, go up to the second floor level
(there's two main floors in total) and head all
the way to the left to find all seven Reploids
waiting for Zero. They'll ask you to defeat the
boss guarding the shuttle in the hangar, so head
through the door on the left to face Blizzack
Staggroff.
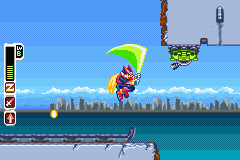
Rescue
Colbor:
You'll be heading back to the subway for
this mission, this time you'll be crossing
the bay to rescue a fellow Reploid from an
evil danger. Once you begin, head right to
reach the bay. You can head through the door
near the ladder to find a few crystals.
You'll have to be careful once you reach the
open area as most of this area is filled
with floating platforms, so try to avoid
falling into the hole. You'll encounter more
of the robots that skid around the ground,
as well as the flying robots that fire
missiles at you. The level 6 Z-Saber attack
will help, whenever flying enemies appear
you can perform the air rolling attack and
easily destroy them.
Watch out for the
falling platform sections, just quickly jump
to the next set of platforms before you fall
in. Whenever you find a ladder leading down,
head down to find crystals or health energy.
Eventually you'll reach a large open area
with platforms moving vertically up and
down, you can cross over them but you'll
have to deal with blue soldiers. If you want
to go an easier way, drop down below the
first platform and you'll find a lone
stationary platform. Jump on it and activate
it with a slash from the Z-Saber, it'll then
take you over to the other side of the hole.
Keep going right and you'll find Colbor, and
the first of X's guardians, Harpuia.
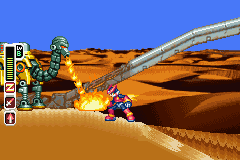
Duel
in Desert:
You'll be back in the desert for this
mission, to stop a frontal assault on
the Resistance Base. You'll need to head
back to where you faced Anubis in the
Find Shuttle mission to confront the
leader of the attack. Along the way
you'll face a horde of blue soldiers,
just try not to take too much damage
from them. Many of the enemies will be
similar to the previous missions, but
you'll also encounter large camels that
breath out fire. Jump up and whack them
in the face, they'll reel back so you
can finish them off by hitting the body.
About halfway across the desert a large
shuttle will appear and drop off a load
of enemies, try not to take too much
damage but make sure you get rid of all
of them.
Eventually you'll reach the
clearing before the shuttle where you'll
face the second guardian of X, Fefnir.
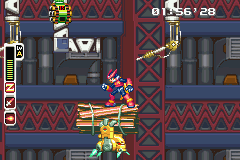
Protect Factory:
This mission will be tricky, as
you'll have to venture back to the
factory to defend it from X's third
guardian, Phantom. You'll start out
at the entrance to the factory,
where you'll immediately face
Phantom. Once you beat him he'll
reveal that he's planted eight bombs
throughout the factory that will
blow in 3 minutes unless you can
find and disarm them all. Once
Phantom leaves, head right into the
factory. The first bomb is up on a
thin roof section just before the
elevator shaft. Slash at the bomb
then grab it when it falls. The
second bomb is down the right side
of the elevator shaft, and the third
is further down the shaft on the
left wall.
Once you reach the
large hole with moving platforms,
things will become a little tricky.
Be on the constant lookout for the
annoying flying robots, as they'll
be constantly trying to knock you
off the platform. The fourth bomb
will be in a small alcove platform,
you should see it early on over the
hole. The next bomb will be tricky
to get, as it'll be up on another
platform alcove, but the flying
robots will be hanging around, so
you'll have to try and destroy them
quickly to avoid falling in the
hole. Further on you'll find the
sixth bomb hiding above in a well
concealed alcove. Once you reach the
end of the hole climb up the ladder
and head left. The seventh bomb is
hiding on a high wall within the
area with the diagonal laser
projectors, and you'll find the last
bomb just before the huge room where
you fought the Hydra Mechaniloid.
Grab all eight bombs to complete the
mission.
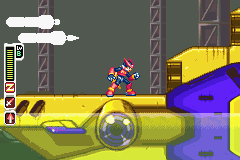
Stop the Hacking:
In this mission you'll be
heading back down to the hidden
base under the desert to stop
Neo Arcadia's hacking computers
from gaining entry into the
Resistance's systems. Once you
begin, head left to the secret
entrance in the sand pit and
drop down. Head into the cavern
and go to the frozen lake, which
isn't frozen anymore. Two
massive Repliforce submarines
will be floating up and down in
the lake, you'll have to get on
top of them to reach the ladder
leading to the inner base. Jump
into the lake and head left,
just be careful of the
mechanical squids and fish.
Watch out for the spike traps,
and make sure you don't get
crushed by the subs.
Once you
reach the far end of the lake,
you'll be able to jump aboard
the left submarine. Head over
the hull of the sub, just be
careful of the multitude of
missiles that fire out of the
sub. Once you reach the back end
of the sub, dash-jump to the
front of the other sub. Go over
to the back end of the sub and
you'll be able to reach the
ladder. Head into the base and
go up to the second level. Go
all the way to the right wall,
then walk through it to find a
hidden passage behind the wall.
Go over to the green door ahead
and Ciel will open it for you.
You'll now be in a small room
filled with six of the hacking
computers. Destroy each one with
the Z-Saber, each computer will
dispense either crystals, an
extra life or a Cyber-elf when
you destroy each one. You can
also search the rest of the
hidden base to find Cyber-elves
and health/crystal capsules in
the cell rooms. Once all the
computers are shut down, head
back out of the base and jump
off the end of sub to land back
in the lake. Head right and
you'll confront X's fourth
guardian, Leviathan.
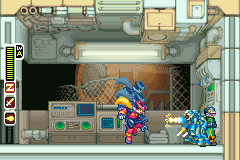
Defend the
Base 2:
Once you finish all of
Ciel's missions, Neo Arcadia
will launch a second attack
on the base, this time
successfully infiltrating
the inner corridors. Most of
the Reploids will begin
evacuation, so you'll have
to cover them from the
enemies infesting the base.
You'll begin outside Ciel's
room, and she'll tell you
that you need to get the
main elevator back online.
Head over to the elevator
shaft, then drop down to the
bottom. Go over to the
engine room and hack any
blue soldiers on the way.
Head inside and save Cerveau
from the three soldiers,
once you beat them the main
elevator will go back
online.
A soldier will
now tell you to head to the
Energy room, as there's a
Neo Arcadia commander in
their trying to steal all
the energy crystals. Head
over to the elevator and go
up to the highest floor. Go
left and blast any soldiers
there, head down the ladder
and go into the Energy room
to face Hanumachine.
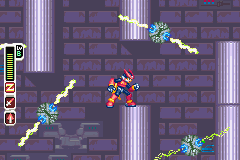
Neo
Arcadia Shrine:
You'll enter the shrine
through the Trans Server
and the mission will
begin. Head out of the
Trans Server room and go
right. Watch out for the
green dogs and vultures
in the area, eventually
you'll reach another
building. Head in to
find the area filled
with the rotating
electric beam balls.
Head through the
building with care, try
to avoid taking damage
from the electric beams
as best you can. Once
you exit the building,
head right and you'll
find a motionless
floating platform. Slash
the platform and hop
aboard as it rises up,
then jump over to the
moving platform on the
left (watch out for the
annoying vultures). Jump
onto the vertical moving
platform and up to the
next ledge (you can jump
over to the motionless
platform ahead to reach
two Cyber-elves).
Keep going up the path
on the left until you
reach another building.
Head in to find two
stone statues inside.
The statues will come to
life and become two
flying purple soldiers.
You'll have to defeat
both of them before
continuing on. Just hack
away at them when they
fly close and you should
beat them with no
trouble at all. Just
make sure you don't fall
into the spike trap
below. Once you beat
them head left and go up
the next path. Hack the
flying robots you
encounter, and
eventually you'll reach
a rocky cliff area. Head
up the cliff and you'll
reach a higher platform.
Go right and enter the
next large building to
face a four-armed
mechaniloid mini-boss.
He'll be carrying three
swords and a shield, but
dodging his sword
attacks shouldn't be
much trouble. You
shouldn't have any
trouble beating him,
just remember to use the
Thunder Chip and stay up
the walls to avoid his
projectiles and his spin
attack. Once you beat
the mechaniloid head
through the door on the
right.
This next part
will be tricky, as
you'll have to travel
over disappearing
blocks. Keep going right
until you reach an area
high enough to reach the
first round of blocks
(don't stand under the
blocks as they shoot
down when they appear).
It'll take some time to
reach the next platform,
try to remember where
each block appears. You
can also reach a ledge
on the right which
contains a full life
refill capsule, a large
energy crystal capsule
and an extra life.
There's two more rounds
of the disappearing
blocks, but with
practice you should make
it to the top fairly
easily. Just remember
that you have to land on
top of the blocks, you
wont be able to jump up
the sides of them. You
can reach another
Cyber-elf by jumping
from the last round of
blocks to the platform
on the left. Once you
reach the top, head into
the building on the
right to face Herculious
Anchortus.
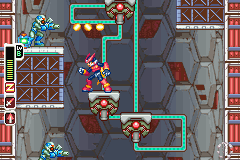
Neo
Arcadia Tower:
This mission will
involve scaling a
large tower. Once
you begin, head
right into the main
shaft and jump
aboard the elevator.
It'll begin to rise,
and for most of the
elevator's section,
you'll face blue
soldiers, the gun
turrets on the walls
and the floating
robots that fire
small blasts
diagonally. Just
blast or hack any
enemies that appear
on the way up and
try not to lose too
much health.
Eventually the
elevator will stop
and you'll reach an
area filled with
spikes. Keep going
up the walls, and
you'll find moving
platforms running
along a track in the
background. Use the
platforms to climb
the tower, just stay
away from the spiked
areas.
Eventually
you'll reach an area
with electric blocks
that charge
electricity on
random sides. Use
the blocks to climb
up but try not to
take too much damage
from the
electricity. Keep
going up and you'll
finally reach the
door leading to the
boss of the mission.
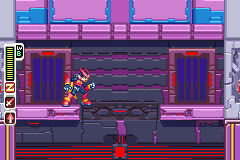
Neo Arcadia Core:
This mission
will be a simple
trek through the
core of the Neo
Arcadia Palace
to find X's
hideout. The
toughest part of
this mission
will be the boss
battles, as
you'll have to
battle a number
of bosses before
reaching X. Head
down the first
corridor to find
it packed with
blue soldiers,
try not to lose
too much health
here. Eventually
you'll reach a
large purple
door. Head
through to find
a large room
with four doors.
Here you'll have
to battle Anubis,
Maha Ganeshariff,
Blizzack
Staggroff and
Herculious
Anchortus again.
Each time you
beat a boss a
small and large
energy capsule
will appear in
the main room,
make sure you
pick them up
before fighting
another boss.
Once all four
bosses are gone,
head through the
purple door on
the right.
You'll have to
make your way
through more
corridors filled
with blue
soldiers and a
range of
enemies,
eventually
you'll reach
another purple
door. Head
through to find
another large
room with four
doors. Here
you'll have to
fight the four
Guardians again,
but after
beating Phantom,
he'll
self-destruct so
you'll have to
get away from
him quickly
before he blows.
Once you've
beaten all four
Guardians, head
right through
the door and
proceed through
the final
corridor to find
X's room.


Golem:
Guide: The Golem will be holding onto Ciel during the entire
battle, so try to avoid hitting her by accident. It'll be using some pretty
heavy laser attacks with it's head, so you'll have to be careful. If it
points it's head at Zero, it'll fire out a beam at the floor and then up the
wall. Jump up into the top left corner of the room to avoid it. If it fires
the beam up the wall and onto the roof, stay on the ground, but be careful
as large blocks will drop from the ceiling. Try to destroy the blocks as
they fall and stay near the corner. Once all the blocks stop falling the
Golem will charge forward into the left wall, quickly jump up the wall to
avoid it. The only weak point of the Golem is it's head, so climb up the
wall and pick off shots from there. Each shot will only take off one bar of
it's health, but after fighting it for awhile Zero will stop and the right
computer terminal in the background will begin to glow. Unknown X will then
drop Zero's Z-Saber out of the screen, once you get it quickly switch your
main weapon to the Z-Saber. Jump up the wall and slash at the Golem's head
once to finish it off.
E-Chip Weakness:
None.
Weapon Received:
Z-Saber.


Aztec Falcon:
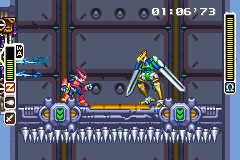
Guide: As you'll only have a small range of weaponry,
Aztec Falcon will be quite tough to beat. He'll be using a lot of
electric attacks, and to top it off, you'll have 1 minute 15 seconds to
beat him as the floor will be slowly lowering down to crush the Reploids
below. If Aztec Falcon stands in a corner and points one of his
wings/arms at Zero, he'll fire out a small electric bolt. He'll stand
and crouch as he fires the bolts, so you'll have to jump up over them as
they pass to avoid taking damage. If Aztec jumps up to a wall he'll jump
down and land in the center of the room, discharging more electric bolts
that fly along the floor and walls. Jump up to avoid them. He might also
jump up a wall and fire down three bolts at the same time, stay up the
opposite wall to avoid them. Be careful as Aztec will also be dashing
about trying to hit Zero so you'll have to be quick. Aztec might also
stop in a corner and open up his wing/arm, then static electricity will
course over his arm, drawing Zero closer to him, dash away from him as
much as you can to avoid being hit. Striking Aztec's arms will be
useless, so you'll have to hit his body to cause damage. Use the
Z-Buster to hit him from long range, but it's a good idea to have built
up the Z-Buster to the maximum level (use the spider nests in the
Underground Lab to build it up quickly). Try to hit him as much as you
can, and whenever he stands still and fires the bolts at you, hit him
when he stands up. Use fully charged shots as they'll cause heavier
damage, but you'll have to hold out long enough to finish him off, as
Zero won't be able to take much damage before losing. Once you defeat
Aztec Falcon you'll receive the Thunder Chip.
E-Chip Weakness: None.
Weapon Received: Z-Buster.
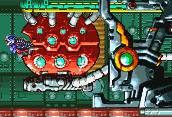
Train Engine Core:
Guide: The train's engine core will be a huge machine
with a large circular object in the center. You'll spot a blue
soldier hanging out of the front of it, you'll have to strike that
part of the core to cause damage. The core will have two main types
of attacks, one attack involves a large flamethrower at the front of
the core, it'll fire out small bursts of fire often, but stay right
back as it'll also fire out a huge flame that stretches across most
of the screen. It might also slowly move forward as it attacks, so
try to stay back to avoid being hit. The other more deadly attack
occurs after the fire attacks. Certain parts of the floor will rise
up to the ceiling where deadly spikes will appear. You'll have to be
extremely careful as if you're hit by the spikes you'll lose a life.
Try to keep moving and stay off the rising floor sections. Use the
charged Z-Saber attack against the core with the Thunder Chip
equipped to cause major damage. Try to stay close to the engine so
that you can cause multiple hits before the floor sections rise, but
keep in mind the flamethrower will still expel fire often. If you
can avoid the spikes above you shouldn't have too much trouble
beating it, but don't take too long as you've got a time limit. Once
you destroy the core you'll receive the captured Cyber-elf Totten.
E-Chip Weakness:
Thunder Chip.
Weapon Received: Z-Saber.


Maha Ganeshariff:
Guide: You'll confront Maha Ganeshariff in the
large underground room where Ciel found Zero at the beginning of
the game. He'll be using some strong attacks, so you'll need to
move around a lot to avoid losing too much health. Maha will
often lash out one of his hands in a rapid fire pattern while
slowly moving forward, make sure to stay well back to avoid
being caught in his fist. He might also fire out small
arc-blades which will return to him after traveling a short
distance, just jump over them to avoid being hit. Maha's two
strongest attacks involve his massive body moving around in an
attempt to crush Zero. If he retracts his head, arms and legs
into his body and begins rolling towards you, quickly jump over
him just as he begins moving, as he'll fire out bombs into the
air as he rolls along the floor, if you jump over him quick
enough you should avoid them. He might also retract his limbs
and hang from the ceiling via a long wire. He'll then begin
swinging back and forth, quickly go to one end of the room and
when he swings a second time dash out under him just before he
lands to avoid being crushed. Use the Z-Saber equipped with the
Thunder Chip to inflict heavy damage. You'll have to hit his
head to cause damage, so make sure you only hit him when he's
open for attack and watch out for his fist attack. If you're
having trouble, use the Z-Buster and hit him from afar. Once you
beat Maha Ganeshariff you'll need to escape from the area and
get back to the Trans Server before the entire area becomes
sealed off (See the Mission Guides). Once you jump down the
large shaft near the Trans Server you'll complete the mission.
E-Chip Weakness:
Thunder Chip.
Weapon Received:
Z-Saber.

Hydra
Mechaniloid:
Guide: You'll fight this boss hidden within
the abandoned factory. It'll have eight heads, each pair
will perform different attacks throughout the battle. The
main circular part of the boss will move back and forth
across the screen while firing out several energy bolts from
the circular core, try to avoid them as best you can. When
you run underneath the core, the main body will begin
rotating clockwise, as it does, the heads that line up
horizontally will open up and attack. Each pair of heads
will have different attacks, the orange heads lunge down at
Zero, the red heads fire out a small flamethrower, the blue
heads spew out ice and the green heads fire electric balls.
The right head will attack first, followed by the left. If
you manage to destroy a head, once the damaged head reaches
the upper vertical position, a large machine will lower down
from above and replace the head with another one. Destroying
the heads can give you a clearer shot at the core, which
will open up when the heads attack. Hit the core with a
charged shot to cause major damage, but if you're having
trouble with the heads, use the Z-Buster from long range.
Stay under the robot when the heads retract so that it'll
rotate without firing at you. Keep avoiding the head's
attacks and you should beat it fairly quickly. Once you
defeat the Hydra Mechaniloid you'll secure the factory and
receive the Flame Chip.
E-Chip Weakness: None.
Weapon Received:
Z-Saber/Z-Buster.
![]()

Anubis
Necromancess III:
Guide: You'll confront Anubis just before
reaching the crashed shuttle. He'll be floating around
the top of the screen for most of the battle, so hitting
him successfully will be a bit tricky. He'll often throw
his staff down to the ground and leave the screen, stay
at the opposite end of the screen as he'll reappear
there and the staff will fly back up to him. If you hear
a moaning sound jump up as Anubis will summon up a few
zombie-like Reploids that will try to grab hold of Zero,
stay well back as it's a pain if there's a heap of them
and they just won't let go. Quickly destroy the zombies
before they cause trouble, you can also use the Thunder
Chip to slow them down. Anubis will also sometimes dive
into the sand, if he does, two pillars will rise up out
of the sand and crash together in an attempt to crush
Zero. You can see where the pillars will rise from the
dust they kick up, try to dash outside of their range or
quickly jump up one when they rise and jump up out of
their way before they crash. After a few rounds of the
pillars Anubis will reappear. Use the charged Z-Saber
equipped with the Flame Chip to cause heavy damage to
Anubis, but be careful as he'll dive down into the sand
often or perform a different attack whenever you hit
him. Make sure you don't get caught out by the zombies
he summons and watch out for the pillars, you should
then beat Anubis without much trouble. Once you defeat
Anubis you can then rescue the Reploid survivor at the
crashed shuttle.
E-Chip
Weakness: Flame Chip.
Weapon Received:
Z-Saber.


Blizzack
Staggroff:
Guide: You'll confront Blizzack
Staggroff in the shuttle bay of the Find Hidden Base
mission. As his appearance suggests, he'll be using
ice attacks throughout the battle. He'll be jumping
around the room often in an attempt to crush Zero,
keep moving and dashing to avoid him. If he stands
in a corner, he might jump up and fire down a small
ice ball. Once the ball hits the ground it'll become
a small clump of ice spikes, make sure you're not
hit by the ball as it'll freeze Zero and you won't
be able to move. Press A and B repeatedly to break
out of the ice. Blizzack will also often fire out
four large ice spikes that will fly out and crash
down on the ground, try to stay back to avoid taking
damage. His other main attack will involve the large
cannons on his arms, he'll often fire out a massive
blizzard vortex that will push you away from him, if
small icicles flow along the vortex they'll grab
hold of Zero and slow him down, but the vortex might
also fire out small ice projectiles. Jump up the
opposite wall to avoid the blizzard. Defeat Blizzack
with the charged Z-Saber shot with the Flame Chip
equipped. Try to rip into him as often as you can,
just try to avoid his ice attacks at close range. If
you're having trouble, use the Z-Buster from long
range. Once you defeat Blizzack Staggroff you'll
rescue the captured Reploids and complete the
mission.
E-Chip
Weakness: Flame Chip.
Weapon Received:
Z-Saber.
![]()

Harpuia:
Guide: The first of X's
Guardians, you'll encounter Harpuia at the far
end of the bay in the Rescue Colbor mission. For
this battle, we strongly recommend that you have
the Ice Chip, otherwise it'll be one of the most
frustrating and difficult battles you'll
encounter in a Mega Man game. He'll begin by a
usual taunt before attacking. Harpuia will often
fly around the screen performing one of two
attacks, he'll often fly about unleashing a
large arc-beam of energy at Zero, try to stay
well clear or jump up to avoid the beam as it
travels diagonally down. If he swoops about
without firing the beam, stay well clear as if
he grabs Zero he'll take him up into the sky and
ram him down on the ground. If Harpuia lands
he'll use his energy says to fire out a barrage
of blasts. The first blast you can easily jump
over, the second will fly upward so stay on the
ground to avoid it, then jump over the third
blast. Harpuia will then fly up and fire the
large arc-beam again, stay as far back as you
can and jump up just as he fires it. If Harpuia
stops in mid-air he'll fire out small electric
probes, hack at them before they hit Zero. If
Harpuia becomes engulfed in fire, he'll float up
to one corner of the screen and create two large
electric beam barriers on either side of the
screen. A large tornado will try to blow Zero
into one of the beams, try to avoid taking too
much damage while the attacks lasts. Use the
Z-Saber with the Ice Chip equipped to finish
Harpuia easily. Each time you hit him with a
weapon he'll perform the three-blast attack
before firing the large arc-beam, but if you're
quick, hit him with a charged shot, then quickly
jump over him and hit him with another charged
hit in the back. If you can keep this routine up
you'll have no trouble finishing him off. Once
you beat Harpuia you'll rescue Colbor and
complete the mission.
E-Chip Weakness:
Ice Chip.
Weapon
Received: Z-Saber.
![]()

Fefnir:
Guide: Fefnir will confront
you just before the crashed shuttle in the
desert. He'll be using his arm cannon for
most of the battle, so you shouldn't have
much trouble dodging him. He'll often fire
out three flames from his cannon, just jump
over them as they pass. He'll also jump
around and fire down diagonal shots often,
just stay out of their way. If he charges
his cannon, he'll fire out a larger flame,
jump over it once again to avoid being hit.
He might also jump over you and fire
downwards, dash to the side to avoid being
hit. Be careful as he might dash into Zero
and grab him, he'll then shoot Zero into the
sky, causing damage. If he charges his
cannon and punches the ground a large
shockwave will fly forward, stay back to
avoid it. If a huge flame engulfs Fefnir,
he'll split his cannon in two and begin
firing huge fireballs into the sky, they
then come flying down all over the screen.
Dash away from him to avoid all the flames.
Use the charged Z-Saber with the Thunder
Chip equipped to inflict heavy damage on
Fefnir. Keep dodging his attacks and
whacking him whenever you can and you should
beat him fairly quickly. Once you beat
Fefnir you'll have scattered the Neo Arcadia
forces in the desert and completed the
mission.
E-Chip Weakness:
Thunder Chip.
Weapon Received:
Z-Saber.
![]()

Phantom:
Guide: Phantom will be
the toughest Guardian to beat as he
doesn't have any element chip
weaknesses. After taunting Zero he'll
dash straight at him, quickly jump up to
avoid taking damage. Phantom will be
using some strong attacks, so you'll
either have to hold out long enough, or
bring along a Sub-tank. If he stands in
a corner and throws out a large
shuriken, it'll fly out and then back to
him. Phantom will jump on top of it when
it reaches the middle of the screen,
he'll then begin flying around the
screen throwing small needles down, you
shouldn't have any trouble dodging them.
After a while he'll jump down and
perform a different attack. If he jumps
up and throws the shuriken down, it'll
hit the ground and break into smaller
needles that'll fly out in diagonal
paths, try to avoid them as best you
can. Phantom's other main attack
involves an illusion trick. If he jumps
into the center of the screen and faces
forward, he'll begin to flash and his
body will begin to grow taller. He'll
then create three copies of himself all
lined up in a row, you can tell which
one is the real Phantom as the clones
will be flashing and slightly out of
focus. Phantom and his clones will move
around the screen a few times before he
returns to normal. If you hit one of the
clones, they'll become two blue soldiers
and Phantom will dive down from above.
If that happens quickly dash to the left
or right to avoid him. Unequip any
element chip and use the charged Z-Saber
to damage Phantom. You can also hit him
when he's performing the illusion trick,
just make sure you don't hit one of the
clones. Phantom might also perform
another illusion trick, if a huge flame
engulfs him the entire screen will
become black and he'll disappear.
Wherever he's standing, he'll begin
throwing small needles at Zero, try to
avoid them and hit the area of the
screen where the needles are coming from
to hit Phantom. Try and hit Phantom at
any time during his other attacks, but
try not to take too much damage, unless
you've got a Sub-tank. After a few tries
you should manage to beat him, but
you'll then have to go and disarm all
the bombs planted in the factory.
E-Chip
Weakness: None.
Weapon
Received: Z-Saber.
![]()

Leviathan:
Guide: You'll fight
Leviathan under the lake in the
hidden base below the desert. She'll
be swimming about the lake during
most of the battle, so you'll have
to jump up to hit her. She'll often
fire out three staff projectiles
that home in on Zero, try to jump up
over them as they close in.
Leviathan might also conjure up a
circular pattern of ice crystals,
she'll then send them straight at
Zero, stay on the ground and jump up
just before they hit the ground. Try
your best to stay away from the
spike traps lining the ground. If
Leviathan begins swimming back and
forth across the screen, she'll
create ice crystals everywhere, then
send them down at Zero. Try to stay
between the gaps and keep jumping to
avoid them. Leviathan might become
engulfed in a large flame, she'll
then create a large ice-serpent that
will swim after Zero. Just use a
charged shot on it's head to destroy
it. Use the Z-Saber with the Flame
Chip equipped to cause heavy damage
to Leviathan. You can also use the
charged shot to destroy the ice
crystals she creates. Keep hacking
away at her and you shouldn't have
much trouble finishing her off. Once
you defeat Leviathan you'll have
completed the mission.
E-Chip
Weakness: Flame Chip.
Weapon
Received: Z-Saber.
![]()

Hanumachine:
Guide: You'll
find Hanumachine hiding out in
the Energy Crystal room. He'll
begin by running straight at
Zero, quickly jump over him
before you're hit. As
Hanumachine is a monkey Reploid,
he'll be running up the walls
and jumping about a lot. If he
stops moving and charges up
energy, he'll extend his staff
and lash out with a huge swing,
stay well back to avoid being
caught by his staff. Hanumachine
will also often engulf himself
in fire and begin bouncing
around the room, ricocheting off
the walls, floor and ceiling.
You won't be able to damage him
when he's engulfed in fire, so
just try to stay out of his way.
He might also send out small
clones of himself that jump
around the room, try to avoid
being caught by them as they'll
grab onto Zero and slow him
down. You can also get a
Cyber-elf if you destroy a
number of his clones.
Hanumachine also often jumps up
and spins around in the air, his
tail will then fire out a range
of fire waves, stay up against
the wall and get ready to dodge
them as they pass. Use the
charged Z-Saber with the Thunder
Chip equipped to cause major
damage. Be careful whenever you
hit Hanumachine, as he'll begin
jumping around sporadically,
dash away from him to avoid a
collision. Keep hacking into him
whenever he holds still, and you
should take him down fairly
easily. Once you beat
Hanumachine the Neo Arcadia
forces will retreat and you'll
have completed the mission.
E-Chip Weakness:
Thunder Chip.
Weapon Received:
Z-Saber.
![]()

Herculious Anchortus:
Guide: You'll
face Herculious Anchortus at
the end of the Neo Arcadia
Shrine mission. He'll often
engage a jet pack on his
back and slowly fly
forwards, jump up the wall
and over him to avoid being
crushed. He might also fire
out three small energy balls
from his head, just jump
over them as they pass.
Herculious will also often
fire out two small clamps at
the ground and wall straight
at Zero, he'll then create a
large electric field between
himself and the two clamps.
Herculious will then slowly
move forward and slam into
the ground or wall. Make
sure you don't get caught
between his fields as you
won't be able to avoid
taking damage when he
charges. Jump over him or
dash under him as he creates
the fields to avoid his
trap. He might also use a
different electric field
attack, he'll jump up into
the air and create four
short beams, each one will
fire down small energy
blasts at Zero, dash between
them as he fires each one.
Use the charged Z-Saber with
the Ice Chip equipped to
cause heavy damage. Just
keep attacking Herculious
whenever you can and keep
dodging his attacks, you
shouldn't have much trouble
beating him. Once you beat
Herculious Anchortus, head
through the next two doors
on the right to find the
Trans Server room.
E-Chip
Weakness: Ice
Chip.
Weapon Received:
Z-Saber.

Rainbow Devil:
Guide:
You'll face this boss at
the top of the tower in
the Neo Arcadia Tower
mission. This creature
is a soldier's head
encased in a large
slime-like substance.
It'll be breaking up
into smaller pieces
often, so you'll have to
move around a lot to
avoid taking too much
damage. If it dashes
into a corner and begins
spinning around, jump up
the opposite wall as
small bits of slime will
spurt out everywhere,
and after landing
they'll go back to the
main body. If it jumps
into the air the body
will become a large head
that bounces around the
room, stay in the corner
to avoid being crushed.
After a few seconds the
head will break into two
smaller sections, then
four even smaller
sections. Try to stay up
the walls and off the
floor as it'll be hard
to dodge the slime balls
from the ground. Stay
away from the main body
as it'll often punch out
over a long distance if
you get too close. Each
element seems to cause
the same amount of
damage as each other, so
use any chip with
charged shots from the
Z-Saber. When you hit
the bouncing head it'll
break into smaller
pieces straight away,
concentrate on hitting
the slime ball that
contains the soldier
head. Make sure the body
doesn't grab Zero as it
slithers across the
ground as it'll
constrain him and cause
damage. Stay up the
walls most of the time
and attack when the body
stops moving. You
shouldn't have too much
trouble beating the
Rainbow Devil, once it's
gone you can proceed to
the final Trans Server
in the next room where
Ciel's waiting for you.
E-Chip Weakness:
None.
Weapon Received:
Z-Saber.
![]()

Master X:
Guide:
You'll confront
Master X at the core
of the Neo Arcadia
Palace. He'll taunt
you before equipping
his heavy battle
suit. You'll need to
be fast on your feet
to avoid taking too
much damage from X,
as his next form
will be a lot more
tougher than his
first. X will have
four different types
of attacks, a normal
style, and a fire,
ice and thunder
style. In his normal
style, he'll often
fire out a burst of
three energy bolts
at Zero, try to stay
up a wall or jump
over them as they
pass. He'll also
perform a sliding
attack often, just
try to jump over him
or jump up a wall
again. He might also
jump into the air
and execute a
mid-air dash attack,
if he's high up
don't worry about
being hit, just
watch out when he
lands, otherwise try
to dash away from
him to avoid the
attack. If you hit
him with a charged
shot with an element
chip equipped, he'll
change to one of the
element attack
styles. In the fire
style, instead of
firing energy bursts
he'll jump up and
fire out a long fire
wave, be very
careful as the wave
will continue to fly
down on a parabolic
path until it leaves
the screen. Try to
jump over it when it
reaches the lowest
point of it's path.
If he charges up his
weapon on the
ground, he'll fire
out several
fireballs that fly
up and down to the
ground, try to stay
between them to
avoid taking damage.
In his thunder
style, he'll fire
out small electric
balls that follow
Zero horizontally,
quickly jump up a
wall and over them
to avoid them. He'll
fire out a large
tornado of ice
crystals in his ice
style, Jump up a
wall to avoid the
vortex. If X jumps
up and fires at the
ground, small
icicles will fly out
diagonally from the
ground, stay well
back when they
appear. Each time X
changes his attack
style, he'll have an
element weakness.
When he becomes
green, use the Flame
Chip, red, use the
Thunder Chip and
blue use the Flame
Chip. You can also
unequip the element
chips to damage him
in a general
fashion. Sub-tanks
will come in handy
here, but you'll
probably want to
save them for the
final battle. Try to
stay up the walls
and dodge X's
attacks as best you
can, after a few
tries you should be
able to finish him
off. Once you defeat
Master X he'll
appear in his final
form.
E-Chip Weakness:
Variable.
Weapon
Received:
Z-Saber.


X's Final Form:
Guide:
X's Final Form
will be that of
a huge winged
mechaniloid,
it'll take up
most of the
screen and you
won't have much
room to move
around in as
floor sections
on the left and
right will fall
away, leaving
you on a small
section below X.
Two vertical
pillars will be
floating up and
down either side
of X, you'll be
using these to
reach and attack
X. X will have
three main types
of attacks. If
he sends three
large blue
circle-shaped
objects into the
sky, they'll
come down on top
of Zero. If any
of them catch
Zero, they'll
paralyze him and
you won't be
able to move.
Make absolute
sure that you're
not above the
hole as if one
of the circles
catches you
there it'll drag
Zero down into
the hole. Stay
under X as he
fires out the
circles, as soon
as he sends out
the third,
quickly dash
away from where
you are and if
done
successfully,
all three
circles will
come down where
you were just
standing. If X
charges energy
in both his
hands, he'll
fire down a
barrage of laser
bolts, if you
time it right
you can dash
between the
shots, but
quickly jump up
on one of the
pillars to avoid
being hit. A
good trick is to
stand on one
corner of the
platform, then
once X fires the
beams quickly
dash and jump
over to the
opposite pillar,
if done
correctly X will
fire both rounds
of beams to
where you were
standing before.
If X fires a
thin beam across
the ground, very
quickly jump up
to a pillar as a
massive fire
wave will
blanket the
floor and cause
heavy damage if
you're caught in
it. You'll have
to hit X's head
to cause damage.
You can hit him
be just jumping
straight up when
he floats down,
or jump off one
of the pillars
to hit him as
you drop down.
Use the Z-Saber
equipped with
the Ice Chip to
inflict heavy
damage on X. Be
careful as
further on in
the battle X
will fire down
more than three
circle objects,
try your best to
avoid them and
stay away from
the holes. Hack
away at X's head
whenever you
can, just
remember to use
the special
tactics
described
earlier to avoid
his attacks. If
you're up to it,
you can jump
right over to
either the left
or right walls
and hit X's head
from there with
a charged shot
from the
Z-Buster, but
quickly jump
back to the
platform when he
fires the
circles.
E-Chip Weakness:
Ice Chip.
Weapon
Received:
Z-Saber.
CONGRATULATIONS!!!
You finished
Mega Man Zero.
Unlike other Mega Man games
where you directly pick up power-ups and enhancements, in this game you'll be
using Cyber-elves, small data program beings that can enhance Zero's abilities,
give him power-ups and affect missions directly. there are more than 70
Cyber-elves hidden throughout the game, you'll find many hidden in small
capsules, others will appear after defeating a certain number of enemies in a
mission, and some will appear after defeating certain bosses. You can check how
many Cyber-elves you have by going into the Sub-Screen, then pressing L to view
the list of Cyber-elves. There are three main types of Cyber-elves, Nurse, which
enhances Zero's health and defense capabilities, Animal, they boost Zero's
physical abilities in battle, and Hacker, they alter mission environments and
enemies. For each type of Cyber-elf, there are three different level types. The
lowest level Cyber-elf can be used without raising, the second level has one
level of raising required, and the third level has two levels of raising
required. To raise Cyber-elves, you must feed them Energy Crystals which can be
gained from some defeated enemies. A small blue capsule will give you four
crystals, while the large ones give sixteen crystals. To actually feed a
Cyber-elf crystals, you need to use a Trans Server, which is described below:
The Trans Server:
This special teleportation device can link up with other Trans Servers in
different areas of the game and instantly teleport Zero there. To activate a
Trans Server, you must stand on it and press up. You can only teleport to other
areas when you've activated the Trans Server there (except the Neo Arcadia
Shrine one). You can also use the Trans Server to feed and download Cyber-elves.
To feed a Cyber-elf, select feed from the menu and select a Cyber-elf to feed.
Select download from the menu to equip up to a maximum of three Cyber-elves that
will be ready to use at any time.
Each Cyber-elf can be used only once, where level 1 elves will only have a
temporary effect, while level 2 and 3 will be permanent. Using Cyber-elves will
greatly increase Zero's abilities and make the game much easier, but the
downside is that every time you use a Cyber-elf you'll lost points at the end of
every mission. If you use too many you'll constantly be getting a negative score
meaning that you'll end up with an F rank and a lousy title for the rest of the
game. When looking for energy crystals, two good places are in the Underground
Lab where the spider nests spew out six spiders in each round, and on the first
crane on the way to the Disposal Center. Read on below for each Cyber-elf's
description, location and effect.
Elves Description:
Nurse Elves:
Winkie:
Large red nurse: Level 3.
Effect: This elf gives you a second
overlapping health bar, doubling your life energy.
Crystals Required: 1000, 2000.
Nuppie, Mippie, Reppie, Lippie:
Medium red nurse: Level 2.
Effect:
These elves partially increase your maximum life energy.
Crystals Required: 750.
Hapitan, Lubtan, Nebitan, Nutan:
Medium blue nurse: Level 2.
Effect: These elves become Sub-Tanks
when used.
Crystals Required: 1000.
Motolar, Tielar, Muelar, Rohealar:
Small blue nurse: Level 1.
Effect: These elves temporarily
convert damage taken into health.
Crystals Required: None.
Morick, Keick, Coswick, Somack:
Small green nurse: Level 1.
Effect: These elves restore full life
energy when used.
Crystals Required: None.
Areff, Bireff, Sireff, Dereff, Ereff, Fureff,
Hareff, Greff, Ireff, Gireff:
Small red nurse: Level 1.
Effect: These elves restore some of
Zero's life energy.
Crystals Required: None.
Animal Elves:
Shelter:
Large turtle: Level 3.
Effect: This elf will double your
defensive power.
Crystals Required: 500, 1500.
Turbo:
Medium squirrel: Level 2.
Effect: This elf will allow Zero to
walk faster.
Crystals Required: 1000.
Ribbid:
Medium frog: Level 2.
Effect: This elf will slow down
Zero's slide speed down a wall.
Crystals Required: 400.
Gibber:
Medium monkey: Level 2.
Effect: This elf will increase Zero's
climbing speed.
Crystals Required: 200.
Buffer:
Medium dog: Level 2.
Effect: Zero won't fall back when
he's hit.
Crystals Required: 400.
Birsky, Birtack, Birdain, Birtoss, Birfly, Birrair:
Small bird: Level 1.
Effect: These elves will rescue Zero
from a hole if he falls in one.
Crystals Required: None.
Sticken, Stickon, Stickle, Sticker:
Small bug: Level 1.
Effect: These elves stun enemies for
a short time.
Crystals Required: None.
Bompu, Bomga, Bomgu, Bompa:
Small cat: Level 1.
Effect: These elves become a shield
that blocks a number of projectiles.
Crystals Required: None.
Beesus, Beedle, Beenet, Beehoney, Beefive, Beevoice:
Small bee: Level 1.
Effect: These elves provide cover
fire.
Crystals Required: None.
Hacker Elves:
Totten:
Large wizard: Level 3.
Effect: This elf will create shields
over all spiked areas in the game.
Crystals Required: 1500, 2000.
Eenite, Kenite:
Medium knight: Level 1.
Effect: These elves will destroy all
enemies in a mission except for the boss.
Crystals Required: 1250.
Hafmargo, Hafmarda:
Medium statue: Level 1.
Effect: These elves half the health
of a boss in the current mission.
Crystals Required: 1000.
Stocchu, Stoctto, Stoccue, Stochpoh, Stocpie:
Small stopwatch: Level 1.
Effect: These elves freeze all
enemies for a limited time.
Crystals Required: None.
Clocka, Clocta, Cloctch, Clocpah, Clocpooh:
Small clock: Level 1.
Effect: These elves give you extra
time in missions which have a timer.
Crystals Required: None.
Itettle, Itemon, Itecle, Itepon, Iteron:
Small treasure chests: Level 1.
Effect: These elves will cause all
defeated enemies in a mission to drop items.
Crystals Required: None.
M-orell, M-oria, M-orque, M-orekka, M-orolli:
Small mettail: Level 1.
Effect: These elves turn all enemies
in a mission into mettails.
Crystals Required: None.
Cyber Elves
Locations:
Resistance
Base:
4 Cyber-elves:
Animal: Beevoice, found in Ciel's
room, you'll need an A or S rank.
Nurse: Fureff, give Ibu 250 crystal
to reach the elf in the room behind him.
Hacker: Clocka, listen to Andrew's
story to receive the elf.
Nurse: Lippie, found on top of the
gate leading to the desert.
Intro Stage: Mission 1
4 Cyber-elves:
Hacker: Clocpah, found in a capsule
to the left of Zero's capsule.
Hacker: Stoccue, found after
destroying a number of spider nests.
Hacker: Stocchu, found after
destroying a number of the blue soldiers.
Nurse: Nuppie, found in a capsule up
in a hidden roof section towards the end of the mission.
Disposal Center: Mission 2
5 Cyber-elves:
Animal: Birsky, found after defeating
a number of the rolling spiked balls.
Nurse: Gireff, found after defeating
a number of the blue soldiers.
Nurse: Mippie, found on a long hook
to the right of the giant wall.
Animal: Gibber, found after defeating
a number of the purple spike pillars.
Hacker: Clocpooh, found on the other
side of a wall near a purple spike pillar, use the Shield Boomerang or Z-Saber
to break open the capsule.
Destroy Train: Mission 3
7 Cyber-elves:
Hacker: Itemon, found after defeating
a number of the small roller robots.
Nurse: Bireff, found up the shaft
just before the mini-boss room.
Animal: Beesus, found after defeating
the mini-boss.
Animal: Buffer, found after defeating
a number of the blue soldiers with large arms.
Hacker: Hafmargo, found after
defeating a number of the large robots with the spiked ball.
Animal: Birdain, found after
defeating a number of the flying missile-shooting robots.
Hacker: Totten, found after defeating
the Train Engine Core.
Retrieve Data: Mission 4
4 Cyber-elves:
Animal: Bomga, found after defeating
a number of the red floating balls.
Animal: Sticker, found after
defeating a number of the green gun turrets.
Hacker: Itecle, found after defeating
Maha Ganeshariff.
Nurse: Somack, Once the lab becomes
sealed off, you can find this one in a room at the top right of the long shaft.
You'll have to make a hard jump to make it, but you can also use the Triple Rod
to break open the capsule.
Occupy Factory: Mission 5
7 Cyber-elves:
Animal: Beenet, found after defeating
a number of the flying shielded robots near the start.
Animal: Ribbid, found after defeating
a number of the wide angle shooting robots, just inside the main entrance of the
factory.
Nurse: Greff, found in the air vent
shaft above the main entrance of the factory.
Animal: Stickle, found after
defeating a number of the hanging spiders.
Nurse: Winkie, found encased in a
small area above the second area where you change moving platforms above the
massive hole.
Nurse: Motolar, up on a wall directly
above the ladder leading out of the massive hole area.
Nurse: Nutan, found in a hidden room
just below the last ladder leading to the boss room.
Find Shuttle: Mission 6
5 Cyber-elves:
Hacker: Itettle, found after
defeating a number of the sand snakes.
Animal: Birfly, found after defeating
a number of the vultures.
Nurse: Lubtan, found above the
crumbling desert ruins.
Hacker: Stocpie, found after
defeating a number of bear-traps.
Hacker: M-oria, found after defeating
Anubis.
Defend the Base: Mission 7
3 Cyber-elves:
Animal: Birtack, found after
defeating a number of the bats the tank fires out.
Hacker: Stoctto, found after
defeating the tank.
Nurse: Hapitan, found down a large
shaft under the massive building just before the Resistance Base gate, you'll
need to let the tank blow open part of the wall so you can access it.
Find Hidden Base: Mission 8
3 Cyber-elves:
Nurse: Nebitan, found hidden behind
the left sandfall at the base of the huge shaft leading down into the base.
Animal: Shelter, found after
defeating a number of the turtle bomb-throwing robots.
Hacker: M-orell, found up a hidden
shaft just before the door leading to the hacking computer room.
Rescue Colbor: Mission 9
5 Cyber-elves:
Nurse: Dereff, found in the lower
room below the start, go through the door on the left to reach it.
Animal: Birtross, found after
defeating a number of the flying blue soldiers.
Nurse: Sireff, found below the
platform before the first turtle robot.
Nurse: Morick, found below the ladder
between two turtle robots.
Animal: Beedle, found after defeating
Harpuia.
Duel in Desert: Mission 10
3 Cyber-elves:
Hacker: Kenite, found after defeating
a number of the fire-breathing camels.
Hacker: M-orque, found after
defeating a number of the small brown cannons.
Animal: Turbo, found after defeating
Fefnir.
Protect Factory: Mission 11
2 Cyber-elves:
Hacker: Hofmarda, found after
defeating Phantom.
Animal: Stickon, found after
defeating a number of the green dogs.
Stop the Hacking: Mission 12
11 Cyber-elves:
Animal: Bompa, found after defeating
a number of the robot squids.
Animal: Bompu, found after defeating
a number of the mechanical fish.
Nurse: Areff, found down the cliff on
the far left of the lake.
Nurse: Rohealar, found on a platform
above the submarine on the right. You'll need to dash jump to the right of the
vertical pole above to reach it.
Nurse: Reppie, found when you destroy
the top-left computer in the hacking computer room.
Nurse: Keick, found when you destroy
the top-right computer in the hacking computer room.
Hacker: M-orekka, found in cell block
1-02.
Nurse: Tielar, found in cell block
2-01.
Hacker: Clocta, found in cell block
3-02.
Hacker: Itepon, found in cell block
3-05.
Animal: Bomgu, found after defeating
Leviathan.
Defend the Base (2): Mission 13
2 Cyber-elves:
Animal: Sticken, found after
defeating a number of the small clones Hanumachine creates.
Hacker: Eenite, found after defeating
Hanumachine.
Neo Arcadia Shrine: Mission 14
9 Cyber-elves:
Hacker: Iteron, found on top of the
building filled with the spinning electric balls.
Nurse: Ireff, found next to Iteron.
Animal: Beefive, found after
defeating the two purple flying soldiers.
Hacker: Stocpoh, found on top of the
building with the two purple flying soldiers, use the Triple Rod to bounce
across the flying robots to reach it.
Nurse: Ereff, found next to Stocpoh.
Nurse: Coswick, found on a platform
just after the room with the two purple flying soldiers. To reach it, equip the
Z-Buster and charge it up. Go over to the cliff side to the left of the room,
then slide down the cliff and hold right. You'll fall down past the platform, as
you do, release the Z-Buster to blow open the capsule, then wait for the
Cyber-elf to float down to you.
Hacker: Cloctch, found after
defeating the four-armed mini-boss.
Nurse: Muelar, found on top of the
building where you fought the mini-boss, when you're on the last section of
disappearing blocks, dash jump over to the left to find a motionless platform.
Slash it and dash jump to the left to reach the building.
Animal: Beehoney, found after
defeating Herculious Anchortus.
Neo Arcadia Tower: Mission 15
3 Cyber-elves:
Animal: Birrair, found after
defeating a number of the flying robots.
Nurse: Hareff, found on a ledge on
the right of the tower shaft guarded by a soldier.
Hacker: M-orolli, found after
defeating the Rainbow Devil.
Neo Arcadia Core: Mission 16
0 Cyber-elves.
Weapons:
Each weapon has
a certain maximum amount of levels that can be raised. To raise the weapons and
improve Zero's skill, use each weapon often against enemies, one good place to
raise weapon levels is the Underground Lab area where the white spider nests
are, as spiders will continue to pour out of the nest you can constantly destroy
them as they appear, you'll also gain a high number of crystals as well. After
you've beating the Retrieve Data mission you won't be able to go back there, so
another good place to raise weapon levels is near the first crane on the way to
the Disposal Center. You won't be able to see how much experience you'll need
for the next level, so you'll just have to battle a lot of enemies and be
patient, as raising each weapon to it's maximum level is well worth your while.
Using weapons against bosses will gain more experience than against normal
enemies. You'll receive the Triple Rod and Shield Boomerang from Cerveau in the
Engine Room of the Resistance Base after beating certain missions.
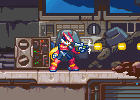
Z-Buster:
You'll begin the game with
the Z-Buster, a handheld blaster capable of delivering damage to almost any
enemy. The standard shot fires off small energy bolts, while charging the
weapon will release a stronger blast. A great weapon for long-range attacks,
the Z-Buster is a handy backup weapon once you gain stronger weapons.
Gained From: Intro Stage.
Level 1: Up to three shots can be
fired on-screen.
Level 2: Up to four shots can be
fired on-screen.
Level 3: A second level charged
shot can be fired.
Level 4: Charging the weapon will
take less time.
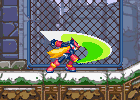
Z-Saber:
You'll receive the Z-Saber
from Unknown X at the end of the Intro Stage. This weapon is great for
slashing enemies apart, but you'll need to be quite close to an enemy to hit
them successfully. Once at it's maximum level, the Z-Saber will be deadly
against any foe, especially when used skillfully. Keep in mind that if you
use air attacks with the Z-Saber more often, you'll gain the air attack and
dash attack techniques before the charged shot ones.
Gained From: X (Intro Stage).
Level 1: You can perform a single
slash attack.
Level 2: You can perform a double
slash attack.
Level 3: You can perform a triple
slash attack.
Level 4: You can charge up the
Saber for a powerful attack.
Level 5: Charging the weapon will
take less time.
Level 6: You can perform a
rolling attack in the air.
Level 7: You can perform a dash
rolling attack (L+Down+B).
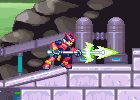
Triple Rod:
You'll receive the Triple
Rod from Cerveau after beating the Retrieve Data mission. This staff-like
weapon can be extended up to three times the original length when fired off.
You can use the directional pad to aim the rod in all eight directions, but
you can only stab down with it when in the air. The energy arc released at
the tip of the rod will cause severe damage to any enemies in range, making
this weapon ideal for damaging enemies further back.
Gained From: Cerveau (Base).
Level 1: You can extend the rod
to the standard attack range.
Level 2: You can perform a double
attack.
Level 3: You can perform a triple
attack.
Level 4: You can charge the rod
to deliver a twirling attack.
Level 5: Charging the weapon will
take less time.
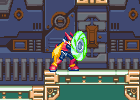
Shield Boomerang:
You'll receive the Shield
Boomerang from Cerveau after beating another mission after the Retrieve Data
mission. This weapon is less flexible than the others, you'll only be able
to use it to attack through the charged shot. Once activated, the shield
will reflect energy blasts aimed at Zero, the shots will bounce off the
shield and return to the source. Once charged, Zero will throw the shield
out, it'll fly out and then return to Zero. Any enemies caught in range will
be slashed in half. Keep in mind that you won't be able to dash while the
shield's activated.
Gained From: Cerveau (Base).
Level 1: You can throw the shield
out to the standard attack range.
Level 2: You can throw the shield
out to the medium attack range.
Level 3: You can throw the shield
out to the maximum attack range.
Special Element Chips:
Throughout the
game, three different bosses will give you a special elemental energy chip once
defeated. Each chip affects the charged shot of each weapon, allowing them to
attack with either the power of lightning, fire or ice. Many bosses will take
more damage than an ordinary charged shot when you use a certain chip.
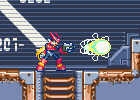
Thunder Chip:
You'll receive the Thunder Chip once you
defeat Aztec Falcon in the Disposal Center mission. This chip will give the
charged shot attacks the power of electricity, electrocuting and frying the
circuits of enemy targets.
Gained From: Aztec Falcon.
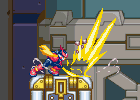
Flame Chip:
You'll receive the Flame Chip once you
defeat the Hydra Mechaniloid in the Occupy Factory mission. This chip will
give the charged shot attacks the power of fire, severely burning any enemy
the attack strikes.
Gained From: Hydra Mechaniloid.
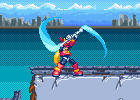
Ice Chip:
You'll receive the Ice Chip once you
defeat Blizzack Staggroff in the Find Hidden Base mission. This chip gives
charged shot attacks the power of ice, freezing and cracking enemy targets
apart.
Gained From: Blizzack Staggroff.


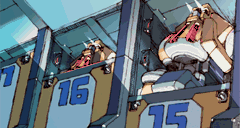
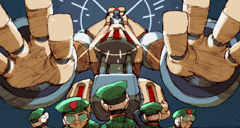






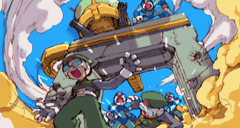
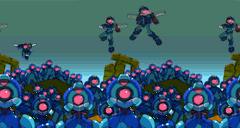



The Cyber-Elf
"Jackson":
There is a secret Cyber-elf called Jackson that you'll receive after finding and
raising all of the Cyber-elves in the game to their maximum level on the normal
difficulty setting. You'll also unlock Ultimate Mode if you then beat the game.
Jackson can be used by holding down the A button for a few seconds, Zero will
then begin to flash different colors for about 10-20 seconds. During that time,
he can't take damage from enemies or spikes, but he also won't be able to pick
up items or use things such as doors and the Trans Servers.
Easy Mode:
You can get a slightly easier game. If you finish the game and save after the
credits, you can begin a new game with all of your old equipment, though they
won't be leveled up yet. This means you can start with the upgrades from cyber
elves in effect, like double life gauge and protection from spikes.
Hard Mode:
After completing the game, you can start a new game in Hard Mode by holding the
left shoulder button down while starting a new file. In Hard Mode, weapons do
not gain levels, and bosses have new attacks.
Ultimate Mode:
Hold R when selecting a new game after playing through Jackson Mode and using
every cyber elf to play Ultimate Mode. Though the name suggests otherwise, this
mode allows you to start with all of your weapons maxed out and with the effects
of cyber elves already in place; permanent cyber elves no longer effect ranking.
Also, you can now perform any of Zero's charged attacks without actually
charging them. To fire a semi-charged Z-Buster shot, press Down to Forward + B
(doing this combination with the Shield Boomerang equipped will use a charged
Shield Boomerang throw). To perform a charged Z-Buster shot, press Down to
Forward, Down to Forward + B. To perform a charged Z-Saber slash, press Forward
to Down + B. To perform a charged Triple Rod swing, press Forward, Down,
Down-Forward + B.
Skip Credits:
After completing the game and saving when the game prompts you to do so, hold A
when the credits appear when you complete the game any other time.