


| Here is a complete guide for Mega Man X2. Choose the tab you want in order to view its content. |

|
Release Date: |
Developer: |
|
Systems: |
Genre: |
Intro:
Mega Man X2 continues the legacy not long after Sigma's first defeat at the
hands of one Reploid - X. Introducing new bosses, weapons and more challenging
gameplay, X2 retains all that made the first game great, as well as enhanced
graphics made possible by the special C4 chip installed into the game's
cartridge.
Game
Specs:
Taking control of X during the game, you'll have to guide him through eight
stages of mayhem, searching for the hidden X-Hunters, as well as the special
robot parts they carry which if recovered can rebuild Zero. You'll gain special
weapons from defeated bosses, and eight energy hearts are hidden waiting in each
stage, as well as four sub tanks vital to your success. Dr. Light's capsule
upgrades will give X new abilities including the awesome G-Crush ability, making
X a true force to be reckoned with. Each X-Hunter are as powerful as each other,
and will persist in taking X down often during the game, but once they're out of
the way, you'll uncover their true plans regarding the Mavericks, as well as
Zero. The special C4 chip allows the game to run smoother, as well as having
much more action on-screen, so be ready for a fast-paced adventure where old
foes hide behind the veil of secrecy, preparing to strike when the time is
right.
Story:
Not long after Sigma's first defeat, the world heralded Mega Man X as their
hero. Still grieving at the loss of Zero, X's best friend and partner at the
hands of Vile, X begins to work with Dr. Cain and the new Maverick Hunters to
ensure peace for all humans and reploids. As time goes by, X becomes stronger
and assists the Maverick Hunters to develop into a huge fighting force capable
of defending the innocent from all evil. During this time, the Hunters have
begun to track down all the remaining Maverick reploids and their factories as
without their leader Sigma, it seems the Maverick's can't regain their power and
numbers. Although it seems the Mavericks are beginning to become extinct, three
mysterious Mavericks calling themselves the "X-Hunters" have appeared and are
plotting to resurrect the Maverick force to succeed where Sigma failed. As the
game begins, X heads out to one of the final Maverick factories, hoping to wipe
them out for good, but little does he know that the real battle is about to
begin...
In Game Intro:
It has been six months since the destruction of Sigma and little has changed.
The Maverick revolt started by Sigma is over, but Mega Man X and the new
generation of Maverick Hunters have yet to destroy all of Sigma's followers.
Lead by information gained by Dr Cain, Mega Man X and the rest of the Hunters
have tracked the last of the Mavericks to an abandoned reploid factory.
There they hope to wipe out the last of the resistance.
Little do they suspect that real war is about to begin...


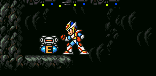
![]()
Mega Man X:
Mega Man X is back, and
this time he must face up to the new "X-Hunters," who are the remaining
mavericks bent on his destruction. X also has a new mission, to locate his
partner Zero's parts and to successfully revive his long lost friend. As
Zero died protecting X, he believes that he owes it to Zero to revive him,
so that the two can be re-united again and so that Zero can continue
assisting the Maverick Hunters. Still unsure about his true purpose, X only
knows now that his primary role is that of the destruction of the mavericks.
![]()
Zero:
Sacrificing himself to save
X, Zero managed to allow X to destroy the maverick Vile but at the cost of
his own life. This was not the end of Zero, though. Mega Man X now has a
mission to find Zero's parts and re-claim them from the X-Hunters, who plan
to rebuild Zero themselves and use him as a maverick against the humans. X
must find and defeat each of the X hunters quickly to regain the parts,
otherwise he may have to face Zero in battle...
![]()
Dr Light:
Dr Light can be found in
the hidden capsules scattered throughout the stages of the game and will
assist X by giving him new upgrades for his body armor to assist him greatly
in battle and give him a higher chance of victory against the mavericks.
Still unknown to all, Dr Light's reason for creating X is a mystery, even to
X himself, but X almost feels as if Dr Light is like a father to him.
![]()
Dr Cain:
Dr Cain makes his first
appearance in this game, and quite useful to X. He will provide X with
information about the mysterious X-Hunters and will gladly rebuild Zero for
X if he can find all of his parts. Dr Cain is confident in X's abilities,
but is also unsure of his purpose in life.

Serges:
Serges is the insane
individual of the three X-Hunters. He often jumps to conclusions and
believes that he can crush X in the war against the humans. He is open about
his feelings and sometimes does things without thinking, giving himself a
disadvantage. He protects Zero Part No. 1.

Violen:
Violen is one of the three
X-Hunters bent on destroying Mega Man X. He is one of the last remaining
mavericks under the command of their leader Sigma. He, along with the other
two X-Hunters, is planning to rebuild Zero to use against the Maverick
Hunters and the humans. He protects Zero Part No. 2.

Agile:
Agile appears to be the
leader of the X-Hunters, always calm and ready for battle. Strong and built
for war, Agile is almost certain that X is no match for him, and looks
forward to meeting X in person. He is the brains behind the X-Hunters and
there are few who stand up to him and live to speak about it. He protects
Zero Part No. 3.

Sigma:
Sigma is back, and after X.
He is the mastermind behind the plan to rebuild Zero and use him against X.
Bent on destroying all humans, Sigma is planning to rebuild his army and
crush the Maverick Hunters once and for all. Secretly building his forces in
a new hidden base, Sigma believes that he now has a huge advantage over X,
and likes the idea of turning Zero against him. X has no idea that Sigma has
been revived, all he knows of is the mysterious X-Hunters but Sigma still
underestimates X and does not understand his true purpose.
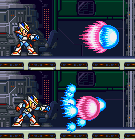
![]()
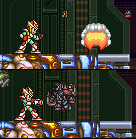
Wheel Gator:
Guide: You will
fight Wheel Gator in a room full of engine oil. He will stay below the oil
for most of the time. He will begin by diving under and will fire out a
metal wheel which will fly up the wall and down the other side. If you stay
on the oil, he will jump up out of it and try to bite X and will cause a lot
of damage if he hits you. He will also often charge up his shoulders and
fire two metal wheels at the wall. Jump up the wall to dodge them. He will
also sometimes jump up and charge against the wall. The mark he makes on the
wall after this will damage you if you touch it, so try to make sure he
doesn't charge at the walls. To defeat him, use the Strike Chain. When he
jumps out of the oil, shoot him with the Strike Chain and he will dive back
under. Stay high up on the wall to dodge him as he jumps out and continue
shooting him when he appears.
Weakness:
strike chain.
Weapon
Received:
Spin Wheel.
![]()
Magna Centipede:
Guide: Magna
Centipede will teleport around the room often during this battle. He will
often fire out three small razor blades which will fly towards you. Dodge
them by jumping over them. He will also shoot his tail out and it will home
in on you and eventually strike. Dash to the left or right to dodge it. He
will sometimes jump up to the roof and attack from there. If he draws you
towards himself, dash away quickly as he will grab you and disable your
weapon so that you won't be able to fire any charged shots. To defeat him,
use the Silk Shot. When you shoot him with it, his tail will fall off and he
won't be able to use his tail attack. When you shoot him he will disappear
and reappear in a different location. If he appears on the roof, face away
from him and shoot the Silk Shot so that the projectile will fire up towards
him.
Weakness:
Silk Shot.
Weapon
Received:
Magnet Mine.

Bubble Crab:
Guide: Bubble Crab
will cause the water level of the room to rise and lower often. He will
begin by creating a protective bubble around himself and you won't be able
to penetrate it with the X-Buster. He will also jump up often and fire out
electric bolts which will change the water level of the room. Try not to
jump too high as the roof has spikes on it. He will often fire out three
bubbles with small crabs in them which will fly towards you when their
bubbles break. To defeat him use the Spin Wheel. When the wheel hits him
when he has his bubble active, it will break it and cause damage to him. If
you have the X-Buster upgrade, use a charged-up shot as well to hit him
successfully.
Weakness:
Spin Wheel.
Weapon
Received:
Bubble Splash.

Morph Moth:
Guide: Morph Moth
will begin the battle as a small object hanging from the ceiling. It will
swing around the room and release pieces of junk which will damage X if they
hit you. He will also often drop to the floor and spin across the room
throwing junk everywhere. He will then jump back up to the roof and will
spin junk around the room. To dodge the junk, jump up the wall and then over
him to dodge it. You will notice the object will begin to grow as the junk
is flying around. He will continue this loop a few times before becoming the
next form. To destroy him, use the Speed Burner. When you have taken his
health down to about half, The shell will break open and the roof will open.
The larger form of Morph Moth will now enter. It will fly around the room
and release a pollen weapon which will cause damage when it touches you. He
will also often fire out an energy beam at you so don't stop moving. Defeat
him by shooting him with the Speed Burner.
Weakness:
Speed Burner.
Weapon
Received:
Silk Shot.

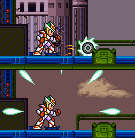
Overdrive Ostrich:
Guide: Overdrive
Ostrich will move around often during this battle. He will begin by dashing
towards you and will cause X to fly across the large room if he hits you.
Jump over him to dodge his charge attack. He will also often hop around and
try to kick X. Dash under him as he jumps to dodge him. If you dash too far
away from him, you will see him moving around in the background and he will
jump up out of the screen and land on top of X. He will also often fire
small purple disks straight ahead and several from the sky. To defeat him,
use the Crystal Hunter. When you shoot him, he will freeze for a few
seconds. When he breaks free, he will jump up and release several disks.
When he jumps up, before he shoots the disks shoot him again to freeze him.
Continue this to defeat him.
Weakness:
Crystal Hunter.
Weapon
Received:
Sonic Slicer.
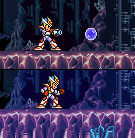
![]()
Crystal Snail:
Guide: Crystal
Snail will often hide in his shell to protect himself during this battle. He
will begin by firing out three ice bubbles which will freeze X if they touch
him. He will often fly up in the air and charge at you in his shell. He will
also sometimes jump up and cause the screen to wobble, and X's movement will
go into a slow-motion type state. To defeat him, shoot him with the Magnet
Mine. When you successfully hit him, he will fly forward out of his shell
and hit the wall which will cause further damage to him. Just try to jump
out of his way as he will probably fly towards you when you shoot him.
Weakness:
Magnet Mine.
Weapon
Received:
Crystal Hunter.

Wire Sponge:
Guide: Wire Sponge
should be the first boss you take on. He will often spin his whip around
which will block your attacks if you shoot at him. He will then release it
and it will fly straight at you. Jump up the wall to dodge it. If the whip
hits the wall he will be drawn towards it. He will also often shoot his whip
up to the ceiling and hang from the roof. He will then fire out small seeds
which will become sharp spikes when the hit the ground. Shoot the spikes to
destroy them. When he drops down, he will often begin vibrating and will
slowly turn a red color. He will then cause huge lightning bolts to fire
down from the ceiling. Stay on the other side of the room to dodge them. To
destroy him, use the Sonic Slicer or X-Buster if you don't have it. When you
defeat him with the Sonic Slicer his upper body will detach itself from the
bottom part when he is exploding for a bit of a humorous end.
Weakness:
Sonic Slicer.
Weapon
Received:
Strike Chain.

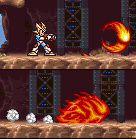
Flame Stag:
Guide: Flame Stag
will be jumping around a lot during this battle. He will begin by jumping up
the walls and will slowly jump back down to try and hit X. He will also
often charge at X on the ground and if he grabs you he will throw you
against the wall and use an uppercut to throw X straight up and will then
slam him into the ground. He will also often shoot out two blue or red
fireballs. When he charges at you and jumps up the walls, try to dodge him
by jumping away from the direction he is going to evade him. To defeat him,
use the Bubble Splash. Each time you hit him he will most likely fire two
fireballs, so dodge them by jumping up the wall and then over them and fire
again. If you don't have the Bubble Splash use the X-Buster in the same
fashion with charged-up shots. Shoot him when he lands and jump over him as
he jumps on the wall.
Weakness:
Bubble Splash.
Weapon
Received:
Speed Burner.

The X-Hunters:
Those are the
X-Hunters. They want to destroy X and they have Zero's body parts. here
is how to destroy them:
Serges:
Guide:
You should take on Serges first in Flame Stag's stage. He can be
found above the room with the platforms falling into the lava. He will
be on a floating platform during this battle. He will occasionally stop
and lay land mines on the floor which will explode when you touch them.
You will find that when you shoot at him he will activate a protective
shield which will block your shot. To successfully hit him, use a
charged-up shot. When he gets hit, he will jump up and spin around,
firing energy beams all around the room. Dodge the beams and shoot him
again when he lands back on the platform. As he moves forward while
jumping, jump over the platform before it hits you. When you defeat him
you'll receive Zero's part No. 1.
Weakness:
Sonic Slicer.
Violen:
Guide:
You should next fight Violen in Morph Moth's stage. When you come
to the long ladder leading down, near the top of it to the right will be
an opening which will lead to his room. He will begin the battle by
firing out energy balls straight at you. Jump up the wall to dodge them.
He will jump around the room often, so dash under him each time he comes
close to one of the walls. He will also fire to his energy beams from
the top of the room. He will occasionally stand still and release a huge
spikes-ball attached to a chain. It will bounce around the room at a
high speed. Try to stay out of its way, as it causes huge damage if it
hits you. To defeat him, keep shooting him with charged shots and normal
shots when he's on the ground. Just try to stay out of his way when he
jumps around and stay out of contact with the spike ball. When you
defeat him you'll receive Zero's Part No. 2.
Weakness:
Bubble Slash.
Agile:
Guide: You
should next fight Agile in Magna Centipede's stage. He can be found at
the end of the large room that has the strange blocks falling from the
roof. He will take out a large sword and use it as his primary weapon
during this battle. He has two main attacks, one where he will charge
across the room with his sword out to try and hit X, and he will also
often jump up and shoot out a large energy beam. He will fire it at you
depending on your position in the room, so try to jump up the wall and
drop down to dodge it or dash under it to dodge it. To defeat him, use a
charged up shot when he is standing still. When you shoot him, jump up
the wall so that when he fires the beam you can drop and fire again.
When you defeat him you'll receive Zero's part No. 3.
Weakness:
Magnet Mine.
If you don't collect all Zero's parts you will have to fight him in the end.

Violen:
Guide: Violen
will be the first of the X-Hunters you will have to battle. He will use
the same attacks as before, using his large spiked ball that will fly
around the room to try and hit you. He will also occasionally jump up
and fire out the small energy balls in different directions. This time
he will make small blocks appear in the room which you can stand on to
hit him if he jumps up too high. To defeat him, use the Bubble Splash.
When you hit him, try to keep away as it will take a few seconds for him
to stop flashing. When he stops flashing continue hitting him. Try to
avoid the spiked ball by staying near the edges of the room or near one
of the small blocks.
Weakness:
Bubble Splash.
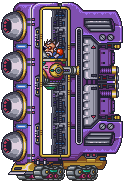
Serges:
Guide: Serges
will battle you in a large vehicle above a large bed of spikes. There
will be four moving platforms for you to stand on. Serges will enter in
a large vehicle which has four gun turrets on the front. Each turret
will fire out a different energy weapon when Serges moves up and down
and fires one. To defeat him, shoot each gun turret with the X-Buster
until they explode. When you destroy one, the vehicle will move forward
and destroy one of the moving platforms. When you destroy all of them,
The front part of the vehicle will explode and Serges will be exposed.
Jump onto the edge of the vehicle and use the Sonic Slicer to finish him
off. To hit him, stand on the edge and charge up the Sonic Slicer, and
release it so that the projectiles fly up and hit him. Try to dodge the
small energy balls he fires and keep away from the spikes.
Weakness:
Sonic Slicer.

Agile:
Guide: Agile
will battle you in a strange looking vehicle. He will float around the
top of the screen most of the time. He will occasionally glow red and
shoot out two spike platforms either side of him, which will fall down
to the floor. Stay underneath him to avoid the platforms. When they
release four energy balls will fly around the walls and floor of the
room so you will also have to jump out of their way. He will also often
fire small missiles across the room which will be followed by a huge
bomb. Jump up the walls to dodge them. To destroy him, use the Magnet
Mine. The best way to do this is to charge up the weapon and jump up the
wall until you are level with him. Release the energy ball and it will
slowly fly through him, causing a lot of damage as he will continue to
fly around it. Continue this to finish him off.
Weakness:
Magnet Mine.
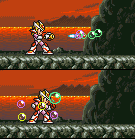
![]()
Zero:
Guide: This is
one battle any fan of Zero's will not enjoy. If you fail to regain all
of Zero's parts from the X-Hunters earlier in the game you will have to
battle Zero before fighting Sigma. But if you did find all of his parts,
a black Zero will appear instead but the real Zero will come in and
destroy it, so you can go straight on to fight Sigma. During the battle
with Zero, he will be often firing charged shots and then firing an
energy beam at you with his Beam Saber. He will also often charge at you
with his Beam Saber extended. When he stops, he will punch the ground
and cause debris to fly into the air and will damage you if they hit X.
To defeat him, use the Speed Burner. Wait for a break in his shots, as
if you hit one of his beams, it will destroy it and not hit Zero. Try to
avoid the rocks that fly up out of the ground and when you defeat him he
will return to normal and lead you to Sigma.
Weakness:
Speed Burner.

Sigma:
Guide: Sigma
will use large claws on his hands as his primary weapon during this
battle. Once again, he will be difficult to beat and will cause a lot of
damage to X if he hits you. He will begin by charging at X and will
strike him and cause him to fly across the room. Try to jump over him to
dodge this attack. He will also often shoot out several energy balls
which will one at a time home in on X. They will fly in a straight line
towards you so dodge them by moving away from them after they are fired.
If Sigma jumps up on the wall he will disappear and then reappear above
X and charge down on you. Dodge him by dashing to the side. He will
sometimes glow yellow and fire an electric wall similar to the secondary
fire of the Electric Spark weapon from Mega Man X. Jump up the wall to
dodge it. To defeat him, use the Sonic Slicer. When he disappears,
charge up the weapon and release it on him when he reappears. Fire many
shots around the room as they will bounce off the walls and eventually
hit Sigma. After you defeat him his true form will be revealed.
Weakness:
Sonic Slicer.

The Sigma Virus:
Guide: The
final form of Sigma will not have an energy bar, but you can tell how
much damage he has taken during the battle. He will fly around the room
and will often charge across the screen firing down an energy beam which
will cause damage to X. He will also often fly to one side of the room
and shoot out two blue balls which will become small enemies. The
advantage of this is that some of them will give you weapon and energy
refill capsules when you destroy them. To defeat Sigma, use the Strike
Chain. Each time you shoot him the screen will blur in the background,
indicating that he is taking damage. After a few shots he will begin to
slowly change color. Keep shooting him until he turns a reddish color.
He will disappear and then reappear over X and will begin to cause
damage. You won't be able to escape from him, but you can still cause
him damage. Keep firing the Strike Chain on him and after a few more
shots he will finally explode.
Weakness:
Strike Chain.
CONGRATULATIONS!!!
You finished Mega Man X2.
Armor
Parts locations:
![]() Leg Upgrade -
Allow X to do a mid-air dash - Found in Overdrive Ostrich's stage.
Leg Upgrade -
Allow X to do a mid-air dash - Found in Overdrive Ostrich's stage.
 The boots upgrade is
found in Overdrive Ostrich's stage. Just before the end of the stage you
will see a dark colored wall on a ledge to the right above the last door of
the stage. Use the Spin Wheel to destroy the wall to find the capsule. This
upgrade will allow X to perform a dash in mid-air. To use it, jump and then
press left or right and A.
The boots upgrade is
found in Overdrive Ostrich's stage. Just before the end of the stage you
will see a dark colored wall on a ledge to the right above the last door of
the stage. Use the Spin Wheel to destroy the wall to find the capsule. This
upgrade will allow X to perform a dash in mid-air. To use it, jump and then
press left or right and A.
![]() Arm Upgrade - Allow X to fire a double X-Buster shot - Found
in Wheel Gator's stage.
Arm Upgrade - Allow X to fire a double X-Buster shot - Found
in Wheel Gator's stage.
 The X-Buster upgrade is
found in Wheel Gator's stage. You will need the Leg upgrade to find this
one. Near the start of the stage you will notice and area with an opening in
the ceiling. Jump onto the wall to the right of the opening and use the
mid-air dash to reach the small protruding wall and climb up the opening to
find the capsule. This upgrade will allow X to fire off two stronger shots
and will also allow him to charge up the special weapons.
The X-Buster upgrade is
found in Wheel Gator's stage. You will need the Leg upgrade to find this
one. Near the start of the stage you will notice and area with an opening in
the ceiling. Jump onto the wall to the right of the opening and use the
mid-air dash to reach the small protruding wall and climb up the opening to
find the capsule. This upgrade will allow X to fire off two stronger shots
and will also allow him to charge up the special weapons.
![]() Body Upgrade - Giga Crush attack - Found in Morph Moth's
stage.
Body Upgrade - Giga Crush attack - Found in Morph Moth's
stage.
 The Armor
upgrade is found in Morph Moth's stage. You will need the Spin Wheel to find
this. Near the start of the stage just after the first room with the
magnetic roof will be a small elevated ledge leading to the next magnetic
room. At the foot of the ledge on the left side, use the Spin Wheel and it
will begin to break open a hole in the ground. Keep digging down to find the
capsule. The Armor upgrade will give X the G-Crush weapon. This upgrade will
absorb damage taken from enemies and convert it into weapon energy. The
G-Crush can be selected from the menu screen and used the same way as a
normal special weapon.
The Armor
upgrade is found in Morph Moth's stage. You will need the Spin Wheel to find
this. Near the start of the stage just after the first room with the
magnetic roof will be a small elevated ledge leading to the next magnetic
room. At the foot of the ledge on the left side, use the Spin Wheel and it
will begin to break open a hole in the ground. Keep digging down to find the
capsule. The Armor upgrade will give X the G-Crush weapon. This upgrade will
absorb damage taken from enemies and convert it into weapon energy. The
G-Crush can be selected from the menu screen and used the same way as a
normal special weapon.
![]() Helmet Upgrade - Find items - Found in Morph Moth's stage.
Helmet Upgrade - Find items - Found in Morph Moth's stage.
 The helmet
upgrade is found in Crystal Snail's stage. In the area where there is a lot
of slanted platforms and many of the bat-type enemies flying around, slide
down a large hole and on the left just before the bottom of the hole you
will see an opening. Continue down the tunnel to find the upgrade. The
helmet upgrade will give X a new sensor device which can be selected from
the menu screen. This device once activated will send out a large cross-hair
which will target secret openings not normally seen where hidden items can
be found.
The helmet
upgrade is found in Crystal Snail's stage. In the area where there is a lot
of slanted platforms and many of the bat-type enemies flying around, slide
down a large hole and on the left just before the bottom of the hole you
will see an opening. Continue down the tunnel to find the upgrade. The
helmet upgrade will give X a new sensor device which can be selected from
the menu screen. This device once activated will send out a large cross-hair
which will target secret openings not normally seen where hidden items can
be found.
Heart Tanks
locations:
Heart Tanks - Increase the energy bar - Found in all 8 stages.

The first heart can be found in Wire Sponge's stage. This heart is by far the most easiest to find and reach. When you begin the level, climb up the wall to the left of the screen and just above X's health display is a tiny hidden room where the heart is hiding.

The second heart is in Wheel Gator's stage. Just after you climb up the ladder after using the armored carrier and making your way under the tank, you will see this heart up on ledge which has spikes on the wall. You will need the Speed Burner and X-Buster upgrade to reach this. Stand on the raised platform to the right of the heart and then charge up the Speed Burner. Before releasing fire, jump up as high as you can to the left and then release fire. X will fly across the screen towards the heart. If he drops too early, try to use the edge of the platform to jump up to the heart.

The third heart is in Flame Stag's stage. When you come to the area where the lava rises and you must climb up the walls to evade it, you will notice this heart on the left of the screen as you ascend. A door will close over it. As you are jumping up the walls charge up the X-Buster and quickly destroy the wall. Dash and grab the heart and then quickly dash out of the small room and up the wall to evade the lava.

The fourth heart is in Morph Moth's stage. You will need the Crystal Hunter to reach this. At the start of the stage, you will find an enemy with a shield just outside the large building. Shoot his shield so it flies up and then shoot him with the Crystal Hunter to freeze him. Jump on top of him and then jump to the right to grab onto the wall of the building. Climb up the wall to find the heart.

The fifth heart is in Magna Centipede's stage. You will need the Speed Burner and X-Buster upgrade to reach this. At the start of the level where there are two of the yellow spotlights covering an area, dodge the lights so that the gun turrets will not fall down. You will notice that the second turret of this area is below an opening in the roof. Use the charged-up Speed Burner to grab onto the right side of the turret and then scale the wall to find this heart.

The sixth heart is in Crystal Snail's stage. This heart is difficult to reach successfully. You may need the Strike Chain to reach this. At the start of the stage when you find the armored carrier, jump back to the left where there is a large hole. Jump down the hole and hold left to land on a lower platform. There will be a large hole to the left of you. Charge and jump off the left side of the platform and hover in the air until the carrier begins to fall, and then jump out of it and fly to the left. If you can't make it to the platform, use the Strike Chain to grab onto the wall and pull yourself to the heart. This one might take a few tries to reach.

The seventh heart is in Overdrive Ostrich's stage. This one will also take a while to reach. Near the end of the level you will see the heart on a ledge covered in spikes with some other power ups. There are two ways to reach this heart. One way is to successfully drive the hover bike you get earlier up to the ledge and turn around to reach the heart and miss the spike wall, or you could use the charged-up Speed Burner to reach it. You'll lose a life this way, but you'll get the heart.

The eighth
heart is in Bubble Crab's stage. Near the start of the level wait for the
large fish to open the floor and continue on into the level. Jump up to the
large wall where the door was and once at the top, jump off to the left and
you should see two vertical platforms floating up and down in the water.
Grab on to one and jump up to find the heart.
Sub-Tanks
locations:
Sub-Tanks -
Stores health - Found in Wire Sponge, Bubble Crab, Flame Stag, and Magna
Centipede stages.

The first sub-tank is in Wire Sponge's stage. Near the start of the stage you will find vertical platforms rising and lowering above a bed of spikes. Jump on top of the first platform and then jump off on to the wall to the left. Jump up the wall and then onto the large platform in the air. Continue on to the right to find the sub-tank.

The second sub-tank is in Flame Stag's stage. Near the start of the level you will find the large beetle-shaped enemy that charges at the wall and destroys certain parts of the wall. Jump on to the flat part of its back and then wait for it to bring you up to the top of the screen. Jump to the left onto the high-up platform to find the sub-tank.

The third sub-tank is in Magna Centipede's stage. You will need the Speed Burner and X-Buster upgrade for this. In the area where the large blocks move around, go to the last part where three rows of two blocks will fall down and stack on top of each other. Dash past them before they all fall and charge up your weapon. When you see the last block, jump on it and wait for it to move to the right. Before it falls down the hole jump to the right and release fire so that X flies across and grabs onto the wall. Jump up to the opening in the roof to find the sub-tank.
The fourth sub-tank is in Bubble Crab's stage. You will need the Bubble Splash weapon and the X-Buster upgrade. In the long flat rocky area underwater where the giant fish passes, destroy any of the jellyfish around and charge up the Bubble Splash. Release fire and bubbles will begin to fly around X. Jump up high out of the water and you will see the sub-tank to the left.
![]()
X-Buster:
The X-Buster is the standard weapon of the game and you begin the game with
it. It has the normal standard yellow beam which causes light damage to
targets. Charged-up shots will results in a stronger blast. When you find
the X-Buster upgrade you will be able to charge up to the purple state and
fire off two shots, one after the other, which will cause huge damage to
targets. This is the universal weapon of the game - no matter how strong the
bosses are the X-Buster will be able to damage them and be defeated using
this weapon.
![]()
Crystal Hunter:
The Crystal Hunter
is gained once Crystal Snail is defeated. This weapon will fire out a small
ice crystal which will crystallize any enemies it strikes. When an enemy is
frozen, X can stand on top of it to be able to reach higher areas in a
stage. The charged-up shot will cause the entire screen to wobble, and this
will cause all the enemies on the screen to slow down their movement and X
can destroy them if they are normally moving too fast.
![]()
Bubble Splash:
The Bubble Splash
is gained once Bubble Crab is defeated. This weapon will fire out a number
of bubbles from X and will slowly float up before popping. The secondary
fire will create several bubbles which will spin around X and damage any
enemies who come into contact with him. It will also allow X to jump much
higher when he is underwater and using the secondary fire.
![]()
Silk Shot:
The Silk Shot is
gained once Morph Moth is defeated. This weapon will fire a small
ball-shaped projectile which will land on the ground in front of X and shoot
out four smaller projectiles in diagonal directions. This can hit any enemy
normally out of reach. The charged-up state will attract a large amount of
junk towards X, which will fly out and spread projectiles across the screen
once fire is released.
![]()
Spin Wheel:
The Spin Wheel is
gained once Wheel Gator is defeated. This weapon will fire out a small metal
wheel which will slowly launch away from X and roll through any enemies and
cause damage, as well as being able to destroy certain walls. The charged-up
shot will fire out eight energy beams that will fire away from X in a
circular fashion.
![]()
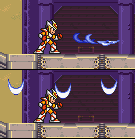
Sonic Slicer:
The Sonic Slicer is
gained once you defeat Overdrive Ostrich. This weapon will fire out two to
three razor-disks which will bounce off any walls they hit. This can be
useful for striking enemies who move around a lot. The secondary fire will
fire out five large energy disks above X which will fly up a short distance
and then fly straight down and strike any targets they hit.
![]()

Strike Chain:
The Strike Chain is
gained once you defeat Wire Sponge. This weapon will fire off a small
extended chain which will grab on to walls and items as well as causing
damage to targets. X can grab onto a wall and drag himself towards it and
can also retrieve items with this weapon. The charged-up shot will fire out
a longer and bigger chain to reach further objects.
![]()
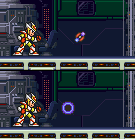
Magnet Mine:
The Magnet Mine is
gained once you defeat Magna Centipede. This weapon will fire a small
mine-projectile which will continue flying straight forward until it hits
something. When it attaches itself as an object, it will detonate after a
few seconds. The charged-up fire will shoot out a small energy ball which
will continue to fly through targets once it hits them and cause more damage
than a normal shot.
![]()
Speed Burner:
The Speed Burner is
gained when you defeat Flame Stag. This weapon will fire out a large
flame-ball which will scorch any targets it strikes. The charged-up state is
useful, as it will cause X to fly straight ahead a small distance while
flaming red, so that any enemies he strikes will be destroyed. This can also
be used to reach items normally out of reach or in a dangerous area.
| 8 | 8 | 4 | 3 | Bosses defeated: None |
| 8 | 2 | 8 | 2 | Energy
hearts: 0 Sub-tanks: 0 |
| 3 | 8 | 4 | 1 | Body Upgrades: None |
| 4 | 6 | 2 | 6 | Zero's parts: 0 |
| 3 | 8 | 3 | 5 | Bosses defeated: Wire Sponge |
| 8 | 2 | 8 | 6 | Energy
hearts: 1 Sub-tanks: 1 |
| 3 | 8 | 4 | 1 | Body Upgrades: None |
| 1 | 4 | 2 | 6 | Zero's parts: 0 |
| 5 | 5 | 3 | 3 | Bosses defeated: Wire Sponge, Wheel Gator |
| 6 | 8 | 8 | 5 | Energy
hearts: 1 Sub-tanks: 1 |
| 3 | 7 | 8 | 1 | Body Upgrades: None |
| 1 | 2 | 5 | 1 | Zero's parts: 0 |
| 8 | 5 | 2 | 8 | Bosses defeated: Wire Sponge, Wheel Gator, Flame Stag |
| 1 | 2 | 8 | 3 | Energy
hearts: 2 Sub-tanks: 2 |
| 3 | 8 | 6 | 4 | Body Upgrades: None |
| 1 | 3 | 2 | 3 | Zero's parts: 1 |
| 7 | 6 | 3 | 4 | Bosses defeated: Wire Sponge, Wheel Gator, Flame Stag, Morph Moth |
| 5 | 7 | 3 | 6 | Energy
hearts: 2 Sub-tanks: 2 |
| 3 | 1 | 2 | 4 | Body Upgrades: Armor |
| 7 | 2 | 4 | 6 | Zero's parts: 2 |
| 7 | 6 | 5 | 4 | Bosses defeated: Wire Sponge, Wheel Gator, Flame Stag, Morph Moth, Magna Centipede |
| 7 | 2 | 7 | 6 | Energy
hearts: 2 Sub-tanks: 2 |
| 3 | 4 | 2 | 4 | Body Upgrades: Armor |
| 7 | 5 | 3 | 3 | Zero's parts: 3 |
| 4 | 7 | 6 | 6 | Bosses defeated: Wire Sponge, Wheel Gator, Flame Stag, Morph Moth, Magna Centipede, Crystal Snail |
| 3 | 8 | 1 | 5 | Energy
hearts: 3 Sub-tanks: 2 |
| 3 | 3 | 8 | 4 | Body Upgrades: Armor, Helmet |
| 3 | 6 | 5 | 1 | Zero's parts: 3 |
| 5 | 3 | 5 | 7 | Bosses defeated: Wire Sponge, Wheel Gator, Flame Stag, Morph Moth, Magna Centipede, Crystal Snail, Overdrive Ostrich |
| 6 | 8 | 4 | 5 | Energy
hearts: 5 Sub-tanks: 2 |
| 3 | 8 | 2 | 8 | Body Upgrades: Armor, Helmet, Boots |
| 7 | 4 | 8 | 1 | Zero's parts: 3 |
| 6 | 4 | 7 | 4 | Bosses defeated: Wire Sponge, Wheel Gator, Flame Stag, Morph Moth, Magna Centipede, Crystal Snail, Overdrive Ostrich, Bubble Crab |
| 6 | 3 | 4 | 7 | Energy
hearts: 8 Sub-tanks: 4 |
| 6 | 7 | 2 | 8 | Body Upgrades: Armor, Helmet, Boots, X-Buster |
| 7 | 2 | 2 | 6 | Zero's parts: 3 |
![]()

"Shuryuken" Dragon
Punch:
Fans of Capcom's addictive
Street Fighter series recognize the term "Shuryuken," while the rest of the
world simply calls it a dragon punch. No matter what it is, it's powerful.
To get it, you must have collected all the power ups (that means 8 Heart
tanks, 4 Sub-tanks, and 4 capsule upgrades). When you're in the X-Hunters'
base stage 3 (Agile's), you'll get to an area where you have to step on
platforms to make them go in different directions. You can either steer the
last one further than it's meant to be, or you can freeze a bat robot with
the Crystal Hunter weapon to climb on the ladder leading upwards that's
directly after that area. Once there, use a charged up Speed Burner and your
Air Dash to get over the spikes. Use your Air Dash once again to reach an
extra life, then slide down the left wall to find the capsule with which Dr.
Light will give you the Shuryuken. To do this, follow the motion you would
follow in a Street Fighter game. Left, down, down/left, Y, all in one smooth
motion. Note: the Lefts are exchangeable for Rights, depending on which way
you're facing.