
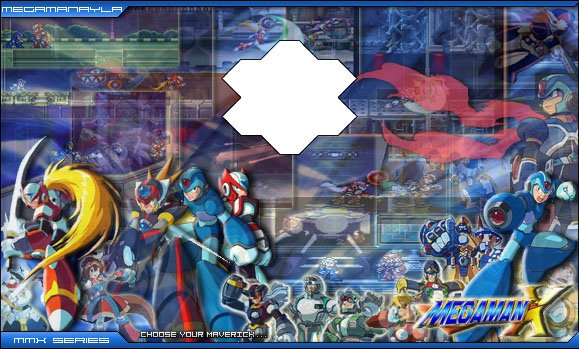


| Here is a complete guide for Mega Man X8. Choose the tab you want in order to view its content. |

|
Release Date: |
Developer: |
|
Systems: |
Genre: |
Game Specs:
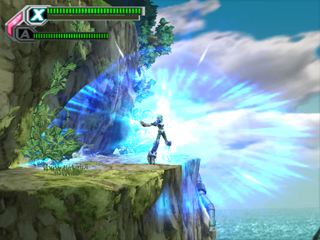
Mega Man X8 is a game that tries to take X series back to its roots. While the
game is fully 3D gameplay will revert back to classic 2D. Again, you can play as
X, Zero and Axl, and just like in X7, you can bring two of them with him. Not
only that you can switch between them, but you can also call up to reserve the
character of the character you have in front ports in a crisis situation. This
is to distribute a powerful so-called Double Attack.
X8 also lets the player choose between three navigators, with each specializing
in a particular area. X8 is also introducing the ERP system in order to buy
items, where the currency is the metals that enemies drop when you defeat them.
In addition, X8 offers a lot of candy, including different weapons for each
character, unlockable characters, mini games and also can interact with Mega Man
X: Command Mission.
| Japan | |||
| Front | Back | Media | |
 |
|||
| America | |||
| Front | Back | Media | |
 |
 |
 |
|
| Europe | |||
| Front | Back | Media | |
 |
 |
||
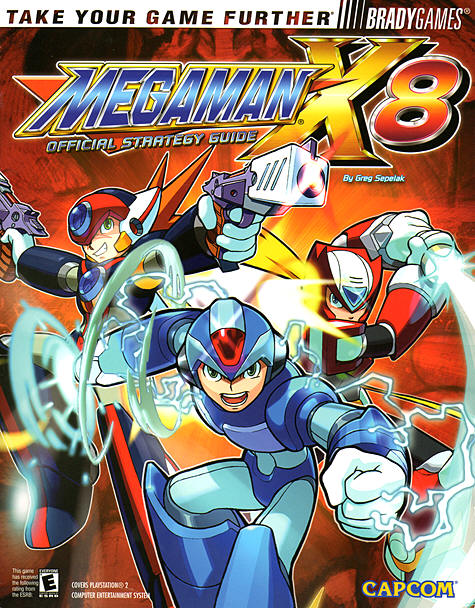
| Original Soundtrack | Strategy Guide | ||
 |
 |
||
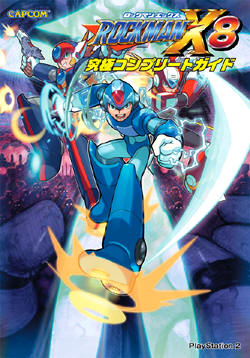
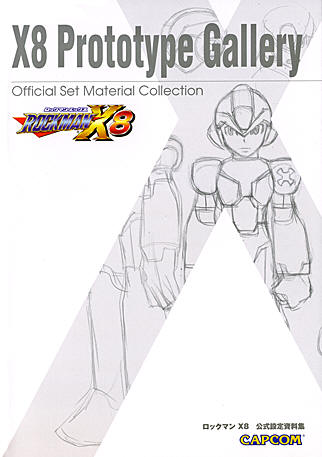
| Guidebook | Art Book | ||
 |
 |
||
 X
is back once again to be fighting him against the terrible Mavericks. In spite
of recent doubts, he has now begun to rely on Axl as he does with Zero. He
continues to believe in a society where people and Reploid can live in community
with each other. He is a strong determination to once again try to defeat Sigma,
and this once and for all.
X
is back once again to be fighting him against the terrible Mavericks. In spite
of recent doubts, he has now begun to rely on Axl as he does with Zero. He
continues to believe in a society where people and Reploid can live in community
with each other. He is a strong determination to once again try to defeat Sigma,
and this once and for all. Zero
seek revenge against all the Mavericks when he still grieves you to have gone on
Sigma's plans to use him as a Maverick. He is always pleased to go into battle
with X and Axl, especially when it comes to immediate actions. Zero is growing
in strength for each minute, and continues to defy it as his creator-designed
for him.
Zero
seek revenge against all the Mavericks when he still grieves you to have gone on
Sigma's plans to use him as a Maverick. He is always pleased to go into battle
with X and Axl, especially when it comes to immediate actions. Zero is growing
in strength for each minute, and continues to defy it as his creator-designed
for him. Axl
has learned from their mistakes and are now using their transformations, the
ability of good things. He has proved himself worthy of a place in the Maverick
Hunters and has become accepted among the highest ranked. For each violation Axl
ripens to a stronger Maverick Hunter, and he comes with X and Zero in all their
missions.
Axl
has learned from their mistakes and are now using their transformations, the
ability of good things. He has proved himself worthy of a place in the Maverick
Hunters and has become accepted among the highest ranked. For each violation Axl
ripens to a stronger Maverick Hunter, and he comes with X and Zero in all their
missions. Dr.
Light returns even he, and although this time he has put into capsules bit here
and there. This time, all the capsules some new features that will give X a huge
advantage against all Mavericks. Despite the fact that the world never seems to
get rid of all the Mavericks, so do think Dr. Light that they will see the
paradise that he and X dream of one day.
Dr.
Light returns even he, and although this time he has put into capsules bit here
and there. This time, all the capsules some new features that will give X a huge
advantage against all Mavericks. Despite the fact that the world never seems to
get rid of all the Mavericks, so do think Dr. Light that they will see the
paradise that he and X dream of one day. Alia
has now become a real veteran of the Maverick Hunters and continues to provide
important information to the X, Zero and Axl. They had never survived without
her help, and they are incredibly grateful for that. She is determined to
destroy all the Mavericks and will do everything she can to help the Maverick
Hunters in their eternal struggle against Sigma and all the Mavericks.
Alia
has now become a real veteran of the Maverick Hunters and continues to provide
important information to the X, Zero and Axl. They had never survived without
her help, and they are incredibly grateful for that. She is determined to
destroy all the Mavericks and will do everything she can to help the Maverick
Hunters in their eternal struggle against Sigma and all the Mavericks. Signas
lead the Maverick Hunters into another stressful battle. He watches over them
with both anticipation and caring, and everything else expected of a leader. He
thinks it can succeed in fulfilling his dream of a society where people and
Reploid can live in community with each other without trying to annihilate each
other.
Signas
lead the Maverick Hunters into another stressful battle. He watches over them
with both anticipation and caring, and everything else expected of a leader. He
thinks it can succeed in fulfilling his dream of a society where people and
Reploid can live in community with each other without trying to annihilate each
other. Layer
is a skilled operator who has specialized in the X, Zero and Axl to defeat the
Mavericks that they encounter. She is also very adept at finding weak points in
the Mavericks, so that they know how to defeat them easier. She is always calm
and very chilly in his comments. She also looks to have a huge crush on Zero.
Layer
is a skilled operator who has specialized in the X, Zero and Axl to defeat the
Mavericks that they encounter. She is also very adept at finding weak points in
the Mavericks, so that they know how to defeat them easier. She is always calm
and very chilly in his comments. She also looks to have a huge crush on Zero. Pallette
is a very young operator, but very skilled. She specializes in analyzing the
hidden paths and secret places where X, Zero and Axl are. She is also
responsible for all Chip Upgrades as they can find. Despite her loud voice and
shout, she will prove to be an important part of their work.
Pallette
is a very young operator, but very skilled. She specializes in analyzing the
hidden paths and secret places where X, Zero and Axl are. She is also
responsible for all Chip Upgrades as they can find. Despite her loud voice and
shout, she will prove to be an important part of their work. Vile
is back and he is stronger than ever. He's still the same cocky and
over-estimate attitude toward X, Zero and Axl, and is obsessed with destroying
them. He is fanatically loyal to Sigma and continues to use his Ride Armor
against all their enemies, and in particular, the Maverick Hunters and all those
who are allied with them.
Vile
is back and he is stronger than ever. He's still the same cocky and
over-estimate attitude toward X, Zero and Axl, and is obsessed with destroying
them. He is fanatically loyal to Sigma and continues to use his Ride Armor
against all their enemies, and in particular, the Maverick Hunters and all those
who are allied with them. Lumine
is a mysterious Reploid created to lead and complete the Jakob Project. He is
one of the new generation Reploid and then Axls possess the ability to change
the shape. After X, Zero and Axl called out to investigate what happened at the
great lift as they found that Lumine captured by their old rival, Vile.
Lumine
is a mysterious Reploid created to lead and complete the Jakob Project. He is
one of the new generation Reploid and then Axls possess the ability to change
the shape. After X, Zero and Axl called out to investigate what happened at the
great lift as they found that Lumine captured by their old rival, Vile. After
their humiliating defeat against Axls transformation capacity as Sigma has
created yet another new body. He plans to take control of the entire new
generation Reploid and sabotage the Jakob Project. All this to build a new world
where the only Mavericks exist. He thinks hard on their chances, and has revived
Vile to tease Maverick Hunters.
After
their humiliating defeat against Axls transformation capacity as Sigma has
created yet another new body. He plans to take control of the entire new
generation Reploid and sabotage the Jakob Project. All this to build a new world
where the only Mavericks exist. He thinks hard on their chances, and has revived
Vile to tease Maverick Hunters.
 This
boss will start at the far right and moving left. It will open a claw to protect
themselves. If it catches you at a wall, it will attack you quickly with its
claws. After the attack, it will jump a bit backward and move forward again with
an open claw. To defeat it you must break the barrier in order to damage it.
Here you can also use the Double Attack.
This
boss will start at the far right and moving left. It will open a claw to protect
themselves. If it catches you at a wall, it will attack you quickly with its
claws. After the attack, it will jump a bit backward and move forward again with
an open claw. To defeat it you must break the barrier in order to damage it.
Here you can also use the Double Attack. Optic
Sunflower will often move around the block you can use to your advantage. The
screen will become white before two green blocks come up and he goes into the
ground. He will then pop up and fire a massive energy beam straight ahead. Use
the blocks to avoid it. He will then bury itself in the ground and use
strĺlattacken again. After a while he will make a copy of itself. He will also
move the blocks and fire its beam the same as at yesterday. Use again the blocks
to avoid it. He will also sometimes throw a little ball that you can be caught
in. Change the character to take you away. If he puts a single block in the
middle, he will fire two candidates laser beams, so watch out for them.
Optic
Sunflower will often move around the block you can use to your advantage. The
screen will become white before two green blocks come up and he goes into the
ground. He will then pop up and fire a massive energy beam straight ahead. Use
the blocks to avoid it. He will then bury itself in the ground and use
strĺlattacken again. After a while he will make a copy of itself. He will also
move the blocks and fire its beam the same as at yesterday. Use again the blocks
to avoid it. He will also sometimes throw a little ball that you can be caught
in. Change the character to take you away. If he puts a single block in the
middle, he will fire two candidates laser beams, so watch out for them.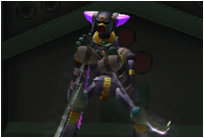 Dark
Mantis will often jump on the walls during the battle. He will often throw out a
homing boomerang when he laughs. He will attack with many jump attacks, and many
are unpredictable. Stay away when he is on the ground where he likely will
deliver a rushing attack against you. When he creates flames around them, he
will fly around the room very quickly, so it is difficult to avoid a collision.
If he captures you, he will suck your life energy and restoring its own, so call
your second character to get away. Also up for when he throws up a number of
arrows raining down and then get stuck into the ground.
Dark
Mantis will often jump on the walls during the battle. He will often throw out a
homing boomerang when he laughs. He will attack with many jump attacks, and many
are unpredictable. Stay away when he is on the ground where he likely will
deliver a rushing attack against you. When he creates flames around them, he
will fly around the room very quickly, so it is difficult to avoid a collision.
If he captures you, he will suck your life energy and restoring its own, so call
your second character to get away. Also up for when he throws up a number of
arrows raining down and then get stuck into the ground. Gravity
Antonione will often rotate the room and create blocks that he attack you with.
He will often dig into a wall and pop up in a brick and throw it at you. If he
rotates the room, make sure not to find yourself in a block, otherwise you will
take much damage. If the block lands on him, he will just pick it up and throw
it at you. If he creates flames around them, he will create a purple storm in
the middle of the room. It will not hurt you, but it will block your ability to
shoot. Watch out also for his green bubbles that can trap you, so call up your
other characters to take you away. If you manage to avoid it, a break of two
bubbles with the same effect. Also up for when he takes up a pillar as he swings
at you.
Gravity
Antonione will often rotate the room and create blocks that he attack you with.
He will often dig into a wall and pop up in a brick and throw it at you. If he
rotates the room, make sure not to find yourself in a block, otherwise you will
take much damage. If the block lands on him, he will just pick it up and throw
it at you. If he creates flames around them, he will create a purple storm in
the middle of the room. It will not hurt you, but it will block your ability to
shoot. Watch out also for his green bubbles that can trap you, so call up your
other characters to take you away. If you manage to avoid it, a break of two
bubbles with the same effect. Also up for when he takes up a pillar as he swings
at you. Earth
Rock Trilobyte will have a suit which he will wear during the fight. You can get
the slide with the charged shots from the X-Buster, three blows from the
Z-Saber or endless shots from A-Bullet. He will eventually drop it and pick it
up after a while. You can destroy it with Squeeze Bomb, Juuhazan or Spiral
Magnum. He will often shoot out small blue projectiles will bounce off the
walls. He will sometimes have two walls come out of the ground and they will
then fall down. Do not stand over them to avoid injury.
Earth
Rock Trilobyte will have a suit which he will wear during the fight. You can get
the slide with the charged shots from the X-Buster, three blows from the
Z-Saber or endless shots from A-Bullet. He will eventually drop it and pick it
up after a while. You can destroy it with Squeeze Bomb, Juuhazan or Spiral
Magnum. He will often shoot out small blue projectiles will bounce off the
walls. He will sometimes have two walls come out of the ground and they will
then fall down. Do not stand over them to avoid injury.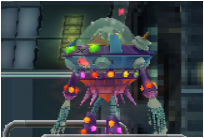 Gigabolt
Man-O-War will often fly around the screen, often comes down to you. If he
hovers just above the ground, you should stand in the middle and not moving. He
will then fly over you without interference. If he flies high, you should stand
in the middle and jump when he comes down. Watch out when he loads up
electricity in his hands when he will create an electric field. Stand on the
edge to avoid damage. When he took some damage, he will create the flames around
them and start spinning. He will call up six small jellyfish enemies. X and Axl
can push them away with his shot, but Zero can destroy them with Rekkyoudan. If
he flies up into a corner, he will throw down their arms at the edges and
capture you in an electric field. Attacking his arms to get rid of electricity.
Gigabolt
Man-O-War will often fly around the screen, often comes down to you. If he
hovers just above the ground, you should stand in the middle and not moving. He
will then fly over you without interference. If he flies high, you should stand
in the middle and jump when he comes down. Watch out when he loads up
electricity in his hands when he will create an electric field. Stand on the
edge to avoid damage. When he took some damage, he will create the flames around
them and start spinning. He will call up six small jellyfish enemies. X and Axl
can push them away with his shot, but Zero can destroy them with Rekkyoudan. If
he flies up into a corner, he will throw down their arms at the edges and
capture you in an electric field. Attacking his arms to get rid of electricity. Avalanche
Yeti will often hide in the snow and use it to their advantage. He will start
with the most to you, then climb up on a wall. Then skip him and beware of his
icicles. After a few knocks, he will surround himself with flames and digging
into the snow. You can easily see where he is, but stay away. Jump up on a wall
and then jump over him when he jumps up. He will attempt a sort of uppercut
attack. He will now stick to this attack, so avoid it as best you can. See also
raised when he lets blue particles swirling around him, so he will jump up and
fly straight towards you.
Avalanche
Yeti will often hide in the snow and use it to their advantage. He will start
with the most to you, then climb up on a wall. Then skip him and beware of his
icicles. After a few knocks, he will surround himself with flames and digging
into the snow. You can easily see where he is, but stay away. Jump up on a wall
and then jump over him when he jumps up. He will attempt a sort of uppercut
attack. He will now stick to this attack, so avoid it as best you can. See also
raised when he lets blue particles swirling around him, so he will jump up and
fly straight towards you. Burn
Rooster will fly around all the time during the battle. He will probably start
by making a kind of kick attack where he bounces around. See how he moves, and
use the walls for protection. When he lands, you should preferably be behind him
when he gets kicked in the ground and let the flames fly up above the ground. He
will sometimes try to fly down at you, so move around to avoid him. After a few
knocks, he will fly away in the background and let the ground move. See now up
for his eldvĺg attack, but the flames can not continue on the part of the floor
is lower down than the part above. After a while, the floor, straighten up
again.
Burn
Rooster will fly around all the time during the battle. He will probably start
by making a kind of kick attack where he bounces around. See how he moves, and
use the walls for protection. When he lands, you should preferably be behind him
when he gets kicked in the ground and let the flames fly up above the ground. He
will sometimes try to fly down at you, so move around to avoid him. After a few
knocks, he will fly away in the background and let the ground move. See now up
for his eldvĺg attack, but the flames can not continue on the part of the floor
is lower down than the part above. After a while, the floor, straighten up
again. Bamboo
Pandamonium is very large and will take up a part of the room. Remember that you
can take with you Ride Armor in this battle. He will often shoot missiles
straight at you, then stand quietly to see it pass, or skip them. If he hits the
ground and you'll see the dirt come up at certain points on the ground. Shortly
thereafter, the great spear pushed straight up. Stand between them to avoid
them. He will then start walking straight ahead and destroy them, climb a pole
and jump over him when he comes. He will then fire more missiles, and sometimes
they will rain down so watch out. He will also occasionally provide plenty of
types to which you can take a lot of damage, so watch out for everything in the
world for the attack. He will also throw grenades which you can watch out for.
Bamboo
Pandamonium is very large and will take up a part of the room. Remember that you
can take with you Ride Armor in this battle. He will often shoot missiles
straight at you, then stand quietly to see it pass, or skip them. If he hits the
ground and you'll see the dirt come up at certain points on the ground. Shortly
thereafter, the great spear pushed straight up. Stand between them to avoid
them. He will then start walking straight ahead and destroy them, climb a pole
and jump over him when he comes. He will then fire more missiles, and sometimes
they will rain down so watch out. He will also occasionally provide plenty of
types to which you can take a lot of damage, so watch out for everything in the
world for the attack. He will also throw grenades which you can watch out for. Sometimes
you will meet Vile on one of the eight Maverick levels and must defeat him to
move forward. He will not have a life meter. He will often dive at you and shoot
electric balls, so you have to move very often. Sometimes he will shoot three
balls that you can slip between, and will also shoot a wave of energy balls. Use
the wall to avoid them.
Sometimes
you will meet Vile on one of the eight Maverick levels and must defeat him to
move forward. He will not have a life meter. He will often dive at you and shoot
electric balls, so you have to move very often. Sometimes he will shoot three
balls that you can slip between, and will also shoot a wave of energy balls. Use
the wall to avoid them. Vile
will have a lot of unpredictable attacks during battle, so watch out. He will
often shoot out electric balls at you and even a wave of energy balls. You can
easily avoid them by deceiving them toward you and then jump away. He will also
fire off three shots as you can avoid by running between them. When he had taken
some damage he will begin to appear on you quite often, so jump over him. He
will also shoot homing balls towards you, so move on you at all times to avoid
them. He will also shoot out a fireballs that, when it hits the ground, will be
a eldvägg going up above the ground. Use the wall to get past it.
Vile
will have a lot of unpredictable attacks during battle, so watch out. He will
often shoot out electric balls at you and even a wave of energy balls. You can
easily avoid them by deceiving them toward you and then jump away. He will also
fire off three shots as you can avoid by running between them. When he had taken
some damage he will begin to appear on you quite often, so jump over him. He
will also shoot homing balls towards you, so move on you at all times to avoid
them. He will also shoot out a fireballs that, when it hits the ground, will be
a eldvägg going up above the ground. Use the wall to get past it. Sigma
will wait for you in the main hangar of the Gateway. He will start by uploading
a crashing blow attack, so jump up on the left wall to avoid it. He will also
fly up and create a red energy charge. You need to very quickly destroy his
shield. If you fail, he will fire a huge beam across the screen that can not be
avoided. Destroy the shield to press him on the ground again. He will then make
a new stab attack, so watch out. Then he will try on energy wave again. When he
lost some life energy, he will surround himself with flames and make a few new
attacks. He will fire four small missiles that can bounce on walls and floors.
Attack them to get them to change direction.
Sigma
will wait for you in the main hangar of the Gateway. He will start by uploading
a crashing blow attack, so jump up on the left wall to avoid it. He will also
fly up and create a red energy charge. You need to very quickly destroy his
shield. If you fail, he will fire a huge beam across the screen that can not be
avoided. Destroy the shield to press him on the ground again. He will then make
a new stab attack, so watch out. Then he will try on energy wave again. When he
lost some life energy, he will surround himself with flames and make a few new
attacks. He will fire four small missiles that can bounce on walls and floors.
Attack them to get them to change direction. Vile
will show up with their old toys - Goliath Ride Armor. He will start up on it
and will slide and jump around often. Stay away so that he can not attack with
their kind acts. Jump when he crashes into the ground to avoid paralysis. In
order to bring down Vile, you need to shoot up his shield. Once it's done, he
will use the same attacks as in previous battles. Watch out for his electric
balls and his homing balls. After a while he will jump up on his Ride Armor
again so you have to destroy the shield again. He will also change the way he
was shooting at. Shoot him down from his Ride Armor again before you attack him.
Vile
will show up with their old toys - Goliath Ride Armor. He will start up on it
and will slide and jump around often. Stay away so that he can not attack with
their kind acts. Jump when he crashes into the ground to avoid paralysis. In
order to bring down Vile, you need to shoot up his shield. Once it's done, he
will use the same attacks as in previous battles. Watch out for his electric
balls and his homing balls. After a while he will jump up on his Ride Armor
again so you have to destroy the shield again. He will also change the way he
was shooting at. Shoot him down from his Ride Armor again before you attack him.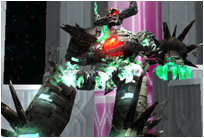 Sigma
will have a longer life meters and will take a huge time to defeat. He will
start by shooting out blue energy rings to jump up on a wall to avoid them. He
will then disappear. Kneel on the left and go right. He will appear just above
you with his sword ready to shoot and try to crash down on you, then quickly
slip away or you will take lots of damage. He will do this one more time before
he enters the rings. He will only use these attacks until you received some
damage to him. Then he will upload the energy and yell "It's all over!". You
will lose control and Sigma will grab you and suck life energy. Call in your
other character to get away. He will then fire a red laser beam to the other
wall. Thereafter, the walls covered with flames. He will fire more rings, which
are now very hard to avoid. If you try to climb the wall behind Sigma, he will
try to beat you down with an uppercut. When the flames disappear, he will do a
sword attack again, so be prepared.
Sigma
will have a longer life meters and will take a huge time to defeat. He will
start by shooting out blue energy rings to jump up on a wall to avoid them. He
will then disappear. Kneel on the left and go right. He will appear just above
you with his sword ready to shoot and try to crash down on you, then quickly
slip away or you will take lots of damage. He will do this one more time before
he enters the rings. He will only use these attacks until you received some
damage to him. Then he will upload the energy and yell "It's all over!". You
will lose control and Sigma will grab you and suck life energy. Call in your
other character to get away. He will then fire a red laser beam to the other
wall. Thereafter, the walls covered with flames. He will fire more rings, which
are now very hard to avoid. If you try to climb the wall behind Sigma, he will
try to beat you down with an uppercut. When the flames disappear, he will do a
sword attack again, so be prepared. Lumine
will constantly hover around and use the eight ball that spins around him. Each
ball represents one of the eight Mavericks. He will press down one of the balls
in his chest and use the strongest attack of any Maverick. With the strongest
attack meant the attack that they use when they lost a lot of life energy.
Lumine
will constantly hover around and use the eight ball that spins around him. Each
ball represents one of the eight Mavericks. He will press down one of the balls
in his chest and use the strongest attack of any Maverick. With the strongest
attack meant the attack that they use when they lost a lot of life energy.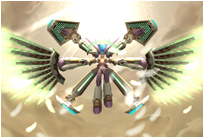 Lumine
will be a great winged Reploid and will start on the right of the screen. He
will begin by diving down towards you. Jump carefully over him to avoid him.
When he returns to the screen, his wing tips that glow and thick fire energy
beams at you that zigzags to the ground. You must stay away from the ground to
prevent them jumping around to avoid them. Lumine will then create a kind of
blue shield to protect itself. Destroy it by constantly attacking. After the
laser beams, he will try to dive with you again. When he comes down again, he
will recharge the energy in your hands and send out circular laser fields around
themselves. The yellow balls will stretch out while they rotate so try to sneak
through holes in order to avoid injury. When the balls when the monitor end, he
will send out new balls, while the first round, pulled slowly back to him. Sneak
between holes to avoid damage.
Lumine
will be a great winged Reploid and will start on the right of the screen. He
will begin by diving down towards you. Jump carefully over him to avoid him.
When he returns to the screen, his wing tips that glow and thick fire energy
beams at you that zigzags to the ground. You must stay away from the ground to
prevent them jumping around to avoid them. Lumine will then create a kind of
blue shield to protect itself. Destroy it by constantly attacking. After the
laser beams, he will try to dive with you again. When he comes down again, he
will recharge the energy in your hands and send out circular laser fields around
themselves. The yellow balls will stretch out while they rotate so try to sneak
through holes in order to avoid injury. When the balls when the monitor end, he
will send out new balls, while the first round, pulled slowly back to him. Sneak
between holes to avoid damage.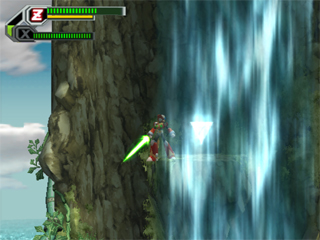 To
receive this you will need to Zero. After you have taken up at the large hole
outside the jungle Alia will tell you that there is a stone ledge behind the
waterfall a bit forward. Use Zero and double jump to find it. She will only say
it when you hit a second time.
To
receive this you will need to Zero. After you have taken up at the large hole
outside the jungle Alia will tell you that there is a stone ledge behind the
waterfall a bit forward. Use Zero and double jump to find it. She will only say
it when you hit a second time.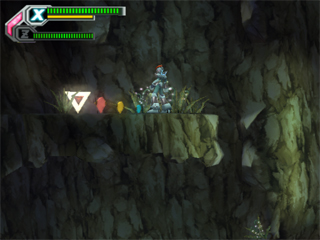 To
receive this you will need X Icarus Helmet Upgrade. Just when you get out of the
cave where you must conquer lots of bats, you should skip to crush a piece of
the roof. Go to the left to find it here.
To
receive this you will need X Icarus Helmet Upgrade. Just when you get out of the
cave where you must conquer lots of bats, you should skip to crush a piece of
the roof. Go to the left to find it here. To
receive this you will need to Axl. At the end of the level after you come out of
one of the training room, you'll see a big gap in front of you. Use Axl to hover
over the hole to find the metal on a single platform. You can also use Zero to
climb up to the right, slide down the platform and glide in the air to the right
to get there.
To
receive this you will need to Axl. At the end of the level after you come out of
one of the training room, you'll see a big gap in front of you. Use Axl to hover
over the hole to find the metal on a single platform. You can also use Zero to
climb up to the right, slide down the platform and glide in the air to the right
to get there. Get
the highest score in all workout rooms to get this in the end.
Get
the highest score in all workout rooms to get this in the end. Get
between 5 and 7 in the training room to get it here.
Get
between 5 and 7 in the training room to get it here. To
receive this you will need X with an X-Buster Upgrade and Crystal Wall, and even
Axl with Plasma Gun. Pallette will tell you about a power generator in a room
that can light up the whole level. Avoid all the searchlights, and when you find
two searchlights next to each other, avoid them. After them, you will encounter
an enemy with a sword. Use the Copy Shot and Axl to pick up its DNA. Crush the
next enemy and crush the enemy on the other side the hole. Jump down, but do not
skip on the left.
To
receive this you will need X with an X-Buster Upgrade and Crystal Wall, and even
Axl with Plasma Gun. Pallette will tell you about a power generator in a room
that can light up the whole level. Avoid all the searchlights, and when you find
two searchlights next to each other, avoid them. After them, you will encounter
an enemy with a sword. Use the Copy Shot and Axl to pick up its DNA. Crush the
next enemy and crush the enemy on the other side the hole. Jump down, but do not
skip on the left.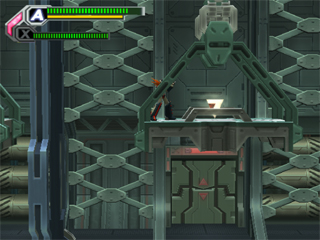 After
you have brightened up the whole level by launching karftgeneratorn go out of
the room with the energy generator and back to the top of the area belongs. You
will find the platform above the door where you first entered. Jump up to find
the platform.
After
you have brightened up the whole level by launching karftgeneratorn go out of
the room with the energy generator and back to the top of the area belongs. You
will find the platform above the door where you first entered. Jump up to find
the platform. To
receive this you will need to Zero. After you have brightened up the whole level
through activating the energy generator, you should continue onto the level.
Jump into the hole you would not jump into before to find the energy generator
and follow the road until you find a door. Just above the door is a platform.
Use Zeros double jump to reach it, and continue upward to find the metal.
To
receive this you will need to Zero. After you have brightened up the whole level
through activating the energy generator, you should continue onto the level.
Jump into the hole you would not jump into before to find the energy generator
and follow the road until you find a door. Just above the door is a platform.
Use Zeros double jump to reach it, and continue upward to find the metal. To
receive this you will need to Zero and X with an X-Buster Upgrade and Crystal
Wall. You will possibly come to a large room with a large staircase on the
right. Jump up the wall to the left to find a block. Double-Jump with Zero to
take you up on it. Upload Crystal Wall of X to find the metal in the block.
To
receive this you will need to Zero and X with an X-Buster Upgrade and Crystal
Wall. You will possibly come to a large room with a large staircase on the
right. Jump up the wall to the left to find a block. Double-Jump with Zero to
take you up on it. Upload Crystal Wall of X to find the metal in the block. To
receive this you will need to Axl. At the beginning of the level, there are
enemies that go around the tags. Crush this with the Copy Shot and pick up his
DNA. At the end of the level there is a room with blocks that move. In the
second of these rooms, you should activate the A-Trans to jump off the ledge.
You will fall past the two red metals and land on a thorny floor. Go forward to
find the metal. You can also turn the room upside down and climb up to the metal
through the blocks that move.
To
receive this you will need to Axl. At the beginning of the level, there are
enemies that go around the tags. Crush this with the Copy Shot and pick up his
DNA. At the end of the level there is a room with blocks that move. In the
second of these rooms, you should activate the A-Trans to jump off the ledge.
You will fall past the two red metals and land on a thorny floor. Go forward to
find the metal. You can also turn the room upside down and climb up to the metal
through the blocks that move.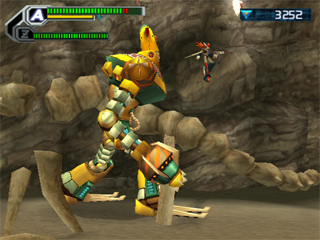 To
receive this you will need to Axl. When you get chased by the big robot at the
beginning of the level you should run up to the dinosaur skeleton. Jump up on it
and hang with Axl to the right to find the metal at the end of the line with
metals.
To
receive this you will need to Axl. When you get chased by the big robot at the
beginning of the level you should run up to the dinosaur skeleton. Jump up on it
and hang with Axl to the right to find the metal at the end of the line with
metals. When
the big robot turns back towards the beginning of the level, you should follow a
bit until you see some cranes in the background. One has a button you can press.
Jump up on the taps and float to the left to eventually find the metal.
When
the big robot turns back towards the beginning of the level, you should follow a
bit until you see some cranes in the background. One has a button you can press.
Jump up on the taps and float to the left to eventually find the metal. To
receive this you will need X with an X-Buster Upgrade and Crystal Wall. When you
chase the big robot back to the beginning of the level you will find a hole in
the ground covered with metal plates in the middle of the open field. The robot
will destroy the plates so jump down and recharge the Crystal Wall to find the
metal.
To
receive this you will need X with an X-Buster Upgrade and Crystal Wall. When you
chase the big robot back to the beginning of the level you will find a hole in
the ground covered with metal plates in the middle of the open field. The robot
will destroy the plates so jump down and recharge the Crystal Wall to find the
metal. To
receive this you will need to Zero and Axl. At the end of the level when you're
not running your Ride Chaser longer, use double jump to Zero to get up into the
hole in the roof. Hover ago with Axl to the left to find the metal.
To
receive this you will need to Zero and Axl. At the end of the level when you're
not running your Ride Chaser longer, use double jump to Zero to get up into the
hole in the roof. Hover ago with Axl to the left to find the metal. To
receive this you will need to zero with T-Breaker. The rörfyllda area with lots
of tags will Pallette some time to point out a weak point in the ground. Use
T-Breaker and Dairettsui to smash the ground and go down to find metal in a box.
To
receive this you will need to zero with T-Breaker. The rörfyllda area with lots
of tags will Pallette some time to point out a weak point in the ground. Use
T-Breaker and Dairettsui to smash the ground and go down to find metal in a box. To
receive this you will need to Axl. In the same area as where you found the
previous metal, you'll find an enemy that flies around. Defeat one with Copy
Shot and pick up his DNA. Now, go back a bit until you find two bats in a hole
in the wall to the left. Transform to the enemy that you are defeated before the
flight and into the hole to find the metal.
To
receive this you will need to Axl. In the same area as where you found the
previous metal, you'll find an enemy that flies around. Defeat one with Copy
Shot and pick up his DNA. Now, go back a bit until you find two bats in a hole
in the wall to the left. Transform to the enemy that you are defeated before the
flight and into the hole to find the metal. To
receive this you will need to Axl. When you are about to walk out of the other
area where you encounter lots of enemies will Pallette inform you about a secret
place above the corridor. Go left to find the second shaft that goes down.
Instead, climb up with Axl, but watch out for the fall when you stand on them,
and at the top, you glide through the line with metals to find a door on the
right. Go in and crush the enemies guarding the metal.
To
receive this you will need to Axl. When you are about to walk out of the other
area where you encounter lots of enemies will Pallette inform you about a secret
place above the corridor. Go left to find the second shaft that goes down.
Instead, climb up with Axl, but watch out for the fall when you stand on them,
and at the top, you glide through the line with metals to find a door on the
right. Go in and crush the enemies guarding the metal. To
receive this you will need to Axl. At the beginning of the level there is an
enemy that rolls up into a ball. Crush him with the Copy Shot, picking up his
DNA and move onto the level. When you get to an area where you can choose
different paths, one of which is the Ride Armor, then skip down to the bottom.
To the left there is a narrow opening in the wall. Transform into the enemy you
defeated before and roll in order to find it here.
To
receive this you will need to Axl. At the beginning of the level there is an
enemy that rolls up into a ball. Crush him with the Copy Shot, picking up his
DNA and move onto the level. When you get to an area where you can choose
different paths, one of which is the Ride Armor, then skip down to the bottom.
To the left there is a narrow opening in the wall. Transform into the enemy you
defeated before and roll in order to find it here.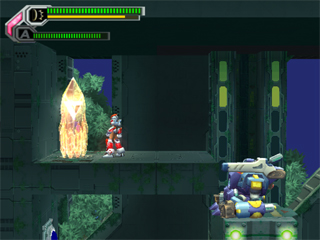 To
receive this you will need X with an X-Buster Upgrade, Crystal Wall, and a Ride
Armor. In the same area as where you found the first metal at this level, you
should use the Ride Armor to move in to level. Set Ride Armor on the conveyor
belt and put yourself on the platform above. Crush the enemy and jump quickly
into the Ride Armor again. Jump quickly to the platform to the right.
To
receive this you will need X with an X-Buster Upgrade, Crystal Wall, and a Ride
Armor. In the same area as where you found the first metal at this level, you
should use the Ride Armor to move in to level. Set Ride Armor on the conveyor
belt and put yourself on the platform above. Crush the enemy and jump quickly
into the Ride Armor again. Jump quickly to the platform to the right. To
receive this you will need Axl, Pickle Barrier and a Ride Armor. Also, make sure
you pick up DNA from an enemy that rolled itself. Otherwise, there is in the
room with you at this time. After the second room full of Ride Armor enemies you
will come to an open room with a floating platform, some metals and an enemy.
Destroy the enemy and jump to the first platform. You will slowly lower it, so
when you are in line with the metals, you should skip right to the next
platform.
To
receive this you will need Axl, Pickle Barrier and a Ride Armor. Also, make sure
you pick up DNA from an enemy that rolled itself. Otherwise, there is in the
room with you at this time. After the second room full of Ride Armor enemies you
will come to an open room with a floating platform, some metals and an enemy.
Destroy the enemy and jump to the first platform. You will slowly lower it, so
when you are in line with the metals, you should skip right to the next
platform. Boots
Upgrade available at Bamboo Pandamonium level. To find it, you Ride Armor and
Zero and X. After the first room full of Ride Armor enemies, you go up the
elevator with the Ride Armor. Glide Jump to the left with the Ride Armor and
then jump out with zero when you are about to fall. Double Jump to reach the
ledge with the canister. Icarus Boots Upgrade allows X jump twice as high.
Boots
Upgrade available at Bamboo Pandamonium level. To find it, you Ride Armor and
Zero and X. After the first room full of Ride Armor enemies, you go up the
elevator with the Ride Armor. Glide Jump to the left with the Ride Armor and
then jump out with zero when you are about to fall. Double Jump to reach the
ledge with the canister. Icarus Boots Upgrade allows X jump twice as high. X-Buster
Upgrade, you will find on the first level. You must first defeat of the eight
Mavericks to find it here. At the end of the level where the large building
there, you'll see a block in front of an open door. Shoot it and go into the
capsule. Icarus X-Buster Upgrade, X fails to upload and fire a massive energy
beam straight ahead.
X-Buster
Upgrade, you will find on the first level. You must first defeat of the eight
Mavericks to find it here. At the end of the level where the large building
there, you'll see a block in front of an open door. Shoot it and go into the
capsule. Icarus X-Buster Upgrade, X fails to upload and fire a massive energy
beam straight ahead. Helmet
Upgrade, please visit Gravity Antonione level. To find it, you need X and Axl.
At the beginning of the level, there are enemies that are going on tags. Crush
this with the Copy Shot with Axl and get on the level. You will come to a room
with three enemies with barriers around themselves. Destroy them and press the
green button on the left to rotate the room. Then press the green button on the
right to rotate the room again. You will now be in line with the corridor filled
with thorns. Destroy the enemy in the corridor and activate the A-Trans with
Axl. Go in and jump down a hole into a teleport.
Helmet
Upgrade, please visit Gravity Antonione level. To find it, you need X and Axl.
At the beginning of the level, there are enemies that are going on tags. Crush
this with the Copy Shot with Axl and get on the level. You will come to a room
with three enemies with barriers around themselves. Destroy them and press the
green button on the left to rotate the room. Then press the green button on the
right to rotate the room again. You will now be in line with the corridor filled
with thorns. Destroy the enemy in the corridor and activate the A-Trans with
Axl. Go in and jump down a hole into a teleport. Armor
Upgrade, you'll find on Earth Rock Trilobyte's level. To find it, you need X and
Melt Creeper. When you are hunted by the big robot at the beginning of the level
you will see a block that blocks an opening in the wall while climbing upward.
It is behind a bulldozer enemy and a purple metallic. When you chase the robot
back, it will break the block. Use Melt Creeper to destroy the capsules to block
the entrance of the capsule. Icarus Armor Upgrade halves the damage X takes from
enemies, and you do not push back when you meet. At the same time, you get a
metal every time you meet.
Armor
Upgrade, you'll find on Earth Rock Trilobyte's level. To find it, you need X and
Melt Creeper. When you are hunted by the big robot at the beginning of the level
you will see a block that blocks an opening in the wall while climbing upward.
It is behind a bulldozer enemy and a purple metallic. When you chase the robot
back, it will break the block. Use Melt Creeper to destroy the capsules to block
the entrance of the capsule. Icarus Armor Upgrade halves the damage X takes from
enemies, and you do not push back when you meet. At the same time, you get a
metal every time you meet. X-Buster
Upgrade, you will find on Optic Sunflowers level. To find it, you need X and
Squeeze Bomb. After the fourth training room, you enter a room with a platform
at the top left. Climb up and use Squeeze Bomb the wall to reach the capsule.
Hermes X-Buster Upgrade, X fails to upload and firing of three energy shots in
various directions.
X-Buster
Upgrade, you will find on Optic Sunflowers level. To find it, you need X and
Squeeze Bomb. After the fourth training room, you enter a room with a platform
at the top left. Climb up and use Squeeze Bomb the wall to reach the capsule.
Hermes X-Buster Upgrade, X fails to upload and firing of three energy shots in
various directions. Armor
Upgrade can be found at Dark Mantis level. At the end of the level you will find
different shafts filled with laser beams and boxes that move in to. When you
reach the end of the pit before the boss room, you climb up instead of jumping
down. Beware of laser beams and continue climbing until you reach an opening in
the right wall. Enter to find the capsule. Hermes Armor Upgrade doing so that X
does not take any damage from enemies with weak attacks.
Armor
Upgrade can be found at Dark Mantis level. At the end of the level you will find
different shafts filled with laser beams and boxes that move in to. When you
reach the end of the pit before the boss room, you climb up instead of jumping
down. Beware of laser beams and continue climbing until you reach an opening in
the right wall. Enter to find the capsule. Hermes Armor Upgrade doing so that X
does not take any damage from enemies with weak attacks. Helmet
Upgrade, please visit Avalanche Yetis level. To find it, you need X, Zero and
defeating Optic Sunflower. Just at the end of the level before the door to the
boss, there is a hole in the roof. Double Jump to Zero to get and use, and
Shining Ray's on the X or Tenshouha as Zero to melt the ice and find the
capsule. Hermes Helmet Upgrade allows X to upload their shots more quickly.
Helmet
Upgrade, please visit Avalanche Yetis level. To find it, you need X, Zero and
defeating Optic Sunflower. Just at the end of the level before the door to the
boss, there is a hole in the roof. Double Jump to Zero to get and use, and
Shining Ray's on the X or Tenshouha as Zero to melt the ice and find the
capsule. Hermes Helmet Upgrade allows X to upload their shots more quickly. Boots
Upgrade, please visit Burn Roosters level. As you go down the large shaft with
tags and tubes, you will see the capsule easily but you can not reach. Continue
down until you find an enemy with an electric barrier around himself. Destroy it
and go left. Climb gently on the top to find the capsule. Hermes Boots Upgrade
allows X to move faster.
Boots
Upgrade, please visit Burn Roosters level. As you go down the large shaft with
tags and tubes, you will see the capsule easily but you can not reach. Continue
down until you find an enemy with an electric barrier around himself. Destroy it
and go left. Climb gently on the top to find the capsule. Hermes Boots Upgrade
allows X to move faster.
 When
you go into a capsule for the first time, you will get Neutral Armor. This
allows X to combine the various parts of Icarus and Hermes Armor Armor, so you
can get a full-fledged specialized attire.
When
you go into a capsule for the first time, you will get Neutral Armor. This
allows X to combine the various parts of Icarus and Hermes Armor Armor, so you
can get a full-fledged specialized attire. Parts
of Icarus Armor in four different levels. You can only use whole Icarus Armor
when you found any. This dress gives X some new abilities to use. His X-Buster
will from now always fire the small blue plasma shot when you shoot. If you
upload to the max, he will fire a giant laser beam straight ahead.
Parts
of Icarus Armor in four different levels. You can only use whole Icarus Armor
when you found any. This dress gives X some new abilities to use. His X-Buster
will from now always fire the small blue plasma shot when you shoot. If you
upload to the max, he will fire a giant laser beam straight ahead. Icarus
Armor allows X even jump twice as high when he jumps. In addition, he is
surrounded by an energy field that can damage enemies if they are in the way
when he jumps. The attack can destroy small enemies directly, while larger just
takes a little damage.
Icarus
Armor allows X even jump twice as high when he jumps. In addition, he is
surrounded by an energy field that can damage enemies if they are in the way
when he jumps. The attack can destroy small enemies directly, while larger just
takes a little damage.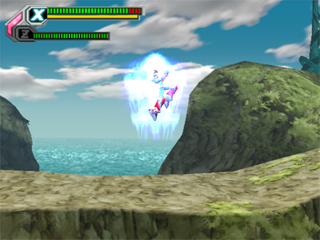
 In
addition, X to use the mighty Giga Crash with this costume. Activate it by
either selecting from the menu, or you make sure you do not have any other
weapons enabled.
Then
press the special button to activate this attack. X will surround a green energy
field that covers the entire screen. Enemies that get too close will be sucked
in and take a huge amount of damage, or destruction directly.
In
addition, X to use the mighty Giga Crash with this costume. Activate it by
either selecting from the menu, or you make sure you do not have any other
weapons enabled.
Then
press the special button to activate this attack. X will surround a green energy
field that covers the entire screen. Enemies that get too close will be sucked
in and take a huge amount of damage, or destruction directly. Parts
of Hermes Armor is on four levels. You can only use whole Hermes Armor if you
found any. This dress gives X a lot of new talent that can be useful. When he
slips, he will from now be invisible, and enemies can not see him. A good way to
avoid the enemies.
Parts
of Hermes Armor is on four levels. You can only use whole Hermes Armor if you
found any. This dress gives X a lot of new talent that can be useful. When he
slips, he will from now be invisible, and enemies can not see him. A good way to
avoid the enemies. If
you load up X-Buster to the max, he will fire three energy balls in different
directions, and thus meet the enemies above, below and in front of him. In
addition, he will be able to use the very useful X-Drive. Activate it by
selecting it from the menu, or make sure you have no other weapons have arrived,
then press the special button.
If
you load up X-Buster to the max, he will fire three energy balls in different
directions, and thus meet the enemies above, below and in front of him. In
addition, he will be able to use the very useful X-Drive. Activate it by
selecting it from the menu, or make sure you have no other weapons have arrived,
then press the special button.
 X
is surrounded by a blue energy field that will improve his normal abilities. He
will move faster and can upload faster than usual. If you load up X-Buster to
the maximum with the X-Drive activated, then X fire five instead of three energy
balls in different directions.
X-Drive
will be active until the weapon energy runs out.
X
is surrounded by a blue energy field that will improve his normal abilities. He
will move faster and can upload faster than usual. If you load up X-Buster to
the maximum with the X-Drive activated, then X fire five instead of three energy
balls in different directions.
X-Drive
will be active until the weapon energy runs out.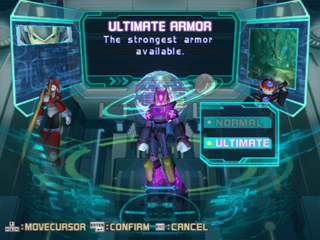 Ultimate
Armor X is special costume. It gives him a number of new abilities. His X-Buster
fires the huge plasma shot if you upload it to the max, and he can also upload
all the special weapons. Moreover, he can jump twice as high, and he also
becomes invisible when he slips.
Ultimate
Armor X is special costume. It gives him a number of new abilities. His X-Buster
fires the huge plasma shot if you upload it to the max, and he can also upload
all the special weapons. Moreover, he can jump twice as high, and he also
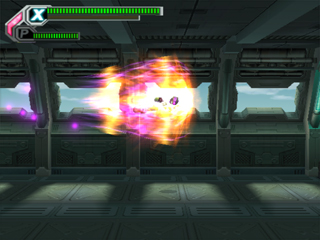
becomes invisible when he slips.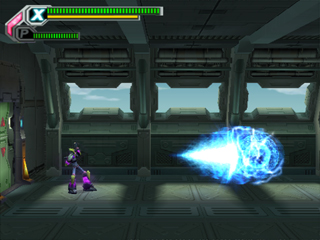 Moreover,
he can use the Nova Strike. Jump and press the special button when you have no
other weapons enabled. X will then fly up covered with an energy field. He can
also use the Shoryuken if you press up and the Special button. You can use it
even when you have a special weapon enabled.
Moreover,
he can use the Nova Strike. Jump and press the special button when you have no
other weapons enabled. X will then fly up covered with an energy field. He can
also use the Shoryuken if you press up and the Special button. You can use it
even when you have a special weapon enabled.
 To
unlock the Ultimate Armor, you must first cope with the game on Normal or Hard.
Then start a "New Game +" file and give X 100% of the R & D Lab. You can also
press a code on the title screen to get it.
Go
to Tips & Tricks section for more details.
To
unlock the Ultimate Armor, you must first cope with the game on Normal or Hard.
Then start a "New Game +" file and give X 100% of the R & D Lab. You can also
press a code on the title screen to get it.
Go
to Tips & Tricks section for more details.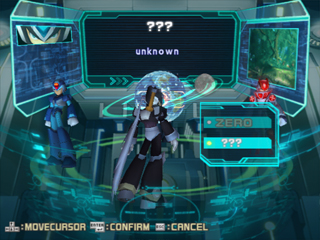 Zeros
Black Armor gives Zero a black dress. The only thing it does is that Zero can
slide forward a bit further, and the color of his suit black, but otherwise it
has no special function.
Zeros
Black Armor gives Zero a black dress. The only thing it does is that Zero can
slide forward a bit further, and the color of his suit black, but otherwise it
has no special function. To
unlock the Black Armor, you must first cope with the game on Normal or Hard.
Then start a "New Game +" file and give Zero 100% of the R & D Lab. You can also
press a code on the title screen to get it. Go to Tips & Tricks section for more
details.
To
unlock the Black Armor, you must first cope with the game on Normal or Hard.
Then start a "New Game +" file and give Zero 100% of the R & D Lab. You can also
press a code on the title screen to get it. Go to Tips & Tricks section for more
details.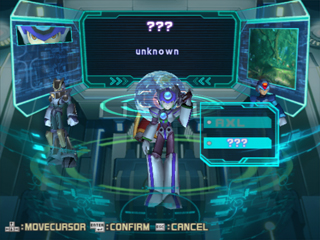 White
Armor is Axl's special costume. It allows Axl hover constantly when he shoots
into the air. In addition, he will have infinite energy weapon when he
transforms himself into an enemy. Moreover, the White Armor no noticeable
difference. You choose for each level if you want to play as usual Axl or Axl
with White Armor.
White
Armor is Axl's special costume. It allows Axl hover constantly when he shoots
into the air. In addition, he will have infinite energy weapon when he
transforms himself into an enemy. Moreover, the White Armor no noticeable
difference. You choose for each level if you want to play as usual Axl or Axl
with White Armor. To
unlock the White Armor, you must first cope with the game on Normal or Hard.
Then start a "New Game +" file and give Axl 100% of the R & D Lab. You can also
press a code on the title screen to get it. Go to Tips & Tricks section for more
details.
To
unlock the White Armor, you must first cope with the game on Normal or Hard.
Then start a "New Game +" file and give Axl 100% of the R & D Lab. You can also
press a code on the title screen to get it. Go to Tips & Tricks section for more
details.|
Regular Parts |
|||||
| Picture | Name | Price | Discount | Stage | Description |
|
|
Life Bottle Half | 50 | 45 | - | Restores 50% of a character's health points. |
|
|
Life Bottle Full | 150 | 135 | Metal Valley | Restores one of your characters life energy to the max. |
|
|
Life Charge | 50 | 45 | - | Fills a Life Tank with some health points (you need a Life Tank first). |
|
|
Retry Chip 1 | 100 | 90 | - | Adds an extra Retry to the two already there. |
|
|
Retry Chip 2 | 200 | 180 | - | Adding a second Retry to the three you already have. |
|
|
Retry Chip 3 | 300 | 270 | - | Adds a third Retry to the four you already have. |
|
|
Weapon Bottle Half | 10 | 9 | - | Restores 50% of a character's weapon energy. |
|
|
Weapon Bottle Full | 30 | 27 | Noah's Park | Restores one of your arms characters energy to the max. |
|
|
Weapon Charge | 10 | 9 | - | Fills Tank Weapon with a little weapon energy (you need a Weapon Tank first). |
|
|
Prickle Barrier | 200 | 180 | - | Allows a character to survive to go on the tags once. |
|
|
Spare Energy | 250 | 225 | - | Restores some health points if you lose all your health points. |
|
|
Alia Buster | 40000 | 36000 | - | Unlocks Alia as a playable character. |
|
|
Layer Rapier | 40000 | 36000 | - | Unlocks Layer as a playable character. |
|
|
Pallette Bullets | 40000 | 36000 | - | Unlocks Pallette as a playable character. |
|
|
Life Tank | 1000 | 900 | Troia Base | Save the life energy in a tank for use at a later date. |
|
|
Life Tank | 1000 | 900 | Pitch Black | Save the life energy in a tank for use at a later date. |
|
|
Weapon Tank | 500 | 450 | Inferno | Save energy weapons in a tank for use at a later date. |
|
|
Hyper AT | 1500 | 1350 | - | Increases the attack power of all the characters. |
|
|
Escape Boost | 1000 | 900 | - | Allows your characters to break away from the enemies' grip quickly. |
|
|
Metal Generator | 5000 | 4500 | Troia Base | Generates 24 metals every second while you walk. |
|
|
Metal Discount | 5000 | - | Metal Valley | Gives you 10% discount on all metal chips. |
|
Mega Man X / Alia |
|||||
| Picture | Name | Price | Discount | Stage | Description |
|
|
Life Up | 1500 | 1350 | - | X Increases maximum health points. |
|
|
Life Up +1 | 3000 | 2700 | - | X Increases maximum health points further (requires Life Up). |
|
|
Life Up +2 | 4500 | 4050 | - | X Increases maximum health points more (requires Life Up +1). |
|
|
Double Barrier | 20000 | 18000 | Inferno | doubles the time X is invisible after being hit. |
|
|
Speedy Recovery | 500 | 450 | - | Your health is restored more quickly when X is your nature reserve. |
|
|
Weapon Up | 500 | 450 | - | Increases the X peak energy weapons. |
|
|
Weapon Up +1 | 1000 | 900 | - | Increases the X maximum additional energy weapons (requires Weapon Up). |
|
|
Weapon Up +2 | 1000 | 1350 | - | Increases the X peak energy weapons even more (requires Weapon Up +1). |
|
|
Chain Combo | 1000 | 900 | - | Combos are easier to make and grow faster. |
|
|
Super Recover | 1500 | 1350 | - | Life energy and weapon energy capsules restores more energy. |
|
|
Spike Walker | 500 | 450 | - | X slides slowly down the walls. |
|
|
Weapon Converter | 500 | 450 | Booster Forest | Weapon Energy for your chosen weapon charge when you are injured. |
|
Zero / Layer |
|||||
| Picture | Name | Price | Discount | Stage | Description |
|
|
Life Up | 1500 | 1350 | - | Zeros Increases maximum health points. |
|
|
Life Up +1 | 3000 | 2700 | - | Zeros Increases maximum health points further (requires Life Up). |
|
|
Life Up +2 | 4500 | 4050 | - | Zeros Increases maximum health points more (requires Life Up +1). |
|
|
Double Barrier | 20000 | 18000 | Metal Valley | Doubles time Zero is invisible after being hit. |
|
|
Speedy Recovery | 500 | 450 | - | Your health is restored more quickly when Zero is your nature reserve. |
|
|
Weapon Up | 500 | 450 | - | Increases the Zeros maximum weapon energy. |
|
|
Weapon Up +1 | 1000 | 900 | - | Increases the Zeros maximum additional energy weapons (requires Weapon Up). |
|
|
Weapon Up +2 | 1000 | 1350 | - | Zeros Increases maximum energy weapons even more (requires Weapon Up +1). |
|
|
Chain Combo | 1000 | 900 | - | Combos are easier to make and grow faster. |
|
|
Super Recover | 1500 | 1350 | - | Life energy and weapon energy capsules restores more energy. |
|
|
Spike Walker | 500 | 450 | - | Zero sliding slowly down the walls. |
|
|
Weapon Converter | 500 | 450 | Booster Forest | Weapon Energy for your chosen weapon charge when you are injured. |
|
|
Shock Absorber | 15000 | 13500 | Central White | Zero is not pushed back when he is injured. |
|
|
Shield Armor | 15000 | 13500 | Booster Forest | Increases Zeros defense against enemies' attacks. |
|
|
Saber Skill +1 | 3000 | 2700 | - | Adds a fourth hit with Z-Saber. |
|
|
Saber Skill +2 | 5000 | 4500 | - | Adds a fifth hit with Z-Saber (requires Saber Skill +1). |
|
|
Rapier Skill +1 | 3000 | 2700 | - | Adding a fourth hit with Layer Rapier. |
|
|
Rapier Skill +2 | 5000 | 4500 | - | Adds a fifth hit with Layer Rapier (requires Rapier Skill +1). |
|
|
D-Glaive | 1000 | 900 | Pitch Black | Unlocks a lance with a long range. |
|
|
K-Knuckle | 1000 | 900 | Primrose | Unlocks a pair of brass knuckles. |
|
|
B-Fan | 1000 | 900 | Primrose | Unlocks a defense weapon at short range. |
|
|
T-Breaker | 1000 | 900 | Inferno | Unlocks a hammer that can smash crates. |
|
|
Σ-Blade | 30000 | 27000 | - | Unlocks a massive sword with an incredibly destructive force. |
|
Axl / Pallette |
|||||
| Picture | Name | Price | Discount | Stage | Description |
|
|
Life Up | 1500 | 1350 | - | Axls Increases maximum health points. |
|
|
Life Up +1 | 3000 | 2700 | - | Axls Increases maximum health points further (requires Life Up). |
|
|
Life Up +2 | 4500 | 4050 | - | Axls Increases maximum health points more (requires Life Up +1). |
|
|
Double Barrier | 20000 | 18000 | Booster Forest | Doubles time Axl is invisible after being hit. |
|
|
Speedy Recovery | 500 | 450 | - | Your health is restored more quickly when Axl is your nature reserve. |
|
|
Weapon Up | 500 | 450 | - | Increases Axls maximum weapon energy. |
|
|
Weapon Up +1 | 1000 | 900 | - | Increases Axls maximum additional energy weapons (requires Weapon Up). |
|
|
Weapon Up +2 | 1000 | 1350 | - | Increases Axls maximum weapon energy even more (requires Weapon Up +1). |
|
|
Chain Combo | 1000 | 900 | - | Combos are easier to make and grow faster. |
|
|
Super Recover | 1500 | 1350 | - | Life energy and weapon energy capsules restores more energy. |
|
|
Spike Walker | 500 | 450 | - | Axl sliding slowly down the walls. |
|
|
Shock Absorber | 15000 | 13500 | Noah's Park | Axl is not pushed back when he was injured. |
|
|
Shield Armor | 15000 | 13500 | Pitch Black | Axl Increases defense against enemy attacks. |
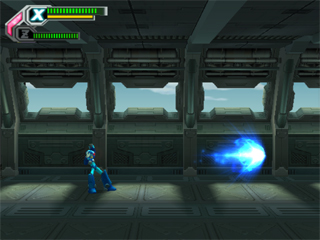 X-Buster
is the weapon that X is equipped with from the beginning. It allows him to fire
various types of shots. Hold button to charge up and release to fire.
X-Buster
is the weapon that X is equipped with from the beginning. It allows him to fire
various types of shots. Hold button to charge up and release to fire.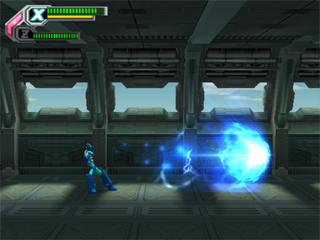 X
strongest shot will send a huge blue energy balls at the enemy that you are
aiming for. The shot is also a wide scope, which means that enemies can be
defeated in a single shot.
X
strongest shot will send a huge blue energy balls at the enemy that you are
aiming for. The shot is also a wide scope, which means that enemies can be
defeated in a single shot. You
get Shining Ray when you defeated Optic Sunflower. This weapon will send out a
small flash. It will then explode and small bursts will fly in different
directions.
You
get Shining Ray when you defeated Optic Sunflower. This weapon will send out a
small flash. It will then explode and small bursts will fly in different
directions.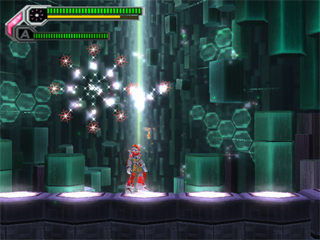 The
charged version will send out several similar bursts that even they will
explode. They will be pushed in different directions and explode faster.
The
charged version will send out several similar bursts that even they will
explode. They will be pushed in different directions and explode faster. You
get Shadow Runner when you defeated the Dark Mantis. This weapon will send out a
boomerang with the homing effect. If not found anything, it will return to X.
You
get Shadow Runner when you defeated the Dark Mantis. This weapon will send out a
boomerang with the homing effect. If not found anything, it will return to X.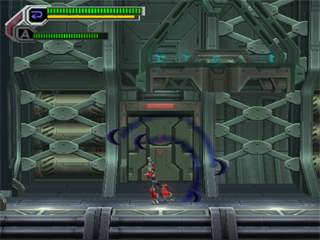 The
charged version will forward made six like boomerangs with the same effect. In
this way, X easily protect themselves from enemies.
The
charged version will forward made six like boomerangs with the same effect. In
this way, X easily protect themselves from enemies.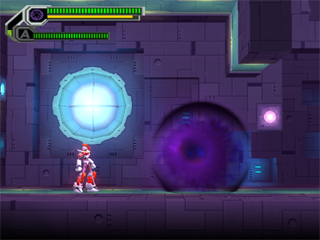 You
may Squeeze Bomb when you defeated Gravity Antonione. This weapon will send out
an ever-growing ball straight ahead. It can suck shots coming at you and even
mash enemies.
You
may Squeeze Bomb when you defeated Gravity Antonione. This weapon will send out
an ever-growing ball straight ahead. It can suck shots coming at you and even
mash enemies. The
charged version will cover the entire screen with a huge black hole. It has the
same effect as the regular shot, and can even vaporize the explosions.
The
charged version will cover the entire screen with a huge black hole. It has the
same effect as the regular shot, and can even vaporize the explosions.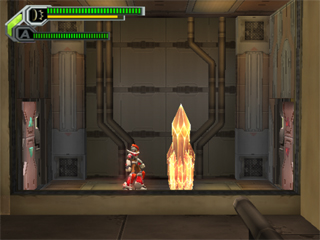 You
may Crystal Wall when you defeats Earth Rock Trilobyte. This weapon will create
a crystal over X. It can protect him from enemies' attacks, and he might even
push it over enemies to mash them.
You
may Crystal Wall when you defeats Earth Rock Trilobyte. This weapon will create
a crystal over X. It can protect him from enemies' attacks, and he might even
push it over enemies to mash them.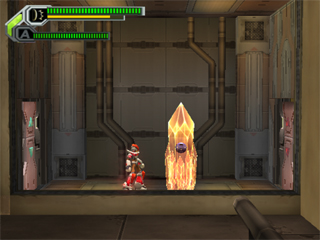 The
charged version will create a similar set major road with the same effect. This
version is also able to draw up objects from the ground. An effective way to
find hidden Rare Metals.
The
charged version will create a similar set major road with the same effect. This
version is also able to draw up objects from the ground. An effective way to
find hidden Rare Metals.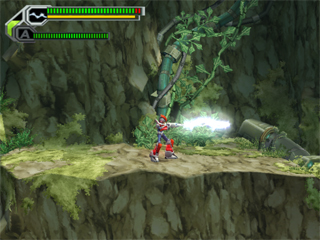 You may Thunderbird Dancer when you defeated Gigabolt Man-O-War. This weapon
will fire a long electric beam straight ahead. If multiple enemies are near the
stream will automatically search to the next.
You may Thunderbird Dancer when you defeated Gigabolt Man-O-War. This weapon
will fire a long electric beam straight ahead. If multiple enemies are near the
stream will automatically search to the next. The
charged version will send three rays with the same solid powerful effect.
Remember though that this gun has very short range.
The
charged version will send three rays with the same solid powerful effect.
Remember though that this gun has very short range. You may Operation Diamond when you defeated the Avalanche Yeti. This weapon will
send out two iskul at 45-degree directions. Enemies who hits will usually
freeze, and flying enemies will fall to the ground and explode.
You may Operation Diamond when you defeated the Avalanche Yeti. This weapon will
send out two iskul at 45-degree directions. Enemies who hits will usually
freeze, and flying enemies will fall to the ground and explode. The
charged version will create a number of snowflakes around X. When he hits
an enemy physically, they will be frozen immediately.
The
charged version will create a number of snowflakes around X. When he hits
an enemy physically, they will be frozen immediately.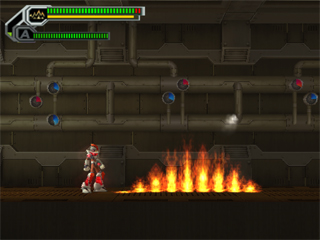 You
may Melt Creeper when you defeated the Burn Rooster. This weapon will send out a
long wave of fire along the ground. Enemies on the ground have no chance to
avoid it.
You
may Melt Creeper when you defeated the Burn Rooster. This weapon will send out a
long wave of fire along the ground. Enemies on the ground have no chance to
avoid it.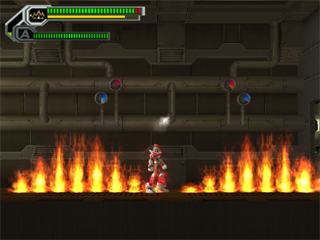 The
charged version will be circulated on both sides of X, but that was more
powerful effect. But remember that objects in the road will stop the fire from
moving forward.
The
charged version will be circulated on both sides of X, but that was more
powerful effect. But remember that objects in the road will stop the fire from
moving forward. You
get Green Spinner when you defeated Bamboo Pandamonium. This weapon will send
out a huge missile straight ahead. When it hits something, it will explode with
vigor, where the explosion has a huge scope.
You
get Green Spinner when you defeated Bamboo Pandamonium. This weapon will send
out a huge missile straight ahead. When it hits something, it will explode with
vigor, where the explosion has a huge scope. The
charged version will fire a missile into the air. After a little while, four
missiles to rain down from above, and destroy all that is over.
The
charged version will fire a missile into the air. After a little while, four
missiles to rain down from above, and destroy all that is over. Z-Saber
is Zero's ordinary weapons. With this you can do a triple combo attack by
pressing the shoot button three times. When you defeat a Maverick, you learn a
new technology that requires a button combination to be performed.
Z-Saber
is Zero's ordinary weapons. With this you can do a triple combo attack by
pressing the shoot button three times. When you defeat a Maverick, you learn a
new technology that requires a button combination to be performed. D-Glaive
is a long lance, which dramatically extends the scope of the Zeros. With this
weapon, he can hit enemies at long distances and even supply me with the injury.
Just remember that you must hit the enemy with the blade at the end to damage
it.
D-Glaive
is a long lance, which dramatically extends the scope of the Zeros. With this
weapon, he can hit enemies at long distances and even supply me with the injury.
Just remember that you must hit the enemy with the blade at the end to damage
it. K-Knuckle
let Zero use his fists when he fights. Instead of fighting with something in his
hand, he uses both arms and legs when he fights, which means that he gets a much
smaller range and that his special techniques are performed in a different way.
K-Knuckle
let Zero use his fists when he fights. Instead of fighting with something in his
hand, he uses both arms and legs when he fights, which means that he gets a much
smaller range and that his special techniques are performed in a different way. B-Fan
is two big Japanese fans, who form an energy field around zero, which protects
him from enemy attacks. Their range is short and you must stand near the enemies
to damage them, but you are strongly protected from enemy shots.
B-Fan
is two big Japanese fans, who form an energy field around zero, which protects
him from enemy attacks. Their range is short and you must stand near the enemies
to damage them, but you are strongly protected from enemy shots.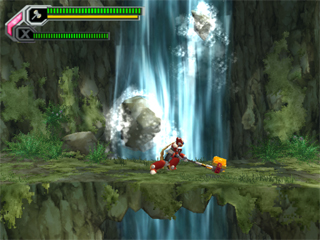 T-Breaker
is a big hammer that Zero can use to destroy boxes or enemies' shields. It has
short range and you can not perform any combo with it, but you can deliver lots
of damage against enemies.
T-Breaker
is a big hammer that Zero can use to destroy boxes or enemies' shields. It has
short range and you can not perform any combo with it, but you can deliver lots
of damage against enemies. Σ-Blade
is a gigantic sword that Zero can use to completely crush their enemies. If the
enemies at all just touches the blade will be damaged, and with its vast scope
makes the Σ-Blade is the game without a doubt the strongest weapon.
Σ-Blade
is a gigantic sword that Zero can use to completely crush their enemies. If the
enemies at all just touches the blade will be damaged, and with its vast scope
makes the Σ-Blade is the game without a doubt the strongest weapon.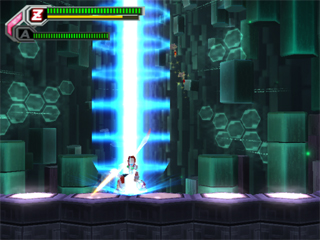 You
learn when you Tenshouha defeated Optic Sunflower. This technique allows Zero to
use the mighty Giga Attack. He will beat into the ground and let a giant energy
beam me straight into the ground with destructive force. Everything that is
around zero will eradicate direct or take heavy with loss.
You
learn when you Tenshouha defeated Optic Sunflower. This technique allows Zero to
use the mighty Giga Attack. He will beat into the ground and let a giant energy
beam me straight into the ground with destructive force. Everything that is
around zero will eradicate direct or take heavy with loss.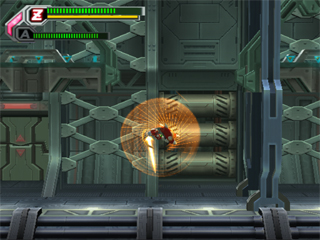 You
learn collapse Susen when you defeated the Dark Mantis. This technology allows
zero spin in the air and striking her arms. Together with D-Glaive or Σ-Blade,
this attack is invaluable.
You
learn collapse Susen when you defeated the Dark Mantis. This technology allows
zero spin in the air and striking her arms. Together with D-Glaive or Σ-Blade,
this attack is invaluable.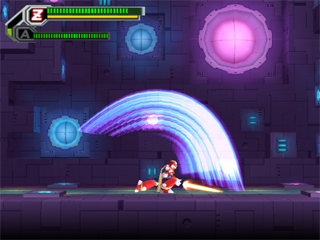 You
learn when you Juuhazan defeated Gravity Antonione. This technique allows Zero
chopping vigorously with his sword and crush the enemies that are attacking. He
can also crush enemies' shields, but keep in mind, however, that he may be
damaged while he was loading up the attack.
You
learn when you Juuhazan defeated Gravity Antonione. This technique allows Zero
chopping vigorously with his sword and crush the enemies that are attacking. He
can also crush enemies' shields, but keep in mind, however, that he may be
damaged while he was loading up the attack.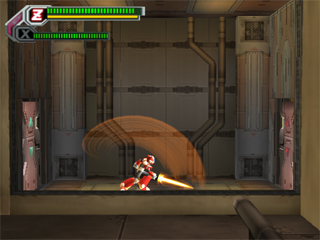 You
learn Rekkyoudan when you defeated the Earth Rock Trilobyte. This technique
allows Zero to reflect enemy shots with his weapon. It also changes color from
green to bright orange.
You
learn Rekkyoudan when you defeated the Earth Rock Trilobyte. This technique
allows Zero to reflect enemy shots with his weapon. It also changes color from
green to bright orange.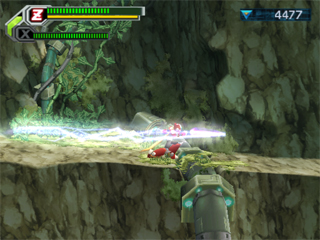 You
learn when you Raikousen defeated Gigabolt Man-O-Wart. This technique allows
Zero to deliver an attack while he was sliding. He will disappear and then pop
up a little later. Once he reappears, a long electric arc is formed behind him.
You can also use this technique in the air.
You
learn when you Raikousen defeated Gigabolt Man-O-Wart. This technique allows
Zero to deliver an attack while he was sliding. He will disappear and then pop
up a little later. Once he reappears, a long electric arc is formed behind him.
You can also use this technique in the air.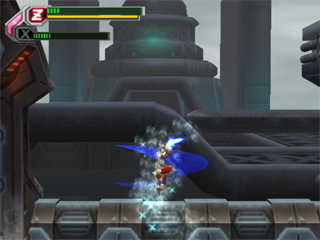 You
learn Hyouryuushou when you defeated the Avalanche Yeti. This technique allows
Zero to get up in the air with a sharp attack. He will spin around with his arms
surrounded by ice. Enemies who are hit will be frozen immediately or destroyed
immediately. This technique is very useful in conjunction with D-Glaive and
Σ-Blade.
You
learn Hyouryuushou when you defeated the Avalanche Yeti. This technique allows
Zero to get up in the air with a sharp attack. He will spin around with his arms
surrounded by ice. Enemies who are hit will be frozen immediately or destroyed
immediately. This technique is very useful in conjunction with D-Glaive and
Σ-Blade.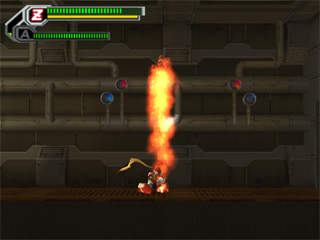 You
learn Enkoujin when you defeated the Burn Rooster. This technique allows Zero
cover his weapon in flames while he falls down and crushes everything under it.
Be careful when you use this against strong enemies, then you can be damaged
when you hit them. So try to land in front of them instead of harming them.
You
learn Enkoujin when you defeated the Burn Rooster. This technique allows Zero
cover his weapon in flames while he falls down and crushes everything under it.
Be careful when you use this against strong enemies, then you can be damaged
when you hit them. So try to land in front of them instead of harming them.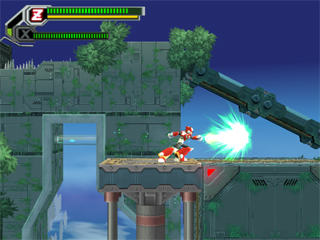 You
learn when you Youdantotsu defeated Bamboo Pandamonium. This technique allows
Zero sliding forward while delivering a powerful attack with his weapon. He can
also crush enemies shields in an efficient manner. However, make sure you do not
run straight through enemies so that you corrupted.
You
learn when you Youdantotsu defeated Bamboo Pandamonium. This technique allows
Zero sliding forward while delivering a powerful attack with his weapon. He can
also crush enemies shields in an efficient manner. However, make sure you do not
run straight through enemies so that you corrupted.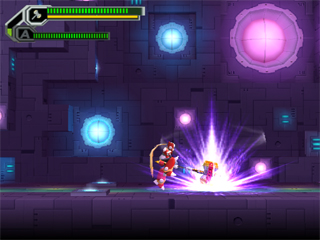 If
you perform Juuhazan with T-Breaker will Zero beating vigorously at the ground
with the hammer. A massive energy field will appear. The hit will be damaged
heavily.
If
you perform Juuhazan with T-Breaker will Zero beating vigorously at the ground
with the hammer. A massive energy field will appear. The hit will be damaged
heavily.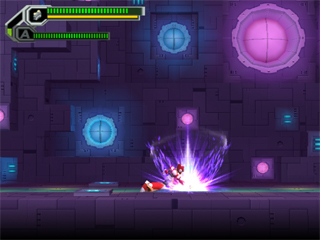 If
you perform Juuhazan with K-Knuckle will Zero beating rapidly in the soil and
trigger a massive energy field. Everything hit the ground will take quite a lot
of damage.
If
you perform Juuhazan with K-Knuckle will Zero beating rapidly in the soil and
trigger a massive energy field. Everything hit the ground will take quite a lot
of damage.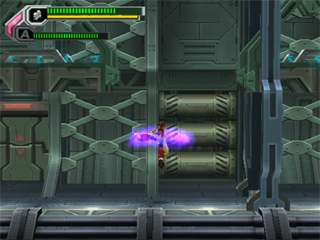 If
you perform collapse Susen with K-Knuckle will Zero to spin around in the air
with one leg outstretched. Enemies who are hit will take much damage.
If
you perform collapse Susen with K-Knuckle will Zero to spin around in the air
with one leg outstretched. Enemies who are hit will take much damage.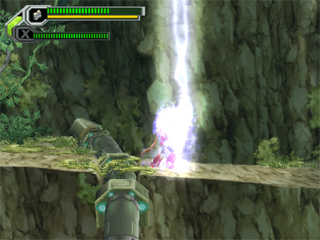 If
you perform Raikousen with K-Knuckle will Zero to glide above the ground while
he triggers an electrical wave behind it. Thereafter, he will perform a
technique similar to an uppercut and send a giant flash straight up. All it will
take to meet lots of damage.
If
you perform Raikousen with K-Knuckle will Zero to glide above the ground while
he triggers an electrical wave behind it. Thereafter, he will perform a
technique similar to an uppercut and send a giant flash straight up. All it will
take to meet lots of damage.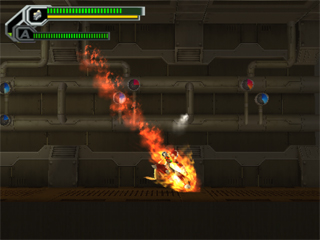 If
you perform Enkoujin with K-Knuckle Zero will perform a diagonal downward kick.
He will also cover their legs with fire and deliver lots of damage to the hit.
If
you perform Enkoujin with K-Knuckle Zero will perform a diagonal downward kick.
He will also cover their legs with fire and deliver lots of damage to the hit.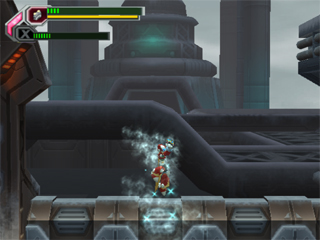 If
you perform Hyouryuushou with K-Knuckle Zero will perform a uppercut, while his
fist is covered with ice. Enemies who are hit will be either destroyed or
frozen.
If
you perform Hyouryuushou with K-Knuckle Zero will perform a uppercut, while his
fist is covered with ice. Enemies who are hit will be either destroyed or
frozen. If
you perform Rekkyoudan with B-Fan will Zero to reflect enemy shots. He will
always reflect them back at the enemy, and not in another direction.
If
you perform Rekkyoudan with B-Fan will Zero to reflect enemy shots. He will
always reflect them back at the enemy, and not in another direction.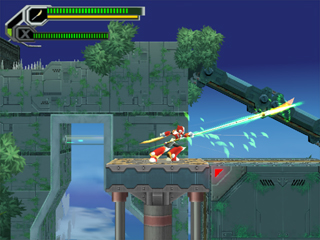 If
you perform Youdantotsu with D-Glaive Zero will perform a quick tip of attack.
He will wield the weapon very quickly in different directions, giving him a good
chance to hit enemies in different positions.
If
you perform Youdantotsu with D-Glaive Zero will perform a quick tip of attack.
He will wield the weapon very quickly in different directions, giving him a good
chance to hit enemies in different positions.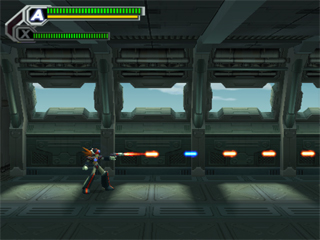 Axl
Bullet is Axls ordinary weapons. With this, he can fire small energy balls in a
quick way to easily crush their enemy. He can shoot in eight different
directions, but he can not move while shooting.
Axl
Bullet is Axls ordinary weapons. With this, he can fire small energy balls in a
quick way to easily crush their enemy. He can shoot in eight different
directions, but he can not move while shooting.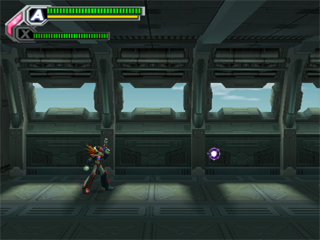 With
Axl Bullet, you can also use the Copy Shot. Press the special weapons button
once to fire a small ball straight ahead. If you defeat an enemy in the same
size as Axl, it will drop a capsule. Pick it up and then select the A-Trans
pause menu. Then press the shoot button to transform into the enemy.
With
Axl Bullet, you can also use the Copy Shot. Press the special weapons button
once to fire a small ball straight ahead. If you defeat an enemy in the same
size as Axl, it will drop a capsule. Pick it up and then select the A-Trans
pause menu. Then press the shoot button to transform into the enemy.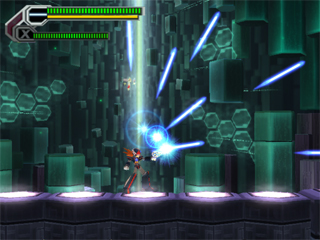 You
get Ray Gun when you defeated Optic Sunflower. This weapon will fire a steady
stream of pulsing blue energy. Swing around the weapon to get a wide scope, or
hold the beam in a direction to fire off an infinite long laser beam.
You
get Ray Gun when you defeated Optic Sunflower. This weapon will fire a steady
stream of pulsing blue energy. Swing around the weapon to get a wide scope, or
hold the beam in a direction to fire off an infinite long laser beam.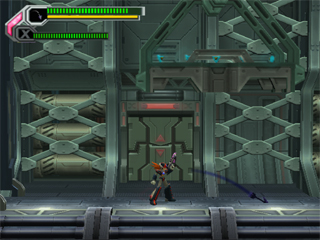 You
get Black Arrow when you defeated the Dark Mantis. This weapon is discharging a
arrow-shaped projectile. If nothing is in the vicinity, it will go into the
ground, but if an enemy is nearby, it will look at it.
You
get Black Arrow when you defeated the Dark Mantis. This weapon is discharging a
arrow-shaped projectile. If nothing is in the vicinity, it will go into the
ground, but if an enemy is nearby, it will look at it.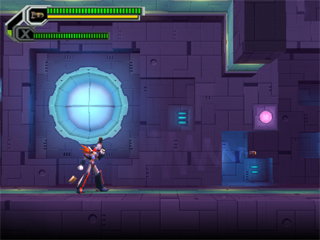 You
may Spiral Magnum when you defeated Gravity Antonione. This weapon will fire a
small ball straight after leaving a blast like an ordinary pistol. You will only
fire one shot per button, so you can not fire a steady shot. However, the shots
are very sharp and can go through enemies and hit any enemies behind.
You
may Spiral Magnum when you defeated Gravity Antonione. This weapon will fire a
small ball straight after leaving a blast like an ordinary pistol. You will only
fire one shot per button, so you can not fire a steady shot. However, the shots
are very sharp and can go through enemies and hit any enemies behind.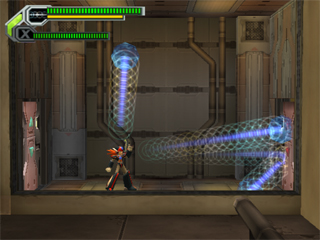 You
may Bound Blaster when you defeated the Earth Rock Trilobyte. This weapon will
send out huge ring-shaped projectiles that can bounce on walls, floors and
ceilings. It is effective to use in smaller rooms, where the shots simply seek
out the nearest enemy and eradicate them quickly. You can only fire three shots
at a time.
You
may Bound Blaster when you defeated the Earth Rock Trilobyte. This weapon will
send out huge ring-shaped projectiles that can bounce on walls, floors and
ceilings. It is effective to use in smaller rooms, where the shots simply seek
out the nearest enemy and eradicate them quickly. You can only fire three shots
at a time.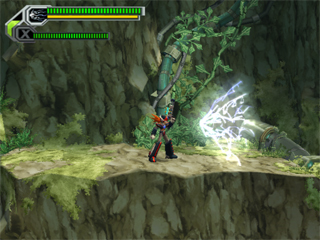 You
may Plasma Gun when you defeated Gigabolt Man-O-War. This weapon will fire off a
web of pure plasma that can freeze enemies. However, you must be close to
enemies in order to meet them. The weapon is also capable of destroying any
enemies shields.
You
may Plasma Gun when you defeated Gigabolt Man-O-War. This weapon will fire off a
web of pure plasma that can freeze enemies. However, you must be close to
enemies in order to meet them. The weapon is also capable of destroying any
enemies shields.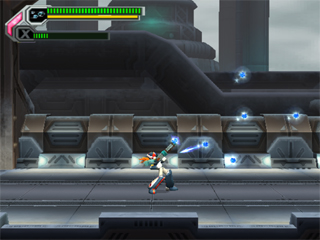 You
get Ice Gatt Ling when you defeated the Avalanche Yeti. This weapon will fire a
small block of ice at high speed. Keep the shoots in a straight line to
eventually freeze enemies, which will explode automatically when you stop
shooting.
You
get Ice Gatt Ling when you defeated the Avalanche Yeti. This weapon will fire a
small block of ice at high speed. Keep the shoots in a straight line to
eventually freeze enemies, which will explode automatically when you stop
shooting.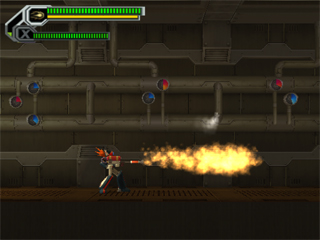 You
may Flame Burner when you defeated the Burn Rooster. This weapon will throw out
the big flame capable of burning broke the enemy at any time. It works best if
you keep the shoots in a straight line.
You
may Flame Burner when you defeated the Burn Rooster. This weapon will throw out
the big flame capable of burning broke the enemy at any time. It works best if
you keep the shoots in a straight line. You
may Blast Launcher when you defeated Bamboo Pandamonium. This gun will throw a
grenade which explodes after a while, or if it directly hit the enemy. Once it
explodes, the explosion of a scope great enough to destroy the enemies that are
too close. In addition, the explosion penetrate an enemy shield directly.
You
may Blast Launcher when you defeated Bamboo Pandamonium. This gun will throw a
grenade which explodes after a while, or if it directly hit the enemy. Once it
explodes, the explosion of a scope great enough to destroy the enemies that are
too close. In addition, the explosion penetrate an enemy shield directly. This
form allows you to throw out a small grenade when you press the shoot button. If
you press the special button and you'll make a smart greeting, which allows you
to sneak past the guards.
This
form allows you to throw out a small grenade when you press the shoot button. If
you press the special button and you'll make a smart greeting, which allows you
to sneak past the guards.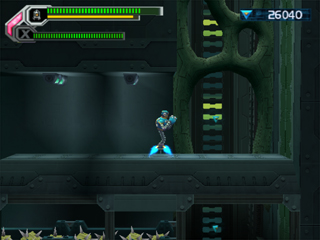 This
form allows you to get through narrow spaces. You will begin in ball form, but
by pushing up so you can take the following form. Press the shoot button to
deliver a fast kind, but remember that you can not move the following form.
This
form allows you to get through narrow spaces. You will begin in ball form, but
by pushing up so you can take the following form. Press the shoot button to
deliver a fast kind, but remember that you can not move the following form.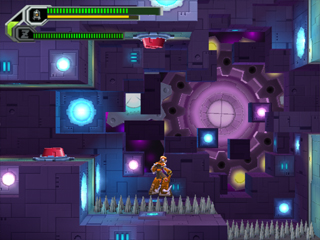 This
form allows you to go unchallenged on the spiky floor. You can also throw away
three balls that can bounce on walls and floors if you press the shoot button.
This
form allows you to go unchallenged on the spiky floor. You can also throw away
three balls that can bounce on walls and floors if you press the shoot button.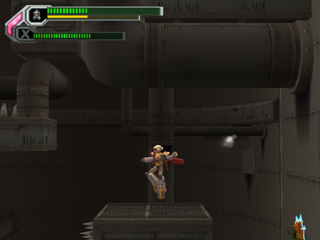 This
form allows you to hover and fly. Hold jump button to hover and when you can not
get higher, press the jump button again while holding the left or right to fly.
You can also shoot small balls if you press the shoot button.
This
form allows you to hover and fly. Hold jump button to hover and when you can not
get higher, press the jump button again while holding the left or right to fly.
You can also shoot small balls if you press the shoot button.
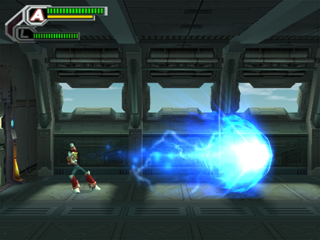 Alia
is just like X, she can use Alia Buster is a copy of the X-Buster, which means
you can charge up energy and fire plasma shots. In addition, she can use any
special weapons, but she can not upload them, and she can not use an Armor
Upgrade.
Alia
is just like X, she can use Alia Buster is a copy of the X-Buster, which means
you can charge up energy and fire plasma shots. In addition, she can use any
special weapons, but she can not upload them, and she can not use an Armor
Upgrade.
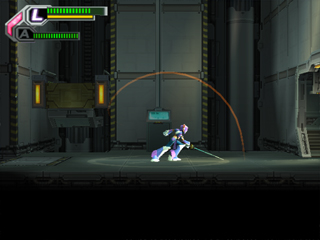 Layer
is a copy of Zero. She can use Layer Rapier which is her equivalent of the
Z-Saber. She can also use any special techniques and other weapons like the
Zero.
Layer
is a copy of Zero. She can use Layer Rapier which is her equivalent of the
Z-Saber. She can also use any special techniques and other weapons like the
Zero.
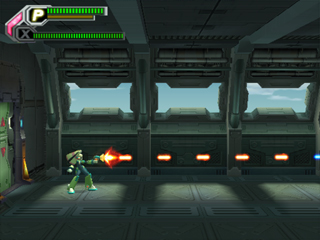 Pallette
works just like Axl. She can use all the special weapons and even soar. However,
she can not use the Copy Shot, and thus can not transform itself into an enemy.
Pallette
works just like Axl. She can use all the special weapons and even soar. However,
she can not use the Copy Shot, and thus can not transform itself into an enemy.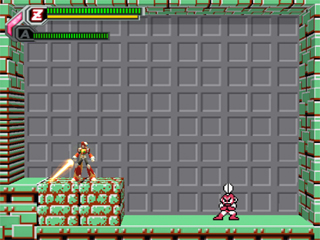 If you have a Command Mission save file on your memory card when you play Mega
Man X8, you will encounter Cut Man at the end of the Troia Base stage (right
before the Maverick battle). Your navigator will tell you this by saying that
the data was downloaded from “CM” (except that Cut Man isn’t in Command
Mission... It would have been more appropriate if they’d used the Anniversary
Collection save, but they didn’t... Ah well). Note that this doesn’t seem to
happen during Easy mode. Also, you cannot gain weapons from Cut Man and there is
no plot related to this; he’s just there for laughs.
If you have a Command Mission save file on your memory card when you play Mega
Man X8, you will encounter Cut Man at the end of the Troia Base stage (right
before the Maverick battle). Your navigator will tell you this by saying that
the data was downloaded from “CM” (except that Cut Man isn’t in Command
Mission... It would have been more appropriate if they’d used the Anniversary
Collection save, but they didn’t... Ah well). Note that this doesn’t seem to
happen during Easy mode. Also, you cannot gain weapons from Cut Man and there is
no plot related to this; he’s just there for laughs.
![]()