


| Here is a complete guide for Mega Man X6. Choose the tab you want in order to view its content. |

|
Release Date: |
Developer: |
|
Systems: |
Genre: |
Intro:
Expanding the series into it's sixth episode, Mega Man X6 retains all the action
and adventure of the previous games, as well as introducing entire new systems
of gameplay, including new bosses, characters, weapons and armor suits - as well
as a new threat for the Maverick Hunters.
Game Specs:
Mega Man X6 continues the action not long after the events of X5. The
magnificent graphics, sound and gameplay already made famous in X4 & X5 are
back, this time a load of new features will be making an appearance as well. The
new Nightmare System is one, in which stages will affect each other by causing
changes to occur throughout the stages, certain stages will also have randomized
sub-level areas. A new Hunter Ranking system, new armor suits, stages, bosses,
characters and more make this the most challenging and longest X game yet!
You'll need all the skill you've gained from the previous games to stop the
Nightmare, as well as Gate's hideous plans for world domination. A surprise
bonus will be waiting to be discovered, one that makes the game much more
enjoyable, and reduces Gate's chances of succeeding...
In Game Intro:
Megaman X -
Episode 6
Three weeks ago...
The Space Colony, "Eurasia," was taken over by Sigma. Sigma hired a mysterious Reploid, "Dynamo". Dynamo led the Eurasia into orbit toward the Earth... Thus beginning the tragic Earth Crisis. Maverick Hunter Zero, taking the Earth's destiny into his own hands, one Reploid made a crash attack against the furious Space Colony... It was a successful attack, and the Space Colony was destroyed. But, although the Earth was saved, the huge explosion seriously damaged it. As for the battle against Sigma... X and Zero defeated Sigma and narrowly escaped with their lives, however, only one would return from the battle. A blue light... X, still gripping a familiar Saber in his hand.
Three weeks later, at present... there is so much pollution on the ruined Earth from the explosion that the Reploids can barely work. And... a man is...


Mega Man X:
X returns to battle three weeks after the devastating Eurasia incident. Now
that the planet so badly damaged, X has major responsibilities in the
restoring of the planet and the fragile relationship between the Reploids
and humans. Still grieving for the loss of Zero, his best friend and
partner, X now uses Zero's Z-Saber as a never-ending reminder of the good
deeds that Zero performed. Still a strong willed fighter of the Maverick
Hunters, X continues to work with Signas, Alia and Douglas to restore peace
throughout the world. Once the worker reploid went crazy and began the
latest outbreak of chaos, X must now defend the world from the insane Gate,
and must stop him from creating his evil Reploid-only utopia. But during the
new battles that occur, X is always on the look-out for a sign that Zero may
have survived their previous battle with Sigma.

Zero:
During the Eurasia incident and the previous battle against Sigma, X and
Zero defeated Sigma's battle bodies, but Sigma managed to take Zero down
with him. X, believing that Zero was lost forever in that battle, did not
realize that Zero did in fact just barely survive, and went into hiding to
repair himself. Now back at full strength, Zero reunites with X (after X
destroys the Zero Nightmare) to once again battle evil. His near-death did
not affect his abilities, as Zero now has a range of techniques and
weaponry, all capable of taking down any enemy. Feeling responsible for the
outbreak of the Nightmare at Gate's hands, Zero feels he must face his past
again and destroy the terror that his own body has caused, and is looking
forward to facing Sigma again, to prove once and for all that Sigma can
never defeat him or X.
![]()
Dr. Light:
Dr. Light will be waiting in the special upgrade capsules, eagerly awaiting
X or Zero to find them. Once again, he'll give X new armor parts for the
Blade Armor and Shadow Armor, but neither can be used until all the parts
have been found. Still watching over X and Zero, Dr. Light is praying for
world peace, but is sure that it will be won some day while X and Zero are
still together, fighting for the good of all.

Alia:
Alia continues to aid the Hunters by giving them valuable advice during
dangerous missions. She'll often contact X or Zero while they traverse
through the stages of the game (press Select to listen to her) and provide
the player with important information dealing with traps and obstacles in
each stage, as well as some background info on the investigators of each
stage. Once Gate's colleague, Alia is very sympathetic towards him, and is
sad that he's become a monster, one not interested in world peace but
building a Reploid-only utopia. She can recognize the evil in him, and is
trying to aid the Hunters as best she can to bring him down, but finds it
difficult to be fighting against an old friend.

Signas:
Still supporting the Maverick Hunters for everything they stand for, Signas
returns to lead the Hunters to victory. Signas watches over all the missions
performed by X and Zero, and often offers advice on particular situations.
Always there to offer help and advice, Signas continues to prove his
leadership skills for the Hunters, and is always confident in X and Zero's
capabilities.

Douglas:
Douglas also returns to help out the Hunters in any way he can. Still the
top mechanic and engineer he has always been, Douglas can use the parts
gained from certain trapped Reploids once they've been rescued to make
powerful Power-up parts for both X and Zero to equip. Ever since the Eurasia
incident, Douglas has begun to improve his skills, so much so that once X or
Zero find a part from a rescued Reploid, he'll have the new part finished
almost immediately with little waiting time.

Gate:
Gate is the evil mastermind behind all the Nightmare occurrences that are
causing chaos everywhere. Once a trusted and highly intelligent colleague of
Alia's, Gate was finding himself held back by his peers, and broke away to
begin his own research. After the Eurasia incident, Gate went to the crash
site to survey the damage, and managed to reach the place where X and Zero
has just fought and defeated Sigma. Finding what seemed to be a piece of
junk, Gate actually recovered a piece of Zero containing his DNA. Not
knowing the dangers of Zero's dangerous and unknown interiors, Gate used the
DNA on himself and became insane. The DNA had a Maverick-like affect on him,
but instead of causing him to go crazy, he began to make plans to build a
Reploid-only utopia. Using the DNA which became known as the Nightmare, Gate
created eight new robots designed to seek out and recruit other Reploids for
his evil utopia. He also created the super-Reploid High Max, all this seemed
to guarantee him victory, but he had forgotten about the Maverick Hunters,
and in particular, X...

Isoc:
Isoc is Gate's top commander of his vast army. Faithfully obeying all orders
given to him, Isoc will gladly do as Gate says to bring about his new
Reploid-only utopia. Calling out for all Reploids to join him, Isoc claims
that Zero has caused all humans and Reploids much pain, and that the new
Nightmare threat (which was in fact created by Gate) must be stopped. Behind
the lies, Isoc is trying to gather as many supporters for Gate as possible.
Not exactly a strong fighter, Isoc will not face X or Zero in battle,
instead he has been conducting research into a new plan by Gate to take over
all the Reploids on the planet...

High Max:
High Max is an immensely powerful Reploid designed and built by Gate. As
Gate's first creation once he gained Zero's DNA and began the Nightmare
crisis, High Max is incredibly powerful and built to rival X and Zero's
strength. Surpassing them in strength, but not intelligence, Gate believes
that High Max is the key tool in the destruction of X and Zero as well as
any others who stand in his way. X and Zero will have to face High Max
before confronting Gate, but his strength and power might be too much for
them, unless they can break through his seemingly invincible body and find
his weakness...

Dynamo:
Dynamo managed to survive the Eurasia incident, and is now a true mercenary,
he works for no-one but himself. Still annoyed that he could not defeat X or
Zero in his previous work for Sigma, Dynamo realized just how strong they
were, and after Sigma was defeated, Dynamo couldn't care less about Sigma or
the fading Mavericks anymore. Working to gain stronger, Dynamo has recently
been scouting out the Nightmare areas, eager to gain as many DNA Souls as he
can to increase his strength and power. He won't directly interfere with X
and Zero this time, but if they manage to catch him lurking around any of
Nightmare areas, he'll try his luck in attempting to overcome them.

Sigma:
Sigma has managed to return, but not intentionally. After the Eurasia
incident, once Gate used Zero's DNA on himself and became insane, he
resurrected Sigma to be a part of his own army. Still as evil as ever, Sigma
was given a new body by Gate, but it was a heavily damaged body and left
Sigma very weak. Now all Sigma does is watch as Gate continues with his plan
to take over the world for his own Reploid utopia, but Sigma probably had
other plans on what to do with Gate once he regained his full strength. With
his Maverick army completely destroyed and the remaining viruses wasted when
he spread it all over Earth during the Eurasia incident, Sigma now relies on
Gate to defeat X and Zero, but Sigma's many past losses against X and Zero
lead him to being prepared if Gate manages to lose against them, and once
that day comes, Sigma will be ready and waiting to take them on again,
preparing his new battle body for action...
Intro Stage:
Not much difficulty here,
you'll just need to make your way across the ruined surface to the
underground complex ahead. Make your way over the terrain and use the
X-Buster or Z-Saber to easily destroy any resistance along the way. Once you
reach the entrance of the complex, head in and move on. You'll eventually
reach a ladder that is blocked by a large block. Use the Z-Saber to destroy
the block and any others that you come across. Keep going and you'll find
large circular machines rolling towards you. Use the Z-Saber to destroy
them. Head on and you'll eventually reach an area with large drill-type
machines in the ceiling. Pass under them quickly as they'll crash down and
try to crush you. Once you make it through this area you'll reach the end of
the stage where you face the Giant Mechaniloid and High Max.
Commander Yammark
Stage:
You'll begin in the
middle of an Amazon forest, surrounded by lush foliage. Head right and
you'll eventually come across strange looking slug-like creatures. You can
ride on their backs, just make sure that you don't shoot them otherwise
they'll curl up into a ball and roll around. Later on you'll need to ride on
them to pass through a spike filled area. Keep going right until you reach
an opening in the ground past the praying mantis-type enemy (they can be
completely destroyed by hitting them with the Yammar Option weapon). Drop
down the shaft and head left. You'll encounter the first Nightmare enemy
down here, destroy it and move on. Destroy the snake-like creatures dangling
out from the roof and floors, and keep going until you reach another opening
leading down further underground.
Head on down to the right and you'll eventually find a
new underground ice-cave area. You'll have to be careful here as there'll be
a lot of spike-filled areas about. Head on through the cave system and
you'll find an area where the floor is completely lined with spikes. Here
you'll have to ride across the slug creatures to avoid the spikes, as you go
along be sure to destroy the flying robots, they'll shoot down annoying
projectiles from above to distract you. Once you reach the final slug (the
spike floor level will drop a bit) jump over what looks like a large hole
and you'll land on safe ground below. Head right to leave the underground
cave. You'll be back out in the open, in an area where large platforms hover
above a huge hole. Make your way over the platforms, you'll have to destroy
many of the praying mantis enemies before reaching the end. Keep in mind
that there's a few trapped Reploids out here. Once you reach the end you'll
find the entrance leading to Commander Yammark's room.
Secret Boss Room: Just after you
enter the underground ice-cave area, head forward and you'll eventually find
a pole leading down into a large hole in the ground. You'll now need X's
Blade Armor, or Zero to reach the teleport portal. Jump up into the hole in
the ceiling above and you'll find a new area. Many trapped Reploids will be
here, make sure you rescue them all. Head right and you'll find loads of the
snake creatures coming out of the floor and ceiling. Make your way through
here, you should eventually reach another large hole leading down. Jump up
to the opening on the right to find another trapped Reploid by a Nightmare,
then drop down the hole and stay against the right wall. You'll fall down
straight into the teleport portal below. For the next area, you must have X
with the Blade Armor equipped. Head right and you'll find another open area
with platforms over a huge hole. Head over the platforms, you'll find
several praying mantis enemies along the way, you'll also find areas where
you need the Mach Dash to get through, otherwise you won't be able to make
it. Keep going and you'll eventually reach the end to find the secret boss
room.
Nightmare System Effects:
1 - In some areas you'll find
wind blowing down to the left, this will cause your character to move a
little slower than normal against the wind.
2 - In certain areas two
floodlights will appear and dramatically reduce your visual clarity of the
screen. The screen will be heavily darkened and you'll have a little better
vision when the lights move around.
Commander Yammark's stage affects Blaze Heatnix (1) and Shield Sheldon's (1)
stages.
Ground Scaravich
Stage:
Ground Scaravich's
stage will be a large museum with four inner sub-areas which will be random
each time you enter the stage. Head down the staircase on the right and move
forward. You'll eventually find a large transparent blue totem pole. Touch
the pole to transport to an inner sub-area. Each area is fairly small,
you'll have to make your way to the end of it to reach small orange statues.
Destroy the statue to teleport back to the main museum. You'll also find
that each area is swarming with Nightmares, use these areas to build up your
Nightmare Soul count. Once you destroy the orange statue, you'll be able to
move on in the main museum.
You'll reappear near the totem pole that teleported
you, but it'll now be active and will attack you. Four heads are on the pole
separated by a larger head in the center. Each pair of heads will spin
around and fire energy balls or arrows at you, dodge their fire and blast
away at them. Once you destroy two heads, the center head will take off and
come after you. Quickly destroy it and finish off the remaining two heads to
destroy the pole. Move on and drop down the hole ahead. Go left and you'll
find the second totem pole. You'll teleport to another inner-area. Make your
way to the end of it and destroy the orange statue. Once you teleport back
to the main museum, head forward and take out the totem pole. Move forward
and drop down the next hole. Head further down to the third totem pole.
Enter the inner-area and destroy the orange statue. Blow apart the third
totem pole and head on to the final one past a bed of spikes. Clear the
final inner area and destroy the fourth totem pole to finally reach Ground
Scaravich's room.
Secret Boss Room: Eventually you
should find the teleport portal in clear view in one of the inner-areas. As
the inner-areas are random, it might take a while to find it, but once you
do, head in to reach the path leading to the boss room. You'll now be in a
large room full of Nightmares, head through and destroy as many Nightmares
as possible. You should eventually find the door leading to the secret boss
room.
Nightmare System Effects:
1 - In some areas you'll find
wind blowing down to the left, this will cause your character to move a
little slower than normal against the wind.
2 - Throughout the inner-areas
you'll find large silver blocks scattered through out the rooms. They'll
move around a bit to try and block your path, make sure you don't get caught
above or below them when they move. You can destroy them with the Metal
Anchor/Rakukojin.
Ground Scaravich's stage affects Metal Shark Player (2) and Shield Sheldon's
(2) stages.
Blaze Heatnix
Stage:
Blaze Heatnix's stage
will be filled with large red circular mechaniloids like the one pictured on
the right. You'll have to face many of them before reaching Blaze Heatnix's
room, each one has a lot of health, so it'll take some fancy footwork to
dodge their attacks. Once you begin, head forward and drop down into the
area where you have to fight the first giant mechaniloid. You'll notice that
it'll have four green bulbs around it, it'll often fire out green energy
balls at you, so get ready to dodge them. The entire thing will be moving
back and forth across the room, jump up the wall and over it when it passes
or crouch down in the low trenches to dodge it. If you use the Meteor
Rain/Ensuizan you'll heavily damage it, otherwise just use the Z-Saber or
the Giga Attack and hack away at the bulbs when it stops moving. Keep
dodging it and you'll eventually destroy it.
Once it blows head through the door on the right. You'll
now be in a large shaft leading down filled with fire exhaust ports. Head
down and make sure you dodge the flames, they cause serious damage if they
hit you. Keep winding your way down through the platforms, once you reach
the bottom of the shaft you'll spot a hole leading down on the right. Drop
down and you'll land in another cavern with the second giant mechaniloid
waiting. A large platform is in the center of the room, the mechaniloid will
move around this in an anticlockwise motion, jump up the wall and blast away
at the bulbs when it comes into range. Once you destroy it head through the
door on the bottom right corner of the room. You're now in a large shaft
with two doors on the right wall - one on at the base of the shaft and the
another a little higher up. At the top of the shaft is the area leading on
to the secret boss room. You can go through either of the two doors, they
both lead to similar areas where you'll be facing another giant mechaniloid.
In both rooms, you'll have vertical poles you can grab onto to help you
dodge the mechaniloid as it moves around. A good tactic is to follow it to
the edges of the room, then when it stops use the Giga Attack (Falcon Armor
is the best) and you should cause severe damage to it. Finish it off then
move on through the door on the right of the room. You'll now enter into
either the base of a large shaft or about halfway up (if you went through
the upper door in the previous shaft-room). Lava will begin to flow up into
the room and another mechaniloid will appear from below. The screen will
begin to move up as well as the lava so you'll need to be quick to avoid it.
Each time the mechaniloid comes up try to cause as much damage as possible
with the Z-Saber (or the Giga Attack), as it'll be difficult to hit the two
lower bulbs. Keep moving up the shaft while damaging it, then once you
destroy it head up to the top of the shaft. Head through the door on the
right to enter the room with the final mechaniloid. This one will be much
easier to fight, as you'll have three platforms to stand on while the lower
part of the room fills with lava. Wait for the mechaniloid to hover below
you, jump up over it and it'll rise up out of the lava. Hack away at the
bulbs before it lowers. Keep this up to destroy it, then head into Blaze
Heatnix's room on the right.
Secret Boss Room: Once you reach
the first tall shaft after destroying the second mechaniloid, the path
leading to the teleport pad is up at the top. You'll need Zero or X with the
Blade Armor equipped. X will also need either the Speedster or Hyper Dash,
and the silver blocks will help as well. Go up to the top of the shaft and
double-jump up or Mach Dash up through the opening in the ceiling. You'll be
able to pick up a lot of trapped Reploids, a heart and upgrade capsule on
the way, but once you reach the top of the shaft, head right to eventually
find the teleport portal. Once you reappear, you'll be at the base of a tall
shaft filled with the fire-exhaust ports. Head up the shaft and make sure
you pick up the energy tank along the way. Once at the top, head right to
eventually find the door leading to the secret boss room.
Nightmare System Effects:
1 - In some areas small bug-like
mechaniloids will appear and hover just in front or behind your character.
They'll block your shots and sometimes try to hit you. You can ward them off
with a few shots or swings, eventually they'll all fly off.
2 - Throughout the stage you'll
find the large silver blocks scattered throughout the rooms. You can use
them to reach higher areas, but if they block the way use the Metal
Anchor/Rakukojin to destroy them.
Blaze Heatnix's stage affects Blizzard Wolfang (1) and Infinity Mijinion's
(2) stages.
Blizzard Wolfang
Stage:
Blizzard Wolfang's
stage will be full of areas where huge ice blocks will be tumbling down the
screen either straight down or rolling down a slope. They cause serious
damage if they strike you so you'll have to be quick to dodge them. Once you
begin, head right over to the pole leading up to the slope. As you head up
the slope, you'll find it difficult to climb as everything is very slippery,
try to hide below outcroppings before the avalanche begins. If you're quick
enough, you should be able to make it all the way to the top before the
blocks fall. Hide in the small alcoves and below outcroppings on your way
up, and make sure you destroy the enemies you'll encounter along the way.
You'll have to survive several avalanches before
reaching the top, but once you get there, head right and you'll find an open
area where more ice blocks will fall from the ceiling. Once the blocks stop,
jump over to the small platforms sticking up from the hole. Make your way
over the hole, once you reach solid ground you'll find another slope leading
down. Head down the slope once the avalanche stops and go down the ladder at
the base. Drop down and climb up the slope on the left, but be careful as
large blocks will bounce down from above. Drop down once you reach the top
and head down the next slope. Eventually you'll reach a flat area, go
forward and drop down into the large pit ahead. It'll look as if you're
trapped, but ice blocks will begin to drop down one by one from the ceiling.
Make sure you don't get crushed by any, and once enough have landed near the
right wall, jump on them to reach the top of the hole. Once you get out of
the hole head right and jump into the next pit. You'll find a few spiked
areas in this next hole, so make sure you avoid them. Once enough blocks
drop down from above, jump up and head out of the hole. Go right and you'll
reach a large shaft leading up. Climb up the ladder and you'll spot a row of
blocks beginning to fall down. A gap will be in each of the rows, just
before the row lands jump up as the gap will seal and if you're in it when
it seals you'll lose a life. Keep heading up the shaft as the blocks fall,
and try to rescue as many trapped Reploids on the sides of the shaft as
possible. Once you reach the top head through the door on the right to reach
Blizzard Wolfang's room.
Secret Boss Room: You'll need to
enter this stage when it shows up as red on the Boss Selection screen so
that the meteorites will be falling down in certain areas. You'll also need
to be using Zero, or X with the Blade Armor or Shadow Armor. Once you reach
the first area where the ice blocks tumble down the slanting slope, head
down to the base of the slope and head through the opening ahead. You'll now
be in the area where the energy heart and EX tank are hidden. You should be
able to see the teleport portal high up on the other side of a wall, jump
down below it and use the Mach Dash or Zero's double-jump to reach it. If
you're using the Shadow Armor, drop down the spike lined hole, grab the EX
tank (if you haven't yet) and go up the ladder to reach the portal. Once
inside, head down the long ramp ahead and blast any enemies along the way.
Dodge the spikes and holes along the way, once you reach the base you'll
spot a pole leading down. Grab hold of it and slowly move down to the
bottom. Directly below is a bed of spikes, to the left is an area with a
trapped Reploid (you'll need the Shadow Armor to reach him), and on the
right is the door to the secret boss room. Jump over the spikes to reach the
door.
Nightmare System Effects:
1 - In certain areas of this stage large flaming meteorites
will be falling down from the top of the screen.
2 - Soul Body clones of X or Zero
(the opposite character to the one you're using) will appear in certain
areas and will fly into your character after appearing, try to jump over
them as they pass or use the Guard Shell to destroy them.
Blizzard Wolfang's stage affects Metal Shark Player's (1) stage.
Rainy Turtloid
Stage:
Rainy Turtloid's
stage will be a long open area trek down a long river, so you'll have to
make sure that you don't fall in the water. Once you begin, head right and
jump over the water pits ahead. After clearing the first few, you'll reach a
building with a health pod at the entrance. Head in and you'll notice that
heavy rain will begin to pour down from above. X or Zero will speak to Alia
about the acid rain, you'll have to be quick in these areas as the rain will
slowly drain your character's health. Inside the building you'll have to
find four small cores and destroy them, look around for them, then once you
clear them all, drop down to the floor and destroy the large object blocking
the exit on the right. Once you blow the machine, the rain will stop and
you'll be able to move on.
Go over to the cave ahead and the rain will begin
coming down again. Head up the sloping ramp and you'll encounter a large
mechaniloid at the top. Wait for it to move it's arm then blast away to
destroy it. Destroy the core at the base of the ladder ahead, then head up
and continue on. Head to the left above and destroy the next large
mechaniloid you come across. Blow the core below the next ladder and head up
out into the open. Go up the sloping ramp and destroy the mechaniloid at the
top. Destroy the core, then drop down into the large hole on the right. The
final core is just above the generator, destroy it to remove the generator's
shield. Blow the generator and continue on. Just ahead is a very long river,
so you'll have to be careful now. Jump across the ledges in the water, and
make sure you destroy any cores along the way. When you reach the moving
platforms, be patient and wait for them to come close enough, then use them
to get across the river. After you destroy two cores along the way you'll
reach an area full of energy capsules, this is also a useful area for
filling up energy tanks. Keep going and you'll eventually reach the
generator. If you managed to destroy all the cores along the way it's shield
will be down. Destroy it and head into the next inner-area. In this next
area, you'll find a large hole ahead with poles leading down. Straight ahead
is the Armor capsule for the Shadow Armor beyond spiked areas, you'll need
the Blade Armor to reach it. Down the hole are three tunnels leading off
both the left and right walls, some will contain the cores and others
trapped Reploids. At the end of each tunnel is a small opening lined with
spikes, wait until you get the Shadow Armor before trying to get through
them. The cores will be hiding on the middle and lower left tunnels, while
the cores on the right will be in the lower and upper tunnels. Once you
destroy the four cores head down to the middle right tunnel to find the
generator. Destroy the generator and head through the door to reach Rainy
Turtloid's room.
Secret Boss Room: In the final
acid rain area with the tunnels leading off on each side of the large hole,
head down the lower left tunnel to reach the teleport portal. You'll need to
make it past the spiked hole, the Shadow Armor makes it very easy but if you
use Zero or any other suit for X you'll have a difficult time aiming a
mid-air dash correctly. Once inside you'll have to destroy more cores to
stop the acid rain. You'll be in a large room with many tunnels leading off
down the left and right walls. Many of the tunnels will contain trapped
Reploids and energy capsules, the cores will be hidden down the following
tunnels: (the top level where you start is classified as the first tunnel)
on the right wall down the second tunnel from the top, left wall third
tunnel from the top, fourth level down in the right tunnel and finally,
bottom level in the left tunnel. Once you destroy all four cores destroy the
generator in the lower right tunnel and head through the door to reach the
secret boss room.
Nightmare System Effects:
1 - In certain areas two floodlights will appear and
dramatically reduce your visual clarity of the screen. The screen will be
heavily darkened and you'll have a little better vision when the lights move
around.
2 - Soul Body clones of X or Zero
(the opposite character to the one you're using) will appear in certain
areas and will fly into your character after appearing, try to jump over
them as they pass or use the Guard Shell to destroy them.
Rainy Turtloid's stage affects Commander Yammark (1) and Ground Scaravich's
(1) stages.
Metal Shark Player
Stage:
Metal Shark Player's
stage will be dominated by a large trash compacter, you'll have to avoid
being crushed by it quite often. Once you begin, head forward and jump into
the Raiden Armored Carrier. While in the carrier you can't be crushed by the
compacter, so use it as long as you can. Head right and traverse over the
piles of junk in the way. Trash any enemies you come across, then once you
reach a tall pile of junk too high to jump over, leave the carrier and head
on. When you reach a higher area where the compacter crashes down to the
ground level, dive into the small trenches to avoid it. Keep going and
you'll eventually move clear of the compacter. Head down the ladder on the
right to land in another compacter area.
You'll be going left this time, and the compacter will
have many more obstacles to avoid. Head in and be ready to move quickly.
Destroy the gray blocks of junk that get in your way, and make sure you
clear out all the Nightmares here, as a few trapped Reploids will be hiding
among the junk piles. Small pylon extensions will be jutting out from the
compacter, make sure you don't get crushed by any of them. Once you
eventually reach a ladder leading down, head down and touch the teleport
portal to warp to the next area of this stage. You'll now be in an area with
another compacter, but the conveyer belt will be moving to the left, so
you'll have to be quick to avoid being crushed. Walk against the conveyer
belt to the right, you can also jump to move against it's motion. The
compacter will have the large pylons attached to it again, make sure you
don't get crushed by them. Move along through the piles of junk, and be
careful of the spikes sticking out from the compacter and the ground. If you
see any gray blocks sliding towards you, quickly destroy them before they
crush you between piles of junk. Once you reach a point where spikes are
lining a block of junk, jump up the side of the pylon coming out of the
compacter on the left, then once the compacter rises up, mid-air dash to the
right over the spikes to dodge them. Keep moving through the junk, and keep
an eye on the height of the compacter, as you'll have to crouch down in some
areas to avoid being crushed. Eventually you'll reach the end of the
compacter and emerge to an open area. Head forward and a massive trash
compacter mechaniloid will drop down from above and literally fill the
screen. It'll rise up a bit and an energy bar will appear. Once it begins to
attack it'll lower down two arms with spikes so make sure you don't touch
them. It'll drop down several bombs, try to stay out of their way as they
bounce along the ground. Eventually it'll lower down a large object with six
circular cores on it. The blue ones will fire off shots at you, the purple
ones are the weakness of the mechaniloid. Blast away at the three purple
cores to damage it, once you destroy the three cores the entire thing will
blow. Make sure you dodge the spike attacks it launches. Once it blows head
through the door ahead to reach Metal Shark Player's room.
Secret Boss Room: At the end of
the second trash compacter area, instead of heading down the ladder to
teleport to the next part of the stage, keep going left and you'll find that
the room will keep going. You'll need to be very fast to get through the
narrow passage below the compacter without being crushed, and below you'll
need the Blade Armor with the Speedster part equipped or the Ultimate Armor.
Once you clear the compacter you'll find a ladder leading down. Drop down
below and head right. You'll find a huge hole with three Nightmares floating
above it. Destroy them and use the Mach Dash or the Nova Strike attack to
reach the other side. Beyond the point where the Helmet capsule for the
Shadow Armor was, the teleport portal will be waiting. Head in to teleport
to the secret boss room area. You'll now be in another conveyer belt area,
but this time the screen will automatically move to the right. You'll have a
Raiden Armored Carrier available, but you'll probably find it easier to make
it through on foot if the brown blocks are active in this stage (destroy
them with the Ground Dash). Head through the compacter area, and make sure
you don't get caught on the left side of the screen. If you see any gray
blocks sliding towards you, quickly destroy them before they squash your
character. This area is fairly straight forward, eventually you'll reach a
tall pile of junk with a trapped Reploid behind it. Just behind the Reploid
is the door leading to the secret boss room.
Nightmare System Effects:
1 - During the second part of the stage with the moving
conveyer belt, you'll notice that parts of the junk piles will be covered in
slippery ice. Your character will slip around on the ice.
2 - In some areas brown, red,
black and blue blocks will appear and often block your path. The brown ones
can be destroyed with the Ground Dash, while the others can be moved by
moving towards them and pressing fire with the Ground Dash.
Metal Shark Player's stage affects Blaze Heatnix (2), Infinity Mijinion (1)
and Ground Scaravich's (2) stages.

Shield Sheldon
Stage:
Shield Sheldon's
stage will be full of areas with strange laser devices. Once you begin, head
right until you reach a large hole. You'll notice a Metool will be walking
in mid-air, it's actually standing on an invisible block - more work of the
Nightmare. Three blocks span the gap, try to estimate where they are or just
dash-jump to the other side. Keep going and you'll reach another hole with
the invisible blocks, head across and move inside the Laser Institute
facility. Just ahead will be a single laser and a mirror reflector in front
of a sealed door. Stand by the door and wait for the laser to fire at the
mirror. Once it hits the mirror the beam will redirect and hit the door to
open it. Head in and continue on to the next door. Wait for the laser to hit
the mirror, then the door will open.
In the next room you'll have to shoot the mirror by the
door to reposition it. Once it's in the correct position, the reflected beam
will hit the door and open it. Enter the next room and jump up the tall
platform. Shoot the mirror straight ahead to allow the laser beam to reflect
down to the lower right of the screen. Follow the beam down and you'll find
two more mirrors by two doors, one in the right wall and one in the floor.
Redirect the mirrors to open each door, the door on the wall leads to Shield
Sheldon's room while the one in the floor leads to the secret boss room.
Secret Boss Room: At the end of
the stage just before Shield Sheldon's room you should spot a door in the
floor. Use the mirrors to reflect the laser beam to hit the door, then head
down into a complex laser-mirror area. You'll need to redirect the lasers to
hit the purple beam emitters, once they're hit they'll begin to fire. Keep
moving along the room and redirect the beams to the end of the room, you'll
find another door in the floor. Use the mirrors to direct the laser to hit
it, then drop down below. Through the left wall below is another upgrade
capsule, head right to reach the teleport portal. Avoid the spikes along the
floor, when you reach an open area jump over to find invisible blocks appear
when you land on them. Go a little further forward to find the teleport
portal. In the new area you'll just have to head over spiked areas and a
large hole before reaching the end. On the way you'll spot the weapon tank
lying on a bed of spikes, you'll need the Shadow Armor to reach it. Head
over the large hole by traversing across the suspended poles in the air to
reach the boss room.
Nightmare System Effects:
1 - In some areas small bug-like mechaniloids will appear and
hover just in front or behind your character. They'll block your shots and
sometimes try to hit you. You can ward them off with a few shots or swings,
eventually they'll all fly off.
2 - In some areas brown, red,
black and blue blocks will appear and often block your path. The brown ones
can be destroyed with the Ground Dash, while the others can be moved by
moving towards them and pressing fire with the Ground Dash.
Shield Sheldon's stage affects Blizzard Wolfang (2) and Rainy Turtloid's (2)
stages.
Infinity Mijinion
Stage:
Infinity Mijinion's
stage will have you battling against a gigantic mechaniloid in the
background. You'll have to battle against it for most of the stage, so get
ready to move quickly. Once you begin and the mechaniloid appears, it'll
repeatedly fire down huge energy balls from it's face. Keep moving to dodge
it. Head down further into the stage and avoid the large holes along the
way. Small bird-like robots will appear often and fire at you, try to
destroy them before they ram you. Eventually you'll reach a huge cable and
an energy bar will appear. You'll need to strike the large red core on it to
cause damage, if you use the Meteor Rain/Ensuizan, it'll cause severe
damage. Once the cable blows you'll be able to move on.
The giant mechaniloid will use a new attack, the head
will rise up and close in on you, three small drones will then appear around
the screen. A large red beam will scan along the screen from the head, if
the beam hits you while you're on the ground, it'll lock onto you and after
a second the three drones will fire out energy beams at you. Jump up quickly
to dodge them, and try to stay off the ground to dodge the scanner beam.
Keep going and you'll eventually reach the next cable. The mechaniloid will
call down two large walls which will fire energy blasts at you, use the same
tactics as before on the red core to destroy it. Once the cable blows the
entire mechaniloid will explode. A teleport portal leading to the secret
boss room will appear, head right to continue on to Infinity Mijinion's
room, which is just a little further down.
Secret Boss Room: After you
destroy the second cable which will cause the giant mechaniloid to explode,
the teleport portal will appear in the air. Jump into it to teleport to the
secret boss room area. Once you reappear, head right to find a huge hole and
a long pole extending across. Head over and destroy any Nightmares along the
way, you'll also find many trapped Reploids here, be sure to save them all.
Keep jumping across the poles and you'll eventually reach the other side
where the door leading to the secret boss room will be waiting.
Nightmare System Effects:
1 - Throughout the stage you'll find the large silver blocks
scattered throughout. You can use them to reach higher areas, but if they
block the way use the Metal Anchor/Rakukojin to destroy them.
2 - In certain areas of this
stage large flaming meteorites will be falling down from the top of the
screen.
Infinity Mijinion's stage affects Commander Yammark (2) and Rainy Turtloid's
(1) stages.
Gate's Laboratory
Stage 1:
You'll need X
equipped with the Shadow Armor or Zero to make it through the first area of
this stage. Once you begin, you'll land among the ruins of Eurasia's crash
site. The entrance to Gate's lab will be further ahead through the ruins.
Once you reach the huge opening in the ground, Alia will speak to your
character and say that she won't be able to contact you while you're inside.
Drop down the huge hole and make your way inside. You'll enter into a
colorful interior complex, but the first part will have walls lined with
spikes. If you're using X with the Shadow Armor, don't even worry about the
spikes, just climb up the walls to reach the top of the shaft. If you're
using Zero, use the Hyoroga so that he jumps up and hangs from the ceiling.
Once there, dash to the left or right so that you avoid the spikes and land
on safe ground.
Once at the top head right to find a long sloping ramp
heading down. The ramp will be covered in ice so you'll have to be careful.
Head down and try to dodge the lasers and holes along the way. Once you
reach the bottom head up the ladder on the right into a new shaft. Head up
the shaft and try to avoid the intense laser beams along the way, as well as
the enemies climbing around the walls (do they look familiar?). Once you
reach the top head right and move down along the corridor. Destroy all the
enemies along the way, make your way through all the lasers and enemies and
you'll eventually reach a door. Head through and as soon as you can move
again jump up the wall as lava will begin to fill the room. Once it just
about reaches you it'll lower down below you. Jump down and quickly head
through the door on the right. Go over to the hole in the roof and the lava
will rise again. Quickly head up through the hole and go right. Destroy the
enemies along the way and you'll eventually reach a ladder leading down.
Wait for the lava to lower, then climb down and head right. Head through
over to the icy ramp and the lava will begin to rise again. The screen will
slowly move up, follow it up the large shaft and make sure you destroy any
Nightmares you encounter. Try to avoid the spiked areas along the way,
eventually you'll reach a door at the top of the shaft. Head through it to
confront the boss of this stage.
Gate's Laboratory
Stage 2:
Halfway through the
second Gate's Lab stage you'll have to fight High Max. Once you begin, jump
up to the poles leading up and make your way up the shaft lined with spikes.
Try to destroy the brown blocks that appear, and you'll have to jump from
pole to pole before reaching the top. Once you reach the top, head right.
Keep going until you spot a large mechaniloid which will fire missiles at
you. Destroy it, then head up to the platforms above it. Make your way
across the platforms and destroy any Nightmares that appear. Keep going and
you'll eventually reach a small room full of Nightmares. Destroy them all
and grab the large energy capsule in the corner before leaving. Drop down
the hole and head right.
In the next area you'll be in a large room with four of
the totem poles from Ground Scaravich's stage scattered around. Head over to
the first pole and destroy it by blowing out the four heads and the center
head. Continue on and destroy the second pole. When the small energy balls
moving around the floor stop moving and open up, blast them quickly before
they fire. Climb up the ladder after the second pole and jump over to the
moving platform. On the left is another totem pole, stay on the moving
platform and blast away at the heads. Hit the lower two heads by sliding
down the side of the platform. Once it blows head over to the platform on
the left. Go left and you'll see another moving platform. Jump over to it
and begin firing away at the totem pole on the left. When the platform rises
up to the roof, slide down the side of it to avoid being crushed. Once you
destroy the pole head up the ladder behind it. Head right and over the
spikes in the floor to find another totem pole. Destroy it and head right to
find yet another one beyond a bed of spikes. Trash it and head up the ladder
behind it. Go left and you'll find an area filled with spikes, so you'll
have to be very careful here. Wait for the moving platform to come close,
then jump on and ride it to the left. Crouch down to avoid the spikes in the
roof, then once you reach the second vertical moving platform, jump on it
but make absolute sure that you don't ride it as it goes up as it'll move
straight into the spikes in the ceiling. Wait for the third platform ahead
to move clear, then jump over the spikes on the left and mid-air dash to fly
past them to land on safe ground. Once you're through, climb up the ladder
and head through the door on the right to confront High Max. Once you defeat
High Max you'll reappear in a new area. Head down the corridor and destroy
the robot birds that fly at you. Dodge the small bed of spikes here and
there, and destroy the rolling machines with the Z-Saber. Keep going down
the corridor and you'll eventually reach a teleport portal. Head in to warp
to the next area. In the next area you'll have to destroy many of the
mechaniloids that appeared in Rainy Turtloid's stage. Head right and make
your way past each of the mechaniloids. Once you reach an area with a hole
next to a mechaniloid, slide down the wall but don't drop down as spikes are
below. Jump to the safe platform and trash the next mechaniloid. Keep going
and you'll eventually reach and area where acid rain will begin falling.
You'll need to destroy the small cores again before you can destroy the
generator. Head over the large hole across the platforms, but make sure that
you're not using the Shadow Armor at all during this stage as you'll need
the mid-air dash move here. Keep destroying the cores and then blow the
generator when you reach it. Head through to the next acid rain area. Move
through and destroy all the cores, once you destroy the second generator
you'll teleport to the final area. Head down the long corridor and destroy
any of the bird robots that fly at you. Once you reach the end of the
corridor head through the door for the final showdown against Gate.
Gate's Laboratory
Stage 3:
The final stage will
contain the eight teleport pads which lead to rooms where you have to fight
the eight bosses again. Once you begin the stage, head right until you find
an opening leading down. Slowly drop down the gray platforms while avoiding
the spikes, once you reach the bottom head right to find a long shaft
leading down containing teleport pads. Once you beat the eight bosses again,
a final pad will appear, use it to teleport to the final area. Head through
the next area and you'll eventually reach the room where you'll have the
final showdown with Sigma.

Commander Yammark:
Guide: Commander Yammark will float down into the room and
summon three smaller dragonfly-type projectiles which will float around him.
Once he begins he'll move to the right corner and send his dragonflies
moving up and down the screen. They'll begin firing out small energy balls
from different positions, get ready to jump over and duck them as they fly
past. He'll also often charge forward while firing the dragonflies, jump up
the wall then over him as he passes, but be careful as the dragonflies will
also fire out behind him. Keep in mind that you can destroy the energy balls
by shooting at them with the X-Buster. Use the Ray Arrow to defeat him, or
if you don't have it yet just stick with the X-Buster. After you hit him a
few times he'll summon more dragonflies (up to a maximum of six), so you'll
have to dodge even heavier fire now. Once his health's half gone, he might
begin to fly straight at you. Jump up the wall and mid-air dash over him,
but be careful as the dragonflies will be following him from behind and will
drop small bombs down to the ground. He might also set his dragonflies into
positions above and below him, he'll then move forward and try to hit you
with his dragonflies. Try to dash under them as they move up. Keep hitting
him with the Ray Arrow or blast away with the X-Buster to finish him off.
Weakness: Ray Arrow.
Weapon Received:
Yammar Option.

Ground Scaravich:
Guide: Ground Scaravich will be pushing a large boulder
around most of the time during this battle. He'll begin by rolling the
boulder straight towards X. Quickly jump over him or use the poles above to
dodge him. Once he comes back from off the screen, he'll fire out three
small energy balls at X, one at time. Just jump over them to dodge them.
He'll continuously move around the screen while pushing his boulder,
eventually when he returns the boulder will grow in size. Use the poles
above to avoid the boulder. Eventually the boulder will grow again to a huge
size. Keep using the poles to dodge it, but remember that you can destroy
the boulders with the X-Buster. The boulder will only grow to one more size,
where it nearly fills the screen. Use the Yammar Option to heavily damage
Ground Scaravich. When he pushes the boulder forward, jump over him and
activate the dragonflies. Move in close so the dragonflies hit him. After
taking damage, he'll roll away to the other side of the boulder and push it
towards X. After a while the boulder may shrink down again. Keep hitting him
with the Yammar Option and try to avoid the boulder as best you can.
Weakness: Yammar Option.
Weapon Received:
Ground Dash.

Blaze Heatnix:
Guide: Blaze Heatnix will be using some strong attacks during
this battle. Once he enters the room he'll call up lava which will fill the
lower half of the screen. Quickly jump up to the platforms and stay out of
the lava. He'll dive down into the lava and fly around below you. After a
few seconds he'll rise up below you, get ready to move out of his way. He'll
then fire out a large fireball which will break up into three smaller
fireballs when they hit the lava. Try to dodge them as best you can or
destroy them with the X-Buster. After firing a few off he'll lower the lava
and call lava down from the ceiling. Drop down to the floor to avoid it.
Blaze'll then fire out small waves of energy that fly out at you, jump over
or dash under them just as they pass to avoid them. He'll also often charge
across the screen to try and ram X, dash under him or jump over him as he
passes. After a while he'll repeat the lava attacks. Use the Ground Dash to
heavily damage him. Once you take his health down to half, he might fly out
of the screen. If he does, he'll fly back across the screen three times
using a huge fire wave, try to dodge him as he passes. Keep hitting him with
the Ground Dash, if you run out of weapon energy just use the X-Buster.
Weakness: Ground Dash.
Weapon Received:
Magma Blade.

Blizzard Wolfang:
Guide: Blizzard Wolfang will be lunging at you often during
this battle. He'll appear out of the darkness and attack. He'll begin be
firing out large ice blocks which will fly up and land down on top of X.
Dash to the side quickly before they land to dodge them. He might also
charge at you, quickly jump over him to dodge him. If he pauses and looks as
if he's about to pounce, he'll jump up and try to ram into X. Dash under him
as he jumps up to dodge this attack. He might also jump up to a wall and fly
down straight at you. Be ready to jump over him whenever he charges. You can
destroy the ice blocks he fires with the X-Buster. Use the Magma Blade to
heavily damage him, and once you take his health down to half he'll begin to
use stronger attacks. He'll often dash around the ground and ceiling while
creating large ice spikes along the floor and ceiling. The ones on the
ceiling will drop down, make sure they don't hit you. He also might create
spikes up the walls, make sure you stay clear of them. Quickly blast away at
the ground spikes to destroy them. He might also jump up into a corner and
fire down a series of ice blocks, get ready to move quickly to dodge them.
Try to dodge his attacks as best you can and keep hitting him with the Magma
Blade.
Weakness: Magma Blade.
Weapon Received:
Ice Burst.
Rainy Turtloid:
Guide: Rainy Turtloid is huge and will take up a fair portion
of the room. He'll always have his back facing you, as it'll be his primary
form of attack. He'll begin by firing out hordes of missiles at X from the
two green crystals on his back. Jump up to the corner of the ceiling to
dodge all the missiles, but you can also destroy them with the X-Buster or
Z-Saber. After he stops firing them, he'll roll into his shell and extend
spikes off his back. He'll begin rolling around and will roll across the
ground to the other side of the screen. He'll then roll towards X depending
on where you're standing. After passing across the screen a few times, he'll
retract the spikes and stand back up. He'll then proceed to fire off a horde
of missiles again. To defeat him, you'll first have to destroy the two green
crystals on his back before you can damage him. Use the Z-Saber to hit both
at the same time, and keep persisting until they blow. Once both are gone,
rip into him with the Z-Saber, or use the Ice Burst to inflict heavier
damage on him. You won't have much energy for the Ice Burst so you'll need
to use the Z-Saber as well. Once he recalls the crystals you'll have to
destroy them again, so go through his attack patterns again before attacking
him again. Once you take his health down to half, he'll begin firing out
water bubbles when he rolls across the screen. Try to dodge them as best you
can. Keep firing away when his defenses are down.
Weakness: Ice Burst.
Weapon Received:
Meteor Rain.

Metal Shark Player:
Guide: Metal Shark Player will be using a few charge attacks
often during this battle. Once he begins, he'll dive to the floor and slide
along towards you. Jump over him before he hits X. He'll be doing this quite
often, he might also jump up above X and drop down on him, dash to the side
to dodge him. If he dives under the junk, he'll move around the ground with
his fin sticking out. Try to stay up the walls to avoid being hit.
Eventually he'll jump out again. He'll also often throw an anchor out at
you, quickly dodge it, but be careful as once it hits the ground it'll
bounce around the room. After a few seconds it'll blow. Use the Meteor Rain
to inflict heavy damage on him. Once you drain half his health, he might
jump up to a corner and charge up yellow energy balls in his hands. Once he
does this, an object will form together in the other corner of the screen in
the shape of Mavericks that X has already fought long ago. While using X
it'll take the form of Magna Centipede from X2, it'll then fire down three
ninja-stars, try to dodge them before they hit you. Keep hitting him with
the Meteor Rain and try your best to avoid his attacks.
Weakness: Meteor Rain.
Weapon Received:
Metal Anchor.

Shield Sheldon:
Guide: Shield Sheldon will be invincible when he has both his
shells attached to his body. He'll begin by moving to one corner of the room
and will throw each of his shells at you, one by one. Jump up the wall and
over them, you'll notice that Sheldon will be now open to attack. Once the
shells return to him, he'll disappear and reappear at the top of the screen.
He'll now use different forms of attacks. He might curl up into his shells
and bounce around the room, you should find it easy to dodge him. He might
also sometimes create a clone copy of himself. Make sure you hit the real
Sheldon, the real one is the one that isn't flashing. After finishing these
attacks he'll reappear in a corner and throw out his shells again. Use the
Metal Anchor to damage him significantly. Once you drain half his health, he
might begin to use a new attack after his shell-throwing one. He'll create
four energy shields around himself, and will then try to fly into X. If you
shoot the shields they'll weaken but will fire out an energy ball so be
careful. Drain one of the shields to open up a clear shot to him, or use the
Metal Anchor to break through. A second attack will be when he begins to
emits circular waves out of his body. He'll then create four shells in each
corner of the screen and will teleport to one of them. They'll fire at you
if you shoot them. Sheldon will fly around between them a few times before
recalling the shells. Keep hitting him with the Metal Anchor while trying to
dodge his attacks.
Weakness: Metal Anchor.
Weapon Received:
Guard Shell.
![]()
Infinity Mijinion:
Guide: Don't underestimate Infinity Mijinion by his size,
he's got some pretty damn strong attacks. He'll morph into the room via
small bubbles before attacking. He'll begin by firing out small energy bolts
at you which will change direction and fly down or up at X when they reach
him. Try to dodge them by jumping clear over them. He might also often
disappear and reappear in the center of the screen. He'll then drop down
into the floor and will fire out two energy balls along the ground. Small
energy bolts will also rain down from the ceiling, try to stay in the gaps
between each bolt. He might also sometimes fire out several energy balls
which will fire out in all directions. Eventually, he'll begin to use his
strongest attacks. He'll often create clones of himself which will float
around the screen. He'll also create several large bubbles which will float
toward X. Try to destroy them with the Z-Saber before they cause too much
damage. Infinity Mijinion has no direct weakness, but the charged shot of
the Guard Shell will help. You can also use the Guard Shell to reflect the
yellow beams he fires out. If the beams fire back and hit him he'll take
damage. When the four shells of the charged shot are active, try to draw him
into their line of fire, every time you hit him he'll fly across to one side
of the room and take damage. You can also stick with the X-Buster and
Z-Saber if the Guard Shell doesn't work out too well. As you keep damaging
him, he'll keep summoning more and more clones and bubbles, so you'll have a
very hard time trying to dodge everything. Having full energy tanks in
reserve will help, try to follow the real Mijinion and keep hitting him.
Weakness: Guard Shell.
Weapon Received:
Ray Arrow.
The following three bosses can be fought in the secret boss rooms found in each stage. When you enter one of these rooms for the first time before having Gate's Secret Laboratory stages active, you'll fight the Zero Nightmare, and once defeated, you'll be able to play as Zero. If you then enter another one of the boss rooms, you'll face High Max. If you manage to defeat him, you'll be able to go straight to Gate's Secret Laboratory stages without having to fight any more bosses. If you enter a boss room again after that, you'll face Dynamo in any of the eight stages. After this you'll keep facing Dynamo in each room.
![]()
Zero Nightmare:
Guide: The Zero Nightmare will be using attacks similar to
the attacks Zero used when you fought against him in X5. He'll begin by
firing out two shots, followed by a slash with his Z-Saber. A small arc of
energy will fly towards you when he slashes out, jump up or crouch down
below it to dodge it. He'll be dashing around the room often, try to stay up
the walls to dodge him. Make sure you stay well clear as he'll also often
slash out his Z-Saber. If he disappears, quickly jump up a wall as he'll try
to reappear on top of X. You can use charged shots from the X-Buster to
damage him, but if you hit him with the Z-Saber he'll take further damage.
Once you take his health down to half he'll begin to use stronger attacks.
He might often fire out a horde of energy blasts at you, jump up the wall to
dodge them. He'll dash around a lot, if he punches the ground large energy
blasts will fly up the screen from the ground, try to stay in between each
shot as they cause heavy damage. If he charges up his Z-Saber, he'll fire
out a huge arc of energy similar to Maverick Zero's unavoidable attack in
X5, but there'll be only one arc and it won't instantly kill you if it hits
X. Keep whacking him with the Z-Saber and pick off a few charged shots
whenever you can, once you defeat him, the real Zero will return and you'll
be able to play as him in any stage.
Weakness: Z-Saber.

High Max:
Guide: High Max will enter the room and taunt you before the
battle begins. He'll be using some very strong attacks, and you'll need to
have the right weapons to defeat him. Make sure you have at least one energy
tank, the Yammar Option or Magma Blade weapon, and use the Falcon Armor.
He'll be floating up in the top corners of the room for most of the battle.
High Max will begin by firing out four energy balls straight at X. Keep
moving around to dodge them, once he finishes firing four, he'll repeat the
sequence two more times. After firing off all the energy balls, he might
charge up energy in his hands. If he generates two circular rings around
himself, he'll fly down and fly straight across the screen, duck down or
dash under him to avoid him. Once reappearing down from the top of the
screen, he'll perform one of the attacks again. If he holds back his arm and
charges up energy in it, stay low or dash under him as he flies out with a
huge energy ball extended. Each time he drops back down into the screen
he'll use one of the three attacks again. He'll also often use a fourth
attack, one where he charges up a huge energy ball which will move along the
ground and up the wall. Jump up the wall and jump over the energy ball to
dodge it. To defeat him, you'll need to hit him with a fully charged shot of
the X-Buster first. When you hit him, he'll freeze and will begin to flash.
Quickly hit him with the Yammar Option or the Magma Blade before he stops
flashing. If you successfully hit him, he'll drop to the ground and take
damage. Once you successfully manage to take his health down to half, he'll
begin to use a much stronger attack. High Max will float over to the center
of the screen and will charge up a huge energy ball over himself. He'll then
create four smaller energy balls, each one will fly straight at X so you'll
have some trouble dodging them. He'll keep firing out the smaller energy
balls, so quickly try to hit him as he floats in the air. You'll find
defeating High Max will be very difficult, but if you have enough energy and
energy tanks in reserve, you should be able to beat him after some practice.
Once you manage to defeat High Max you'll be able to go straight on to
Gate's Secret Laboratory stages.
Weakness: Magma Blade/Yammar Option.
![]()
Dynamo:
Guide: Dynamo will be using similar attacks to the ones he
used in X5, but with stronger versions. He'll often fire out four swinging
blades which will fly straight at X. Try to dodge them as they fly past.
Once he's thrown out four, each one will fly back to him, make sure you stay
out of their way. If he jumps to one side of the screen, quickly jump up the
wall behind him as he'll punch the ground and cause huge energy beams to
fill the screen. Blast away at him with the X-Buster of use the Z-Saber. If
you have the Meteor Rain, use that to damage him further, when you hit him
once he'll be temporarily stunned. If you hit him again before he recovers
he'll fly across the screen and drop a Nightmare Soul. Make sure you pick it
up, as you'll receive a whopping 200 Souls if you get it in time. Once his
health is half gone, he'll jump into the center of the screen and will
continuously fire out spinning blades at you. Keep moving to dodge them.
Once he finishes, he'll jump at X and slash out with a large blade, stay
above or below him to dodge the blade. Keep hitting him with either the
X-Buster, Z-Saber or Meteor Rain and you should defeat him fairly easily.
Weakness: Meteor Rain.
![]()
Nightmare King:
Guide: At the end of the first Gate's Secret Laboratory
stage, you'll face two huge DNA blocks with metallic eyes in the center of
each. They'll take up a lot of space in the room, so you'll need to move
around quickly. As this stage is incredibly difficult to get through without
the Shadow Armor, this guide will assume you have the Shadow Armor equipped.
The two blocks will take up positions in two corners of the large room. Once
the battle begins, they'll either begin moving around in a clockwise or
anti-clockwise pattern around the room. As soon as they begin to move,
quickly jump up the wall and follow them around, you'll need to be very
quick to avoid being hit by one. After moving around the room six or seven
times, one of the blocks will move to line up with the other. Once they're
both in line, each eye will move out of the center of the blocks and emerge
out into the open. It'll now be open to attack. If the eyes are moving out
near the ground, attack one from the ground, otherwise try to jump up a wall
to attack one. Slash away with the Z-Saber, but if you're on the ground,
wait until the eye is close enough, then use the Giga Attack. The two
crescent-shaped beams will trash the eye, draining a lot of energy. When the
eyes are fully out, they'll perform different attacks. Sometimes they'll
fire out small water blasts, when they hit the walls and floor they'll crawl
along the ground/walls before dissipating. Try your best to dodge it. The
eyes will also often fire out a barrage of fireballs, the fireballs will
shoot up into the sky then drop down, try to stay between them as they fall.
The eyes will also sometimes create electric fields which will appear over
the screen, try your best to avoid them. If a huge fire wave appears on the
floor, stay up the walls to avoid it. Once you destroy one of the eyes, the
block will remain. After taking down half of the overall boss' health, the
blocks may begin to move around the screen faster. Try your best to keep up
with them to avoid the blocks. Wait for the second eye to be in firing
range, then continue to hack away with the Z-Saber or use the Giga Attack
(if you have enough energy for it). You shouldn't find beating this boss to
be too difficult after some practice.
Weakness: Giga Attack.
High Max:
Guide: Halfway through the second Gate's Laboratory stage
you'll have to face High Max for the last time. He'll be using stronger
attacks than in the previous battle, so you'll have to be quick to dodge
him. He'll begin by creating a heavy deflector shield on both sides of his
body. You won't be able to shoot through the shields, you'll just have to
wait until they come down. He'll move up into the corner of the screen and
then lower down to the ground. Quickly jump up the wall and get ready to
mid-air dash over him as he flies over across the screen. He'll come back
down again and often repeat the screen-dash. If he flies back down and stops
at the top corner of the screen, he'll begin to charge up energy in his
hands. If you hear him say something, he'll release a huge purple energy
ball which will move across the ground and up the opposite wall. Jump over
it as it passes along the floor. Once the ball disappears up the wall, he'll
either lower down and continue his screen-dashing move, or he'll charge up
more energy in his hands. If he charges up energy without saying anything,
stay on the ground as he'll release the shields and they'll fly across the
screen. Now is the time to attack. With his shields gone, charge up the
X-Buster and fire off a shot at him. He'll freeze and begin to flash. Keep
the Yammar Option or the Magma Blade out, and quickly hit him with either
weapon before he stops flashing. Stay clear, as once you hit him he'll drop
to the floor and take damage. After recovering himself, High Max will call
back the shields and continue his screen-dash move. Wait until he releases
the shields again before attacking. You can also destroy the shields with
sustain fire from the X-Buster, but if you do be quick to attack him as
he'll restore it quickly. Once you drain half of his health, he might
sometimes combine the two shields together, they'll then begin to fly around
the room while firing small energy balls at X. Try your best to dodge them.
This battle will take a long time to finish, but if you're fast and know his
attack patterns, you should be able to survive without taking too much
damage. Once you finally defeat High Max you'll reappear in the second half
of the stage, continue on to the end of it for the final showdown against
Gate.
Weakness: Magma Blade/Yammar Option.

Gate:
Guide: Gate will confront you at the end of the second Gate's
Laboratory stage, and will be using a highly dangerous new battle body. The
room will be full of small platforms for you to stand on, just make sure you
don't fall into the hole below. Gate will be flying around during the entire
battle, so he won't have to worry about needed something to stand on. He'll
use one main attack with a few variations. Once the battle begins he might
fly straight at you. He'll be charging at you quite often, so be ready to
move when he does. When he flies at you, jump up and mid-air dash over to
the platform up against the opposite wall. To make it easier, keep flying
back and forth across the two platforms near the walls to dodge his charge
attacks. His main form of attack will be that of firing out large energy
balls at you. Move quickly as the balls will land just where you're
standing, then they'll perform an attack depending on the ball's color. If
the color is blue, it'll begin to suck you into it with a black-hole like
effect. Try to stay well away from it so Gate doesn't trap you while causing
damage. If the ball is red, your character will go into slow motion while
Gate remains at normal speed, try your best to avoid being hit. If the ball
is purple, it'll begin to flash and then will send out several Nightmares,
try to destroy them quickly before they begin to annoy you. If the ball is
green, it'll follow you around the room and try to ram X, so keep moving to
avoid it. Finally, if the ball is orange it'll fire out a small energy ball
at you, it should be fairly easy to avoid. Gate will continue to use his
charge and energy ball attacks. You'll find that absolutely no weapon in
your arsenal will even slightly damage Gate, so you'll need to use his own
weapons against him. When he fires out an energy ball, move away and start
firing at it with the X-Buster, or slash away with the Z-Saber. Once you
destroy the ball, six smaller energy balls will fly out, three each to the
left and right, try to avoid being hit by them, but if you take damage don't
worry as it'll only take a tiny bit of health off. If one of the flying
energy balls hits Gate it'll damage him. This is the only way you can
inflict damage on Gate. Keep using this technique, then once you take down
half his health, he'll begin to use stronger attacks. He'll often charge at
you and then release a large purple vertical beam of energy directly in
front of him, stay well clear to avoid it. He might also fire out more than
one energy ball at a time. Energy tanks and the Life Recover part will
greatly help you out here, but keep avoiding his attacks while destroying
the energy balls to damage him, and you'll eventually defeat Gate. Once he's
beaten he'll reveal a dark secret...
Weakness: Energy Balls.

Sigma:
Guide: Sigma will enter the room in his badly beat-up body
before crashing to the floor. He'll slowly rise, and will taunt X before the
battle begins. He'll be very slowly moving towards X, make sure he doesn't
corner you up against the walls. He'll use several different types of
energy-based attacks. If he looks as if he's about to fire something from
his head, he'll fire out a fast moving energy ball straight at X. Try to
dodge it as best you can, but it's speed will make it tough to dodge. He
might also often fire up a huge green energy beam. It'll hold still for a
while before slowly moving towards X. You'll find it difficult to dodge so
just try to dash over the top of it by jumping up a wall. He might fire off
the small energy balls while the green beam is active so you might take some
damage before it leaves. Use the Metal Anchor to cause serious damage to
Sigma. Once hit by an anchor, he'll fly over to one corner of the screen and
fall over. He'll fire out three small purple balls onto the ground as he
hits the wall, try to stay back from them. He'll also release several large
energy sparks, they'll all fly straight at X, quickly jump up the wall and
dash over them as they pass. Once you take his health down to half, he'll
use stronger attacks. He'll begin to charge up small green energy balls,
they'll then form into a large purple energy wave that will fly across the
screen. Sigma will continue to create the energy waves, try your best to
dodge them. You can also use the Metal Anchor to destroy the sparks he fires
out after falling over, and if you hit the large vertical energy wave he
fires with the Metal Anchor, it'll move back towards him, enabling you to
dodge the beam. Try not to waste more than one energy tank during this
battle, and also have the Life Recover part equipped, it'll help out
greatly. Once you manage to destroy Sigma he'll transfer to his final battle
body.
Weakness: Metal Anchor.
Sigma's Final Form:
Guide: Sigma's final form will be a massive skeletal shaped
mechaniloids, and will be taking up almost the entire space of the room. The
head part of the body will be the primary unit that will attack you, and
will also be the source of the body's weak point. You won't have much room
to move around in so you'll have to be quick. The head will begin by firing
out large green objects from it's forehead. When the objects land on the
ground or the side of the screen they'll form into smaller green heads.
They'll move around a lot and will try to ram X, you'll need to blast them
with the X-Buster or Z-Saber before they crowd in too much. The higher-up
ones will also fire down small energy bolts. One of the objects will become
a moving platform with a spike attached to the bottom of it, try to avoid
touching it. If Sigma's head opens up, stay below it as it'll fire out a
massive green energy beam to the left that will shred all of the green
objects in the way. If the head opens and a green energy pad appears on the
floor, quickly dash away from it as a huge energy beam will shoot up out of
it. He'll fire off two or more of the huge beams, try to stay out of their
firing range. After firing off the beam he'll fire out the green objects
again. Keep in mind that some of the green heads will drop energy or weapon
capsules, make sure you pick them up if you need energy. None of your
weapons can damage any part of the body, except for the inside of the head's
mouth. You'll need to wait for the head to open up, then hit the inside of
it with the Ground Dash to cause heavy damage. You can also use the X-Buster
or Z-Saber to cause damage. If you've got the Shadow Armor equipped, use a
charged saber shot to cause massive damage when the mouth opens up, if you
hit the inside successfully you'll cause multiple damage hits. Once you take
his health down to half, he'll begin to use a much more powerful attack. If
his head opens he'll fire out a small energy ball either towards the top of
the screen of down towards the floor. Once it hits the roof or floor it'll
fire out two gigantic energy balls to the left and right, they'll be very
difficult to dodge. If he fires them up towards the ceiling, stay low, but
if he fires them down to the floor jump up on top of the moving platform (if
it's there). If you have the Ultimate Armor, use the Nova Strike when the
huge energy balls fly past to avoid them. Each time he fires out the small
energy ball, try to hit him quickly before his mouth closes. Whenever he
opens his mouth, stand back a bit so that when you jump up and hit him, you
won't accidentally ram into the head. Keep firing away at the green heads,
as the energy/weapon capsules they drop are very handy. Make sure you have
both energy tanks full and have the Life Recover part equipped before taking
Sigma on, and don't hesitate to use them. Try to avoid the annoying platform
as it moves around the screen, keep firing at it to eventually destroy it.
Keep avoiding Sigma's attacks, and keep attacking the head when it opens.
Persist and you'll eventually win against Sigma. It'll be a very challenging
battle, but with skill and practice, you'll make it through.
Weakness: Ground Dash.
CONGRATULATIONS!!!
You finished Mega Man X6 with X.
Commander Yammark:
Guide: Commander Yammark will be using similar attacks to
when fighting him with X, but he'll have some variations. He'll often send
out the dragonflies to fly straight at Zero, make sure you get well out of
their way before they hit you. If you have the Rekkoha, use it as many times
as possible to cause huge damage to Yammark, otherwise just slash away with
the Z-Saber. Once you take his health down to half, get ready to move around
quickly once he begins to fly around the room. Keep hacking away at him, use
Z-Buster shots every now and then, and you shouldn't have too much trouble
beating him.
Weakness: Rekkoha.
Technique Learned: Yammark
Option.
Ground Scaravich:
Guide: Ground Scaravich's
boulders will be deadly against Zero. He'll use the same attacks as when
fighting X, but Zero won't be able to take as many hits as X could. Once
Ground Scaravich begins to roll the boulder around, hack away at him from
behind to cause heavy damage. You can also use the Yammar Option to damage
him further. As you damage him, he'll begin to create larger boulders. Make
sure you don't get hit by them at all. Blast away at them with the Z-Buster
or hack away with the Z-Saber to destroy the boulders. If you can't, use the
poles up above to avoid the boulder. Be very careful is he kicks the boulder
after rolling it into the center of the screen. It'll bounce forward,
quickly dash under it as it moves overhead. After the boulder disappears
he'll call down another boulder from above and kick it towards Zero. Dash
under the boulders as they bounce over. Keep persisting against Scaravich
and you'll eventually destroy him.
Weakness: Yammar Option.
Technique Learned: Sentsuizan.
Blaze Heatnix:
Guide: Blaze Heatnix will be
difficult to defeat with Zero. His weakness is the Sentsuizan, but it'll be
very difficult to hit him with it without accidentally falling into the lava
below. Instead just use the Z-Saber or Z-Buster. You can also destroy the
fireballs he shoots out with the Z-Saber, so whenever he's up out of the
lava, hack away. He'll be using the same attacks that he does against X, so
remember his attack patterns. If he causes the lava to appear at the top of
the screen, drop down and hack away with the triple-swing to cause heavier
damage. Just be very careful if he flies off screen, get ready to dodge his
massive Nova Strike-like attack. It'll be a fairly long and tough battle,
but with practice and skill you shouldn't have too much trouble beating him.
Weakness: Sentsuizan.
Technique Learned: Shoenzan.
Blizzard Wolfang:
Guide: Blizzard Wolfang will use
a new attack during this battle, as well as all the others he had when using
X to fight him. Once the battle begins, get ready to jump over him if he
charges, or dash under him if he jumps. Instead of launching the ice blocks
into the sky, he'll fire them straight at Zero, make sure you get out of
their way as they pass. Use the Shoenzan attack to cause heavy damage to
Wolfang. It'll be difficult to hit him without accidentally sliding into
him, so when he fires an ice block, jump over the block and land right next
to him. Perform the attack and you should avoid being hit. Another good
tactic is to stand still and whack him with it when he charges at you or
jumps over. When he begins to use the ice spike-attacks, stay in a corner
and hack away at the spikes with the Z-Saber or the Z-Buster. Whack him
again when he lands nearby. Keep pelting Wolfang with the Shoenzan and you
shouldn't have too much difficulty here.
Weakness: Shoenzan.
Technique Learned: Hyoroga.
Rainy Turtloid:
Guide: Rainy Turtloid will be
difficult to beat with Zero. He'll use the same attacks as when fighting X,
but you'll need to use the Z-Saber to attack him with. His weakness is the
Hyoroga, but you won't be able to reach the ceiling to perform the
upside-down attack. Instead, hack away with the Z-Saber on the two green
crystals, once they blow hack into Rainy's back. Stand on the ground and
keep hacking away when he sends out the missiles, you should be able to
destroy them all before any get through. Keep hacking away a few more
seconds, then quickly move away when Rainy curls up and creates the spikes
on his back. Make sure you don't get hit when he rolls around as he'll cause
major damage to Zero if he hits him. Keep dodging Rainy's attacks and you
shouldn't find beating him to be too difficult.
Weakness: Hyoroga.
Technique Learned: Ensuizan.
Metal Shark Player:
Guide: Metal Shark Player will be
using the same attacks as he did when battling X, except he'll summon a new
Maverick. Try your best to dodge him as he moves around the screen, he'll
cause heavy damage if he strikes Zero. Dodge the anchor he fires out, and
jump up the wall when he dives under the junk. Use the Ensuizan to heavily
damage him. When you hit him he'll be stunned and will take heavy damage.
Once his health goes down to half, he'll begin to use his Maverick-summoning
move. Instead of creating a form of Magna Centipede, he'll create a form of
Sting Chameleon from the first X game. Sting will then fire out his very
long tongue to try and hit Zero. Jump up the walls to dodge him. He'll
disappear, then reappear somewhere else before firing out his tongue again.
Strike Metal Shark to stop the attack. You shouldn't have too much
difficulty beating him.
Weakness: Ensuizan.
Technique Learned: Rakukojin.
Shield Sheldon:
Guide: Shield Sheldon will be
tough to beat with Zero. Try to dodge his shells as best you can, as they
cause heavy damage to Zero. You'll need to wait again until he fires off
both shells before you can hit him. When he throws the two shells out, jump
up the wall and over them. Quickly rush over to Sheldon and perform the
Rakukojin attack to cause heavy damage. If Sheldon creates the clone of
himself, hack away at the real one with the Z-Saber. If he creates the four
energy shields, try your best to avoid touching them, they cause severe
damage. Whack Sheldon with the Z-Saber through the shield, but if you get
hit, quickly use the Rakukojin before Zero stops flashing. Persist with your
attacks and you should be able to defeat him before he causes too much
damage.
Weakness: Rakukojin.
Technique Learned: Guard Shell.
![]()
Infinity Mijinion:
Guide: Infinity Mijinion will be
as tough as ever. You'll be able to use the Guard Shell to reflect the small
yellow beams he fires out back at him, and the Z-Saber will do fine to cause
significant damage. He'll be using his intense clone and bubble attacks, but
if you use the Ensuizan, you can very easily destroy the clones and bubbles
without taking any damage. If you hit Infinity with the Z-Saber, he'll fly
back and take heavier damage. After hitting the wall he'll create more
bubbles and clones, get ready to destroy them. Zero will take heavier damage
whenever something hits him, so it'll be a good idea to have an energy tank
or two in reserve. You can also try using the Ensuizan if you can corner
him, you'll keep causing him damage while destroying the clones/bubbles. As
with X, it'll be difficult to defeat Infinity, but keep persisting and
you'll win through.
Weakness: Guard Shell.
Technique Learned: Rekkoha.
The following two bosses can be fought in the secret boss rooms found in each stage. When you enter one of these rooms for the first time with Zero before having Gate's Secret Laboratory stages active, you'll face High Max. If you manage to defeat him, you'll be able to go straight to Gate's Secret Laboratory stages without having to fight any more bosses. If you enter a boss room again after that, you'll face Dynamo in any of the eight stages. After this you'll keep facing Dynamo in each room. You won't be able to face the Zero Nightmare with Zero for obvious reasons.
High Max:
Guide: High Max will be very
difficult to beat with Zero, as his attacks will cause major damage to Zero.
Make sure you have the Ensuizan technique, it'll make hitting High Max much
easier. You can use the Shoenzan to freeze High Max, but if you rapidly hit
him with the Ensuizan, he'll freeze and drop down while taking damage. Just
make sure you stay well away from him so that you avoid accidentally hitting
him as he drops. Use the same techniques as with X to dodge his relentless
attacks, but once you manage to take down half his health he'll begin to use
the stronger energy ball attack. If you have energy tanks, don't hesitate to
use them as you'll find it very difficult to dodge his energy balls. Keep
trying to hit him with the Ensuizan, after some practice and determination
you should be able to beat him.
Weakness: Shoenzan/Ensuizan.
![]()
Dynamo:
Guide: Dynamo will be very easy
to defeat with Zero if you have the Ensuizan technique available. Once the
battle begins, use the same techniques as with X to avoid Dynamo's attacks,
then hack away at Dynamo when he's not throwing around the spinning blades.
If you have the Ensuizan, whack him once to stun him, then hit him again to
cause severe damage. He'll fly across the room and drop a Nightmare Soul.
Pick it up and continue attacking him. Keep in mind that if he fires out any
spinning blades, hit them with the Ensuizan to deflect them. Whack him
further with the Ensuizan, or just use the Z-Saber to beat him. You won't
find defeating Dynamo to be too difficult.
Weakness: Ensuizan.
![]()
Nightmare King:
Guide: This boss will be very
tough to beat using Zero, so you might want to stick with X if you don't
want to have much trouble. It's attacks will cause major damage to Zero, and
you'll only be able to damage the eyes with the Rakukojin or the Z-Saber, so
you'll have difficulty fighting it. Whenever the eyes move out on the floor,
use the Rakukojin near one to seriously damage it, or slash away with the
Z-Saber. Try not to get hit as Zero takes ages to recover from a hit than
the time it takes X to recover. If you have too much trouble fighting this
boss with Zero, just use X instead, you'll find it much easier then.
Weakness: Rakukojin.
High Max
Guide: High Max will not be too
difficult to beat with Zero (if you can get to him, that is). Once again,
you'll have a much easier (and far less frustrating) time getting through
this stage with X. High Max will be using the same attacks as when battling
X, but they'll cause Zero much more damage, so you'll have to be careful.
Whenever he isn't charging up an attack, quickly whack him with the Ensuizan,
but stand back before he falls down. You'll also find that Zero can hit High
Max even when he has his shields up, so the battle shouldn't last too long.
Make sure you dodge his attacks, and you shouldn't have too much trouble
beating High Max. Once you defeat him you'll proceed on to the final part of
the stage.
Weakness: Shoenzan/Ensuizan.
Gate:
Guide: Gate, as with High Max,
will not be too difficult to beat with Zero. You'll have to dodge the energy
balls he fires as they'll cause more damage to Zero than they did with X,
but if you're quick enough you should avoid being hit. Use the same tactics
as with X to dash over him whenever Gate charges, and when he fires out an
energy ball, jump up above the ball when it stops and hack away at it with
the Ensuizan. If you manage to destroy it while floating above it, you'll
avoid taking damage from the smaller energy balls that fly out, otherwise
you'll need to jump up quickly to avoid being hit. The smaller balls will
fly out and hit Gate, causing damage. Once you take his health down to half,
he'll begin to use the stronger energy beam attack. You shouldn't have too
much trouble avoiding the beam. Keep using the Ensuizan and you should
eventually beat Gate without much trouble.
Weakness: Energy Balls.
Sigma:
Guide: Sigma's first form will be
tough to beat with Zero, as his attacks can cause heavy damage. You'll need
to try and avoid taking too much damage to save energy for the second part
of the battle. Make sure you have both energy tanks full, and have the Life
Recover part equipped, they can greatly help you out. Try to keep both tanks
for the second part of the battle against Sigma. When he begins to slowly
move towards Zero, quickly jump forward right next to him and use the
Rakukojin attack. If you miss hitting him with the huge blade, the metal
anchor that flies out when you hit the ground should get him. Once Sigma's
hit, he'll fly over to the corner and spew out the three purple balls as
well as the electric sparks. Quickly jump over to the other wall and up over
the sparks as they fly towards you. You can also try to use the Ensuizan
against Sigma, it'll be very effective as he doesn't move too much, you'll
also be able to use the Ensuizan to repel the large vertical green beam
Sigma fires out. Keep ripping into Sigma with both the Rakukojin and the
Ensuizan, and you should be able to beat him, just try not to take too much
damage and don't use any energy tanks or the Life Recover part yet. If you
want to make the battle much, much easier to finish, just use the Z-Buster
on Sigma. Each hit will cause heavy damage to him, and you should be able to
defeat him taking little to no damage at all using this trick. Once you
defeat Sigma the hardest part of the battle will rise.
Weakness: Rakukojin.
Sigma's Final Form:
Guide: Sigma's final form, like
the one in X5, will be incredibly tough to beat with Zero. He'll be using
the same attacks as when battling X, but they'll cause much more damage to
Zero, so you'll have to try your best to avoid being hit by the green heads,
as well as the massive energy beam attacks the head performs. When the
battle begins, stay under Sigma's head to avoid all the green heads the
forehead fires out. When the heads appear, hack away at them with the
Ensuizan, you should be able to destroy them easily with this move, just get
ready to get out of the way if one of the heads fires at Zero. Remember to
pick up the energy capsules some of the heads drop, they'll really help you
out in this battle. You'll be able to destroy the moving platform with
repeated hits from the Ensuizan, so try to make sure the platform doesn't
get in your way. When Sigma fires out the huge beam out of his mouth, stay
below the head and wait for the beam to disappear. If he fires out the beams
from the floor, keep out of their way as they appear. Try your very best not
to get hit by any of the beams, they cause serious damage to Zero. Most of
your special techniques will not be able to damage Sigma's mouth, but the
Ensuizan will damage it. Whenever the mouth opens up, try to damage it as
much as possible before it closes. You'll only cause a little damage to
Sigma whenever you hit his mouth with the Ensuizan, so you'll need to be
able to hold out a while during this battle. Use the energy tanks or the
Life Recover part when you need to, and remember to destroy the green heads
often to pick up life energy refills. Once you take his health down to half
he'll start to use the massive energy ball attack. If the small ball flies
to the top of the screen, crouch down as the two huge balls fly past,
otherwise try to double-jump up as they fly past, or use the Hyoroga to jump
up the ceiling as he fires off the energy balls. The huge energy balls will
be your biggest threat, he'll fire out several before firing out the green
heads again, so try to hold out as best you can and grab some life energy
refills from the green heads when Sigma begins firing them out again. This
battle will greatly test your skills in using Zero, Sigma will be very tough
indeed to beat, but with practice and skill, you should eventually win
through.
Weakness: Ensuizan.
CONGRATULATIONS!!!
You finished Mega Man X6 with Zero.
Armor Parts
Locations:
Blade Armor:
 Leg Part - Found in Commander Yammark's stage.
The Boots
upgrade is found in Commander Yammark's stage. Just after you drop down into the
first underground area, you should see an opening in the wall on the right
behind the praying mantis-type enemy. Head through and on to find the capsule
behind a trapped Reploid. The boots part of the Blade Armor will allow X to
perform the Mach Dash - a powerful mid-air dash. To use it, jump up and hold the
dash button. X will stop and freeze mid-air, once you release it he'll dash left
or right a fair distance and be invincible for a short time. If you hold up and
release the dash button he'll dash straight up.
Leg Part - Found in Commander Yammark's stage.
The Boots
upgrade is found in Commander Yammark's stage. Just after you drop down into the
first underground area, you should see an opening in the wall on the right
behind the praying mantis-type enemy. Head through and on to find the capsule
behind a trapped Reploid. The boots part of the Blade Armor will allow X to
perform the Mach Dash - a powerful mid-air dash. To use it, jump up and hold the
dash button. X will stop and freeze mid-air, once you release it he'll dash left
or right a fair distance and be invincible for a short time. If you hold up and
release the dash button he'll dash straight up.
 Arm Part - Found in Infinity Mijinion's stage.
The X-Buster
upgrade is found in Infinity Mijinion's stage. This capsule will be very easy to
find. Once you destroy the second large cable which causes the Giant Reploid in
the background to explode, a teleport portal will appear. Jump in to teleport to
the area leading to the secret boss room. Once you reappear, head left to find
the capsule sitting alongside an energy heart. The X-Buster part of the Blade
Armor will give X a new charged shot which will leave plasma blasts behind when
it strikes an enemy to cause further damage. You can also perform a special
Z-Saber attack by holding up while releasing fire after charging up the
X-Buster.
Arm Part - Found in Infinity Mijinion's stage.
The X-Buster
upgrade is found in Infinity Mijinion's stage. This capsule will be very easy to
find. Once you destroy the second large cable which causes the Giant Reploid in
the background to explode, a teleport portal will appear. Jump in to teleport to
the area leading to the secret boss room. Once you reappear, head left to find
the capsule sitting alongside an energy heart. The X-Buster part of the Blade
Armor will give X a new charged shot which will leave plasma blasts behind when
it strikes an enemy to cause further damage. You can also perform a special
Z-Saber attack by holding up while releasing fire after charging up the
X-Buster.
 Body Part - Found in Shield Sheldon's stage.
The Armor
upgrade is found in Shield Sheldon's stage. The Speedster or Hyper Dash part
will help here, use either Zero or X's Falcon Armor to reach it. Head down to
the teleport portal which leads to the secret boss room, but once you drop down
out of the room with the reflecting lasers and into the room with the floor
lined with spikes, jump through the wall on the left and you'll find a large
hole ahead. Jump up and rescue the trapped Reploid floating above, then jump out
left as far as you can go and mid-air dash to the left. You should hopefully
manage to grab onto the edge of the platform ahead, the capsule will be waiting
just ahead. The Armor part of the Blade Armor will give X a stronger defense
power, and will also give him a special Giga Attack move, unique to the Blade
Armor.
Body Part - Found in Shield Sheldon's stage.
The Armor
upgrade is found in Shield Sheldon's stage. The Speedster or Hyper Dash part
will help here, use either Zero or X's Falcon Armor to reach it. Head down to
the teleport portal which leads to the secret boss room, but once you drop down
out of the room with the reflecting lasers and into the room with the floor
lined with spikes, jump through the wall on the left and you'll find a large
hole ahead. Jump up and rescue the trapped Reploid floating above, then jump out
left as far as you can go and mid-air dash to the left. You should hopefully
manage to grab onto the edge of the platform ahead, the capsule will be waiting
just ahead. The Armor part of the Blade Armor will give X a stronger defense
power, and will also give him a special Giga Attack move, unique to the Blade
Armor.
 Helmet Part - Found in Ground Scaravich's stage.
The Helmet
upgrade is found in Ground Scaravich's stage. This capsule will be difficult to
find, as it's hidden in one of the random totem pole areas, so it might take a
while for you to find it. Once you land in the correct area you should spot the
capsule straight away, sitting up on a ledge. Jump up to the capsule to trigger
it off. The Helmet part of the Blade Armor will allow X to consume less energy
while using special weapons than normal.
Helmet Part - Found in Ground Scaravich's stage.
The Helmet
upgrade is found in Ground Scaravich's stage. This capsule will be difficult to
find, as it's hidden in one of the random totem pole areas, so it might take a
while for you to find it. Once you land in the correct area you should spot the
capsule straight away, sitting up on a ledge. Jump up to the capsule to trigger
it off. The Helmet part of the Blade Armor will allow X to consume less energy
while using special weapons than normal.
Shadow Armor:
 Leg Part - Found in Blizzard Wolfang's stage.
The Boots
upgrade is found in Blizzard Wolfang's stage. You'll need Zero or X with the
Blade Armor equipped to reach this one. When you reach the end of the first part
of the stage, you'll reach an area with a sloping ridge with huge ice blocks
falling down. You should spot a platform up above the base of the slope, use
either Zero's double jump or the Blade Armor's Mach Dash to reach the top of the
platform. Once there, head right to find the capsule behind more falling ice
blocks. This upgrade will allow X to jump up to a ceiling while hanging
upside-down. Press fire while hanging to fire down three shots. You can also
dash left and right while hanging upside-down. You can also stick to walls
without sliding down, and can walk on spiked areas without losing a life.
Leg Part - Found in Blizzard Wolfang's stage.
The Boots
upgrade is found in Blizzard Wolfang's stage. You'll need Zero or X with the
Blade Armor equipped to reach this one. When you reach the end of the first part
of the stage, you'll reach an area with a sloping ridge with huge ice blocks
falling down. You should spot a platform up above the base of the slope, use
either Zero's double jump or the Blade Armor's Mach Dash to reach the top of the
platform. Once there, head right to find the capsule behind more falling ice
blocks. This upgrade will allow X to jump up to a ceiling while hanging
upside-down. Press fire while hanging to fire down three shots. You can also
dash left and right while hanging upside-down. You can also stick to walls
without sliding down, and can walk on spiked areas without losing a life.
 Arm Part - Found in Blaze Heatnix's stage.
The X-Buster
upgrade is found in Blaze Heatnix's stage. You'll need the same requirements to
reach this as you did for the heart and energy tank in this stage. Once you
reach the tall shaft leading up to the heart, head up there and keep going to
the very top of the shaft. You should then easily spot this capsule sitting up
on a platform at the top. This upgrade will allow X to perform a deadly
charged-saber attack, as well as giving him a new standard shot, small
ninja-star shaped projectiles that fly out in different directions.
Arm Part - Found in Blaze Heatnix's stage.
The X-Buster
upgrade is found in Blaze Heatnix's stage. You'll need the same requirements to
reach this as you did for the heart and energy tank in this stage. Once you
reach the tall shaft leading up to the heart, head up there and keep going to
the very top of the shaft. You should then easily spot this capsule sitting up
on a platform at the top. This upgrade will allow X to perform a deadly
charged-saber attack, as well as giving him a new standard shot, small
ninja-star shaped projectiles that fly out in different directions.
 Body Part - Found in Rainy Turtloid's stage.
The Armor
upgrade is found in Rainy Turtloid's stage. You need the Blade Armor to reach
this one. Once you reach the final acid rain area before Rainy's room, instead
of dropping down to the area with all the cores down small alcoves, jump across
to the other side beyond the health pod, and you should find a small opening in
the wall lined with spikes. This next part will be tricky, as you need to use
the Mach Dash and aim very carefully so you fly between the spikes. Jump up,
then just before you hit the ground activate the dash, hold it down to check and
see if you're in the right position. If it looks low enough, release the dash
button and you should hopefully fly through the gap and land on the other side.
Jump up to reach the trapped Reploid above, then use the same technique as
before to make it through the next spike-filled gap to find the capsule. This
upgrade gives X a new type of Giga Attack, one where two large crescent-shaped
projectiles will fly around X and cause serious damage to any enemies in range.
Body Part - Found in Rainy Turtloid's stage.
The Armor
upgrade is found in Rainy Turtloid's stage. You need the Blade Armor to reach
this one. Once you reach the final acid rain area before Rainy's room, instead
of dropping down to the area with all the cores down small alcoves, jump across
to the other side beyond the health pod, and you should find a small opening in
the wall lined with spikes. This next part will be tricky, as you need to use
the Mach Dash and aim very carefully so you fly between the spikes. Jump up,
then just before you hit the ground activate the dash, hold it down to check and
see if you're in the right position. If it looks low enough, release the dash
button and you should hopefully fly through the gap and land on the other side.
Jump up to reach the trapped Reploid above, then use the same technique as
before to make it through the next spike-filled gap to find the capsule. This
upgrade gives X a new type of Giga Attack, one where two large crescent-shaped
projectiles will fly around X and cause serious damage to any enemies in range.
 Helmet Part - Found in Shark Player's stage.
The Helmet
upgrade is found in Metal Shark Player's stage. You'll need the Blade Armor with
either Speedster or Hyper Dash equipped to reach this one. Once you reach the
second compacter area, head through until you find a ladder leading down.
Instead of going down, head left (destroy any brown blocks in the way with the
Ground Dash) and you'll find that the room extends further. Wait until the
compacter rises, then quickly keep dashing to the left until you drop off the
platform to find another ladder. Head down and you'll drop down into a new area.
Go right until you find a huge hole. Destroy the three Nightmares there, then
jump out as far as you can go over the hole, then use the Mach Dash to reach the
other side. You'll spot the capsule just ahead as well as a trapped Reploid and
the teleport portal leading to the secret boss room. This upgrade allows X to
swing his Z-Saber at a faster rate than normal.
Helmet Part - Found in Shark Player's stage.
The Helmet
upgrade is found in Metal Shark Player's stage. You'll need the Blade Armor with
either Speedster or Hyper Dash equipped to reach this one. Once you reach the
second compacter area, head through until you find a ladder leading down.
Instead of going down, head left (destroy any brown blocks in the way with the
Ground Dash) and you'll find that the room extends further. Wait until the
compacter rises, then quickly keep dashing to the left until you drop off the
platform to find another ladder. Head down and you'll drop down into a new area.
Go right until you find a huge hole. Destroy the three Nightmares there, then
jump out as far as you can go over the hole, then use the Mach Dash to reach the
other side. You'll spot the capsule just ahead as well as a trapped Reploid and
the teleport portal leading to the secret boss room. This upgrade allows X to
swing his Z-Saber at a faster rate than normal.
Ride Armor Locations:
 Ride Armor - Assist in battle - Found in Metal Shark Player's stage.
The Raiden
Armor is found in Metal Shark Player's stage only. You'll be able to use it in a
similar way to the ones available in X4 & X5, with the single drill punch
attack, the huge swipe attack and the charge attack (hold fire). For the two
areas that the carrier is in, you'll be able to use it without worrying about
being crushed by the compacter. If the compacter lands on top of you while
you're in the carrier, it'll stop and you won't take any damage. This can help
you greatly to get through the compacter areas.
Ride Armor - Assist in battle - Found in Metal Shark Player's stage.
The Raiden
Armor is found in Metal Shark Player's stage only. You'll be able to use it in a
similar way to the ones available in X4 & X5, with the single drill punch
attack, the huge swipe attack and the charge attack (hold fire). For the two
areas that the carrier is in, you'll be able to use it without worrying about
being crushed by the compacter. If the compacter lands on top of you while
you're in the carrier, it'll stop and you won't take any damage. This can help
you greatly to get through the compacter areas.
Heart Tank Locations:
Heart Tank - Increase the energy bar - Found in all 8 stages.

This first heart is found in Commander Yammark's stage. Once you reach the inner ice-cave area, you'll eventually spot a pole leading down, head down and move on to the right. When you spot a Nightmare ahead hovering over a trapped Reploid, rescue the Reploid and drop down the hole just in front of him. You'll land in a lower cavern containing two trapped Reploids, a Nightmare and the heart. Destroy the Nightmare, rescue the two Reploids and grab the heart before leaving.

The second heart is in Ground Scaravich's stage. This heart will be difficult to reach as you'll need to find the correct sub-level area within a totem pole, and as most of the totem pole areas are random, it might take a few tries to find it. Once you find the right area, you'll find this heart just before reaching the end, it'll be in plain view so you can't miss it.

The third heart is in Blaze Heatnix's stage. You'll need Zero to reach this, or X's Blade Armor with Speedster or Hyper Dash equipped. You can also reach this heart if the silver blocks are present in the stage. Once you destroy the second large wheel-shaped Mechaniloids, you'll reach a tall room with two doors leading on. Jump up to the higher door, then jump up the wall on the left. You should see a trapped Reploid and a Nightmare above up on a ledge, use Zero's double jump to reach the gap and climb up, or with X the Mach Dash equipped with Hyper Dash or Speedster should allow you to reach the opening. Behind one of the trapped Reploids above is the heart.

The fourth heart is found in Blizzard Wolfang's stage. You'll need Zero or X with the Blade Armor equipped. You'll also need to enter Wolfang's stage while it shows up as red on the Boss Selection Screen so that the meteorites will be falling down the screen in certain areas. Once you reach the end of the first part of the stage, you'll reach an area with a sloping ridge where huge ice blocks will be falling down. Head down the slope to the base and you'll find an opening in the wall (if the meteorites aren't falling it'll be closed). Head in and you'll find a new area. Look below the ledge you're standing on and you should spot two trapped Reploids. Hiding behind the one on the right is the heart. Head down and use Zero's double-jump or the Mach Dash to reach them.

The fifth heart is found in Metal Shark Player's stage. During the second part of the stage where the conveyer belt is constantly moving, towards the end of the belt you should spot the heart hiding behind a trapped Reploid between large blocks of junk. Wait for the compactor to rise clear of the junk, then jump down to reach the Reploid and the heart.

The sixth heart is in Infinity Mijinion's stage. Once you destroy the second cable controlling the Giant Mechaniloids in the background, it'll explode and a blue teleport capsule will appear. Jump into it to teleport to the area leading to the secret boss room. As soon as you reappear, head left to find the capsule for the X-Buster part of the Blade Armor, you should then easily spot the heart sitting right next to it.

The seventh heart is in Rainy Turtloid's stage. The Shadow Armor will make this heart easy to reach, otherwise it'll be hard to use an air-dash for any other armor suit and Zero to reach the heart without hitting the spikes. In the final acid rain area just before Rainy's room, the heart will be hidden in one of the spike alcoves on the left. By using the Shadow Armor you'll be able to get into the small alcoves without risk of losing a life, the center alcove of the three should have the heart hidden inside.
The eighth
heart is in Shield Sheldon's stage. You'll need the Shadow Armor to reach this
one without losing a life. Take the path leading down to the secret boss room,
then just before the teleport portal that leads to the boss room, you should
spot the heart sitting on the spiked floor just below the invisible platforms.
Jump down and grab it with the Shadow Armor, otherwise if you land on it with
any other suit or Zero, you'll lose a life.
Sub-Tank Locations:
Sub-Tank - Stores health - Found in Blaze Heatnix's and Commander
Yammark's stages.
The first energy tank is in Blaze Heatnix's stage. You'll need the same requirements to reach this one as you did for the heart in this stage, once you reach the upper area beyond the heart, head right and eventually you'll find a teleport portal. Head in to reach the area leading to the secret boss room. While climbing up the area with the fire exhaust ports, you should easily spot the energy tank in clear view up against the right wall.

The second energy tank is in Commander Yammark's stage. You'll need either Zero or X with the Blade Armor with Speedster or Hyper Dash equipped. When you reach the underground area where you encounter the first Nightmare in this stage, keep going until you spot an opening in the ceiling. Jump up the opening to find a trapped Reploid, rescue him, then go over to the edge of the platform. Once there, jump over to the left as far as you can go, then mid-air dash to the left to land on another platform which has the energy tank and a trapped Reploid waiting.
Weapon Tank Locations:
 Weapon Tank - Stores weapon energy - Found in Shield Sheldon's stage.
The weapon
tank is in Shield Sheldon's stage. In the area leading to the secret boss room,
eventually you'll spot the weapon tank sitting on a bed of spikes. You can reach
it by either using the Shadow Armor, or you can also deliberately hit the
shield-reploid on the left of the tank so that you begin to flash. While your
character is still flashing, quickly jump down, grab the tank and jump back up
before the invincibility wears off.
Weapon Tank - Stores weapon energy - Found in Shield Sheldon's stage.
The weapon
tank is in Shield Sheldon's stage. In the area leading to the secret boss room,
eventually you'll spot the weapon tank sitting on a bed of spikes. You can reach
it by either using the Shadow Armor, or you can also deliberately hit the
shield-reploid on the left of the tank so that you begin to flash. While your
character is still flashing, quickly jump down, grab the tank and jump back up
before the invincibility wears off.
EX Tank Locations:
 EX Tank - More lives per continue - Found in Blizzard Wolfang's stage.
The EX tank is
in Blizzard Wolfang's stage. You'll need the Shadow Armor to reach this, and
you'll also have to enter the stage when it shows up as red on the Boss
Selection Screen so the meteorites will be active. Head to the area where the
wall is opened up by the meteorites, then head in and drop down off the right of
the platform. Ahead you should spot an opening leading down lined with spikes.
Drop down to find the EX Tank waiting on another bed of spikes. You can also
head up the ladder on the right to reach the teleport portal leading to the
secret boss room.
EX Tank - More lives per continue - Found in Blizzard Wolfang's stage.
The EX tank is
in Blizzard Wolfang's stage. You'll need the Shadow Armor to reach this, and
you'll also have to enter the stage when it shows up as red on the Boss
Selection Screen so the meteorites will be active. Head to the area where the
wall is opened up by the meteorites, then head in and drop down off the right of
the platform. Ahead you should spot an opening leading down lined with spikes.
Drop down to find the EX Tank waiting on another bed of spikes. You can also
head up the ladder on the right to reach the teleport portal leading to the
secret boss room.
 Nightmare Souls - Infects with virus - Every stage.
These
Nightmares will be floating around in all the stages of the game. You'll find
loads of them in each stage, so be sure to destroy them all. Once you destroy
one, it'll drop a blue Nightmare Soul. Pick these items up to increase your
Hunter Rank. The more souls you have collected, the higher your rank will be,
and you'll be able to equip more Power-up Parts.
Nightmare Souls - Infects with virus - Every stage.
These
Nightmares will be floating around in all the stages of the game. You'll find
loads of them in each stage, so be sure to destroy them all. Once you destroy
one, it'll drop a blue Nightmare Soul. Pick these items up to increase your
Hunter Rank. The more souls you have collected, the higher your rank will be,
and you'll be able to equip more Power-up Parts.
 Captured Maverick Hunters - Give you special parts - Found in all
8 stages.
These trapped
Reploids have broken away from Gate's lies but are unable to escape from the
Investigator's stages. You'll need to find them and help them escape before the
Nightmares can take over their bodies. Each of the eight stages has sixteen
Reploids hidden away, with a total of 128 to find. Certain Reploids carry
special Power-up Parts, so make sure you rescue all of them to ensure that
you'll get all the parts. If a Nightmare consumes a trapped Reploid, it'll take
over it and you'll lose the part the Reploid's carrying (if it has one). Refer
to the Parts Guide for more info on the trapped Reploids.
Captured Maverick Hunters - Give you special parts - Found in all
8 stages.
These trapped
Reploids have broken away from Gate's lies but are unable to escape from the
Investigator's stages. You'll need to find them and help them escape before the
Nightmares can take over their bodies. Each of the eight stages has sixteen
Reploids hidden away, with a total of 128 to find. Certain Reploids carry
special Power-up Parts, so make sure you rescue all of them to ensure that
you'll get all the parts. If a Nightmare consumes a trapped Reploid, it'll take
over it and you'll lose the part the Reploid's carrying (if it has one). Refer
to the Parts Guide for more info on the trapped Reploids.

![]() X Regular Armor:
X Regular Armor:
X's basic armor. No special
powers. Much weaker than all of X's other armors.

![]() Falcon Armor:
Falcon Armor:
A repair of the armor from
X5. Gives you the power to hover air-dash, laser shot, and Giga Attack.
Special Weapons are usable.


![]()


 Blade Armor:
Very well-balanced.
Pressing the jump or dash button in the air lets X hover for a moment, and
then dash in one of four directions (up, down, or to either side). The
longer X hovers, the more powerful the dash; X is temporarily invincible
while dashing. The powered shot is less powerful than that of the Falcon,
but covers more area. As an alternate, the powered shot can be used as a
powerful Z-Saber swipe. Special Weapons are usable. Nova Strike is usable.

![]()

 Shadow Armor:
It's basically the opposite
of Blade, in that it is not balanced but specialized for particular
situations. It has no air-dash. Clinging to the wall lets you stick there
instead of sliding off. X can walk on spikes without damage coming to him,
and his powered shot is a swipe of the Z-Saber. Normal shot is three
differently directioned throwing stars. X can also cling to the ceiling and
throw stars from there, and dash on the ceiling once before falling. Special
Weapons not available. Giga Attack available.
![]() Ultimate Armor:
Ultimate Armor:
This is a hidden armor only
available through a code. It includes the same abilities as the Ultimate
Armor from X5, in that it's exactly like the Fourth Armor, only allowable to
do the Giga Attack infinite times. Special Weapons available.
Parts:
The Power-up Part system in
X6 is much different to the one in X5, and is substantially less
complicated. Four types of parts will be available, normal parts which both
X and Zero can equip, specific parts that X or Zero can only equip, and
special limited parts that can be used once only in a stage. You can also
find the life energy and weapon energy parts that enhance your current
character's life or energy bars. The only way to gain the special parts in
the game is to rescue the Reploids that carry these parts. 128 Reploids are
hidden through the eight stages, with each stage having 16 to find. Certain
Reploids will be carrying the power-up parts, once you rescue the Reploids
you'll have gained the part straight away - you won't have to wait for it to
be built. You must make sure that no Nightmares take over the Reploids, as
if one is taken over that's carrying a part, you won't be able to get that
specific part. It is possible, however, to gain all of the parts, just make
sure that you rescue most if not all of the Reploids to ensure that you'll
get all the parts. X and Zero can both equip a maximum of five parts, one
limited part and four of any other kind, but you'll need to raise your
Hunter Rank before being able to equip parts.
Here are all the parts with
their location and their information:
Life and Energy
Parts:
![]()
Life Up:
Found In: All Stages.
This part will give
your current character an extra energy heart.
![]()
Energy Up:
Found In: All Stages.
This will increase your
maximum special weapon energy by a small amount.
Normal Parts:
![]()
Speedster:
Found In: Central Museum.
This will allow your
character to move faster and jump further than normal.
![]()
Jumper:
Found In: Northpole Area.
This will increase your
character's jumping height and distance.
![]()
Hyper Dash:
Found In: Inami Temple.
This will increase your
character's dash speed and dash-jump.
![]()
Energy Saver:
Found In: Laser Institute.
Your special weapons will
use half their normal energy when used.
![]()
Super Recover:
Found In: Amazon Area.
Health and weapon refill
capsules will restore double their normal level.
![]()
Buster Plus:
Found In: Magma Area.
The X-Buster/Z-Buster's
damage inflicted on enemies increases by one.
![]()
Speed Shot:
Found In: Weapon Center.
This will increase the
speed of shots fired from the X-Buster/Z-Buster.
![]()
Shock Buffer:
Found In: Recycle Lab.
This will decrease damage
taken by half and reduce the stun period after taking damage.
![]()
D-Barrier:
Found In: Laser Institute.
The temporary invincibility
time after your player takes damage will be doubled.
![]()
D-Converter:
Found In: Weapon Center.
Damage taken will restore
weapon energy for the Giga Attack as well as special weapons.
X's Parts:
![]()
Rapid 5:
Found In: Amazon Area.
This will increase the
maximum number of buster shots on-screen from 3 to 5.
![]()
Ultimate Buster:
Found In: Magma Area.
All shots fired will be
charged shots, including special weapons.
![]()
Weapon Plus:
Found In: Magma Area.
This will increase the
damage caused to enemies by special weapons.
![]()
Quick Charge:
Found In: Central Museum.
Charging time for the
X-Buster takes half as long as it normally does.
Zero's Parts:
![]()
Saber Plus:
Found In: Inami Temple.
Damage inflicted on enemies
by the Z-Saber will be increased.
![]()
Saber Extend:
Found In: Recycle Lab.
The Z-Saber reaches out a
little further than normal, giving it a longer range.
![]()
Shot Eraser:
Found In: Northpole Area.
Most energy projectiles
fired by enemies can be blocked with the Z-Saber.
![]()
Master Saber:
Found In: Weapon Center.
Special Z-Saber techniques
will cause more damage than normal.
Limited Parts:
![]()
Life Recover:
Found In: Amazon Area.
Your character's life
energy will be completely refilled once.
![]()
Hyper Drive:
Found In: Recycle Lab.
This part will greatly
enhance your character's defense power temporarily.
![]()
Weapon Recover:
Found In: Inami Temple.
Your character's special
weapon energy for all the weapons will fully recharge.
![]()
Power Drive:
Found In: Magma Area.
This will increase the
damage inflicted on enemies by special weapons temporarily.
![]()
Weapon Drive:
Found In: Northpole Area.
Special weapons will not
consume any energy for a limited time.
![]()
Over Drive:
Found In: Central Museum.
This will increase the
X-Buster/Z-Buster's damage inflicted on enemies temporarily.
![]()
X-Buster/Z-Saber:
You'll have the classic X-Buster weapon for every one of X's armor suits.
Each suit has the primary fire, a short burst of laser blasts, as well as a
special charged shot. Most of the suits can fire off the charged shot to
inflict much heavier damage to enemy targets. X will also be equipped with
Zero's signature weapon, the Z-Saber. X can use the saber to deliver a
deadly swing of energy, causing significant amount of damage to enemies. The
two special armor suits, Blade and Shadow, can utilize a special charged
saber shot, causing much more damage than a normal swing.
![]()
Yammar Option:
The Yammar Option is gained once you defeat Commander Yammark. This creates
three dragonfly-type missiles which hover around X wherever he goes. If any
enemies strike the dragonflies, the dragonfly will explode and cause heavy
damage to the enemy. You can also cause the dragonflies to fire energy
blasts by pressing fire when they are active. The charged shot will cause
the three dragonflies to fire out larger blasts in random directions.
![]()
Ground Dash:
The Ground Dash is gained once Ground Scaravich is defeated. This weapon
fires a large block compound of metal and dirt which flies out a short
distance from X. Any enemy in striking range will take heavy damage. This
weapon can also be used to destroy the brown blocks that appear in various
stages, and can also be used to move the other colored blocks. The secondary
fire creates a huge boulder, once activated it will shoot out away from X
and devastate any targets in firing range.
![]()
Magma Blade:
The Magma Blade is gained once you defeat Blaze Heatnix. This weapon
utilizes the Z-Saber, causing X to swing out a blade of fire which creates a
large fireball-type projectile. The fireball will fly out straight ahead and
burn any targets it strikes. The secondary fire will cause X to summon
several huge fireballs which fly across the screen in random directions.
Anything caught in the blaze is either instantly destroyed or heavily
damaged.
![]()
Ice Burst:
The Ice Burst is gained once Blizzard Wolfang is defeated. This weapon fires
out a small ice block which will fly out a short distance from X before
landing on the ground. If the block strikes any target before landing it'll
explode and cause heavy damage to the enemy. If it does land successfully, X
can jump on top of the block, acting as a stepping stone allowing him to
jump higher. The secondary fire will cause X to flash for several seconds.
While flashing, dash around to create two large ice-spikes, each one will
fly up and down the screen from where X fires them off. Any targets within
range will be heavily damaged or destroyed.
![]()
Meteor Rain:
The Meteor Rain weapon is gained once you defeat Rainy Turtloid. This weapon
fires out a small water-bubble which flies directly up from X. Once it hits
a ceiling or object, it'll bounce off and fly back down towards the ground
before dissipating. Any enemy target caught in the bubble's flight path will
take heavy damage. The secondary fire will fire a single bubble up out of
the screen. Several bubbles will then fly down from the left on a diagonal
path in random positions. Anything caught in the hail will take heavy
damage.
![]()
Metal Anchor:
The Metal Anchor weapon is gained once Metal Shark Player is defeated. This
weapon fires out an anchor shaped projectile which will bounce out forward
along the ground until it strikes something. If it hits a wall, it'll bounce
back in the opposite direction, otherwise after several seconds it'll
explode. On contact with an enemy, the anchor will explode, causing heavy
damage. You can also use this weapon to destroy the silver blocks appearing
in certain stages. The secondary fire is very effective, as it'll summon
several projectiles shaped like Storm Eagle from the first Mega Man X game.
Each one will fly down the screen diagonally and devastate any target caught
in their path.
![]()
Guard Shell:
The Guard Shell weapon is gained once you defeat Shield Sheldon. This weapon
creates a small energy barrier in front of X, which can be used to deflect
energy weapons fired by enemies. Solid objects cannot be blocked by the
shield. You can also direct the position of the shield by pressing up, down,
left or right when activating the shield. The secondary fire will create
four large clam-shell objects which will position themselves in each corner
of the screen. Once in position, press fire again to cause each one of the
shells to fire off a small energy ball. Each blast will fire down in a
diagonal direction. Anything caught in the fire range will be destroyed or
heavily damaged.
![]()
Ray Arrow:
The Ray Arrow is gained once Infinity Mijinion is defeated. This fires out a
large energy blast which will fire out straight ahead from X. If the blast
hits an object, it'll change direction and fly straight up. Any enemy caught
in the blast will take heavy damage. The secondary fire will create several
huge energy blasts which will fly straight up the screen, devastating any
enemy targets on-screen.

Z-Saber/Z-Buster:
Once you regain Zero as a playable character, he'll be using a new Z-Saber
as well as his trusty Z-Buster. The Z-Saber is used in a similar way to the
one Zero had in X4 & X5, but the style of attack is new. The triple-slash
attack can be performed, but Zero will slash out in a slower rate, but each
swing will cause heavy damage to an enemy target, most targets won't survive
three hits. The Z-Buster can fire off a single energy shot, but cannot be
charged up. When used in conjunction with the Z-Saber, the Z-Buster can be
quite effective.
Yammar Option:
While standing still, press up and attack (Z-Buster) to activate the
dragonflies. Press fire again to discharge the dragonflies.
The Yammar
Option is gained once Commander Yammark is defeated. This technique allows
Zero to create three dragonflies which will hover around him. Any enemy
targets striking the dragonflies will be heavily damaged. You can also fire
energy balls from the dragonflies by pressing fire once they're active.
Sentsuizan:
After jumping up, press up and fire (Z-Buster) to perform this attack.
The Sentsuizan is gained once you defeat Ground Scaravich. This technique
will allow Zero to perform a slanting dash attack from the air. Once
executed, Zero will fly down on an angle with his Z-Saber extended. Any
enemy targets in range will be heavily damaged.
Shoenzan:
While standing still, press up and then the fire button (Z-Saber) to perform
this attack.
The Shoenzan is gained once Blaze Heatnix is defeated. This
technique allows Zero perform a heavy fire attack from the ground. Once
activated, Zero will slash up with his Z-Saber while creating a large fire
wall in front of him. Anything caught within the fire wave will be heavily
damaged or destroyed.

Hyoroga:
While on the ground, jump while holding up to grab hold of the ceiling.
The Hyoroga is gained once you defeat Blizzard Wolfang. This technique
allows Zero to jump up to the ceiling and hold on while dangling
upside-down. While in this position, press fire again to allow Zero to fire
down three large ice-spikes. Any enemies caught in the spikes' range will be
heavily damaged. Zero can also dash to the left or right while hanging
upside-down.
Ensuizan:
Press and hold down while standing still or jumping and press fire
(Z-Buster).
The Ensuizan is gained once you defeat Rainy Turtloid. This
weapon causes Zero to spin around while slashing with his Z-Saber. This
attack is very effective and most enemies caught in the saber's range are
heavily damaged or destroyed. This attack can be performed on the ground or
in the air.

Rakukojin:
Jump up, then press down and fire (Z-Saber) to perform this attack.
The
Rakukojin is gained once Metal Shark Player is defeated. This technique
causes Zero to perform a massive sword attack from the air. Once executed,
Zero stabs down with a huge metal saber that is deadly to any enemies caught
in range. Once Zero lands he'll fire out a metal anchor projectile similar
to X's version of this weapon.
Guard Shell:
Select this from the weapon select screen to activate the shield.
The
Guard Shell is gained once Shield Sheldon is defeated. This device allows
Zero to create an energy shield in front of him to block any energy-type
projectiles from enemies. Solid objects cannot be blocked, but when used in
conjunction with the Ensuizan attack, the shield is quite effective.

Rekkoha:
Press the Giga Attack button to perform this attack.
The Rekkoha is
gained once you defeat Infinity Mijinion. This weapon causes Zero to perform
a massive energy attack, where once performed several huge energy beams will
fly down from the top of the screen. Any enemies on-screen will be
completely destroyed.
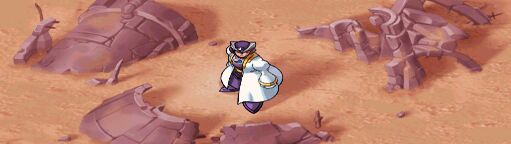
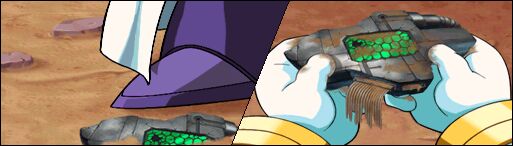
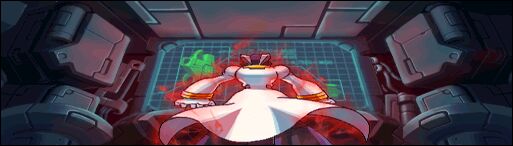


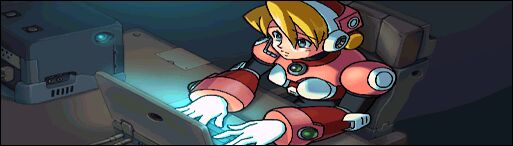


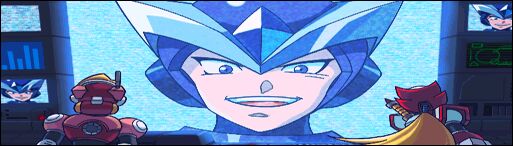


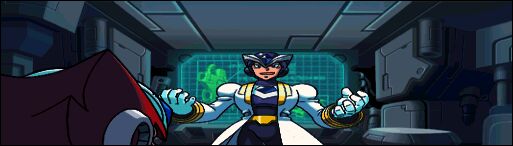

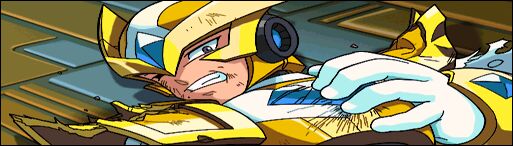


![]()
X's Ultimate Armor:
While at the Start screen, press left three times and right once, then press
Start. X will start with his Ultimate Armor. This code cannot be used in
addition to the Zero's Black Armor code.

Zero's Black Armor:
While at the Start screen, press L1 three times and R1 once, then press
Start. Zero will start with his Black Armor. This code cannot be used in
addition to the X's Ultimate Armor code.
VS Mode:
There is a rumor about a secret VS mode in Mega Man
X6. There is code that should be put in the title screen and the
mode will be revealed but no-one know the code.
![]()