


| Here is a complete guide for Mega Man X4. Choose the tab you want in order to view its content. |

|
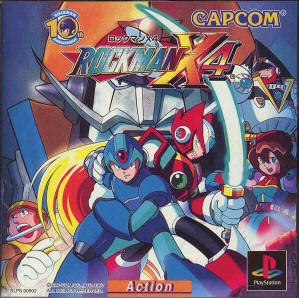
Release Date: |
Developer: |
|
Systems: |
Genre: |
Intro:
As the first X game to appear on the Sony Playstation, Mega Man X4 introduces
new 32-bit graphics, superb music and sound effects, as well as huge stages and
an intriguing storyline. This time, you'll be able to play as X or Zero for the
entire game, giving the game two unique storylines to follow.
Game Specs:
Mega Man X and Zero return in this all-new action adventure as the first Mega
Man X game to appear on the Playstation. Bringing with it all the graphics,
sound and gameplay of the first three, X4 introduces rich new graphics and
sound, as well as a new style of challenging gameplay. You'll be able to take
control of either X or Zero during the entire game, each character has their own
unique storyline. New characters are introduced. Dr. Light will be waiting in
the special capsules. X and Zero must challenge huge bosses before confronting
the real mastermind behind the plot to bid the Hunters and Repliforce against
each other. Before the end of their quest, X and Zero's loyalty to the Hunters
and their friends, as well as each other will be tested to the very core...

![]()
Mega Man X:
Mega Man X is the first robot to begin the existence of the Reploids, and
ever since the Mavericks appeared, he has battled them and defeated their
leader Sigma three times now. His past remains a mystery, but X always has a
strong sense of justice and believes in a world where humans and reploids
live together in peace. As one of the leaders of the Maverick Hunters, X was
involved in allying with Repliforce, but he is worried that they are the
cause of the recent trouble occurring in the city. Always fighting for
justice, X will do whatever it takes to defend the world and hopefully one
day discover Dr Light's purpose for him in life.

Zero:
Zero is Mega Man X's best friend and partner in the Maverick Hunters. Zero's
past has remained a mystery, but after Zero's constant nightmares of his
creator, it is now rumored that the evil Dr Wily created Zero to eventually
destroy X. Although this may be the truth, Zero is still fighting for
justice and has never turned against X. Zero is also heavily involved in the
Repliforce mystery, but he has fallen in love with the Colonel of
Repliforce's sister Iris, and is torn between his relationship with her and
Colonel's refusal to co-operate.
![]()
Dr Light:
Dr Light is the creator of Mega Man X. Dr Light's purpose for creating X is
still a mystery, but Dr Light had designed X to be a reliable and strong
minded defender of all that is good. He appears again in the special
capsules that enhance X's abilities, and he aids X by giving him advice and
confidence in his actions.

Double:
Double is a Maverick and is Sigma's spy who at first seems to aid X by
giving him information about the actions of the Repliforce. His true
intention was to be the insider who would gain X's plans of action and pass
them on to his leader Sigma.
![]()
Iris:
Iris is the girlfriend of Zero and is also Colonel's sister. Always torn
between her love for Zero and her brother's stubborn actions, she is always
pleading with Zero not to fight with Colonel. Iris assist Zero by giving him
information on the Repliforce's actions throughout the game and gives him
advice on what to expect from Colonel.

Colonel:
Colonel is the commanding officer of Repliforce's army. Once an ally of the
Maverick Hunters, he is now against them as the Maverick Hunters now believe
that the destruction of Sky Lagoon was their doing and is now considering
Repliforce as Mavericks. Colonel is willing to fight them as he has a strong
sense of honor and will not obey X and Zero. This stubbornness of his
creates friction between their relationship and causes Repliforce's bad
reputation, as well as their ultimate destruction.

General:
General is the leader of Repliforce. He has always believed that Reploids
should live in peace with humans, but he believes that the reploids should
have more rights among humans other than to be their servants. His bad habit
of jumping to conclusions and not listening to reason causes a loss of faith
in the Maverick Hunters and makes the Repliforce an enemy. Although he is a
stubborn leader, General's prime objective was only to give reploids the
right to live as they please, without being ordered around by humans.

Sigma:
Sigma has somehow returned after his defeat in Dr Doppler's lab years ago
which ended the war of the reploids. He has remained in hiding and has used
several spies and insiders to create friction between the Maverick Hunters
and Repliforce which ultimately turned the two groups against each other. It
was the Maverick Magma Dragoon who betrayed the Maverick Hunters and
destroyed the Sky Lagoon, making the Repliforce look like they were the ones
who did it. Sigma's main objective was to cause Repliforce and the Maverick
Hunters to destroy each other, leaving the world open for attack, but his
bad habit of underestimating X and Zero's abilities strikes again and he
doesn't plan on them finding out the truth.

Web Spider:
Guide: Web Spider will stay out of the screen often during
this battle. When you see leaves falling down from the top, he will appear
where they are falling. He will often fire out blue webs that will sap your
energy away if they hit X. Dash and jump off the wall to dodge them. After
his energy is half gone, he'll come down and create a large blue web. He'll
then move around it while firing the blue webs and four small spiders at a
time. To defeat him, hit him with the Twin Slasher each time he appears, and
once he lowers down onto the web, just keep hitting him while dodging his
attacks.
Weakness: Twin Slasher.
Weapon
Received:
Lightning Web.
![]()
Storm Owl:
Guide: Storm Owl will use some powerful attacks during this
battle, so its important that you have energy tanks filled. He will fly out
of the screen often and then reappear to perform an attack. He'll often fly
up into the corner and fire out several energy balls that will all fly at X
at the same time. Dash under them to dodge the balls. He will also sometimes
try to grab X to slam him into the ground. If he lands on the ground he'll
cause three huge tornados to fly around X to cause damage. If he flies to
the center of the screen, dash to a corner as he'll fire out energy balls in
random directions. He'll fire out three long energy beams from the top
corners of the screen, dash to the left or right to dodge them. To defeat
him, use the Aiming Laser. When he flies low enough, wave the target over
him to lock on and then fire. Repeat the process to defeat him.
Weakness: Aiming Laser.
Weapon
Received:
Double Cyclone.
Frost Walrus:
Guide: Frost Walrus will take up a lot of space in the large
room. Whenever he punches his chest a few times, jump up the wall as he'll
then jump down and slide along the ground. Jump off the wall just before he
hits it. He will also sometimes fire out large ice spikes that will fly down
from above and land in the ground. Shoot them to destroy them. He will also
use a freeze attack and a variation of the ice spike attack. To defeat him,
use the X-Buster or the Rising Fire. Use charged shots and jump over him
whenever he slides across the floor, or walk up to him and hit him with the
Rising Fire.
Weakness: Rising Fire.
Weapon
Received:
Frost Tower.

Slash Beast:
Guide: Slash Beast will use fast
attacks during this battle so you will have to be quick. He will often roar
at X and then jump up above him. He'll then come slamming down into the
ground to try and crush X. He will also often fire out two energy waves that
will fly at X on an angle. If he charges up a purple beam, he will dash
across the screen twice with it extended. Jump up the wall to dodge him. To
defeat him, use the Ground Hunter. Each time you hit him with it he will
perform his charge attack so jump up the wall and then repeat the process to
defeat him.
Weakness: Ground Hunter.
Weapon
Received:
Twin Slasher.

Colonel:
Guide: Colonel will battle you once you defeat four of
the eight bosses. He will use his beam saber as his primary weapon.
He'll often dash across the screen and will then fire out three blue
energy beams. To dodge them, dash under the first one, jump the second
and then dash under the third. He will sometimes block your shots as
well. If he disappears, dash away as he'll reappear on top of X and
strike him. To defeat him, Use charged shots and hit him as you dodge
his energy beams, and remember to dash away when he disappears to avoid
his sword blows.
Weakness: Frost Tower.

Magma Dragoon:
Guide: Magma Dragoon will use
many fire and lava attacks during this battle. If you have managed to keep
the Raiden Armor while facing him, just use it to either heavily damage him
before it blows or to completely defeat him. He'll begin by charging at you
and will use a fire attack. His attacks will involve him breathing fire
across the screen which will be difficult to dodge, he will also create a
small fire ball that will fly up and then down at X. To defeat him, use the
Double Cyclone. Each time you hit him he'll jump over to the opposite side
of the room. Follow him and repeat the attack to finish him off.
Weakness: Double Cyclone.
Weapon
Received:
Rising Fire.

Split Mushroom:
Guide: Split Mushroom will use several attacks during this
battle. He will begin by jumping up one of the walls and will then create
six clones of himself that will eventually fly straight at X. Jump up the
wall and dash-jump over them as they pass. He will then jump to the middle
of the screen and cause purple rain to fall. He'll then create a mirror
clone of himself and they'll perform several attacks while the clone is
active. To defeat him, use the Lightning Web. Each time you hit him he'll
jump to the opposite wall and begin to create clones. Hit him again and
repeat the process to finish him off.
Weakness: Lightning Web.
Weapon
Received:
Soul Body.

Jet Stingray:
Guide: Jet Stingray will use
strong attacks, so it will come in handy if you have energy tanks filled.
You'll have to defeat him twice while you're on the jet bike before fighting
him. He will hover above the water and will fire out several small stingrays
that will crawl along the ground. Use a charged shot to destroy them before
they hit you. He will also sometimes perform a dive attack that can cause
heavy damage. Jump over him to avoid it. If he flies down into the water, he
will fire out stingrays and will begin to suck X in towards him. To defeat
him, use the Frost Tower. As he floats down from the sky, jump up and
activate the weapon. He'll freeze for a few seconds and then will break out
of the ice and fly back up the screen. He'll then hover down in the same
position, so just repeat the process to destroy him.
Weakness: Frost Tower.
Weapon
Received:
Ground Hunter.

Cyber Peacock:
Guide: Cyber Peacock will only be
visible for short amounts of time during this battle. Once he disappears
he'll reappear over X and cause damage, so dash away every time he vanishes.
He will also sometimes extend his feathers so that they cover a large range
of the screen. Jump up the wall to dodge it. He will often fly up and use a
radar to lock onto X. He'll then fire out missiles that will home in on X.
Destroy the missiles before they explode. To defeat him, use the Soul Body
and make sure that the clone part hits him. When you hit him he'll disappear
and then reappear again. Dash away as he appears and then hit him again.
Repeat the process to destroy him.
Weakness: Soul Body.
Weapon
Received:
Aiming Laser.
Colonel:
Guide: Colonel will use the same
attacks as he did during the earlier battle. He will have two new attacks,
one where he'll stand in the middle of the room and generate lightning that
will flow up from the ground. Stand between the gaps of the bolts to dodge
them. He will also sometimes fire out a large purple energy blade that will
increase in size at it moves across the screen. Jump up the wall to dodge
it. His three blue energy blasts will also move faster this time. To defeat
him, use charged shots from the X-Buster and hit him when he fires the blue
and purple energy beams, and when he fires off the lightning attack.
Weakness: Frost Tower.

Double:
Guide: When you meet Double in
the final stages, he'll reveal his true identity and will become a large
reploid. He'll be using very fast moves during this battle, so you'll have
to be quick on your feet. He will fire out many energy balls and projectiles
that will fly around and annoy you while he jumps around trying to crush X.
Dodge the energy balls he fires by hovering in the air. To defeat him, use
the Double Cyclone. Hit him as much as possible, and if your health becomes
low, use an energy tank. Keep hitting him and use charged-shots to inflict
heavier damage.
Weakness: Double Cyclone.

General:
Guide: General is huge and will
take up most of the room. You'll fight him not long after defeating Double.
He'll fly around often while trying to crush X. He will often fly low across
the screen. If he flies across at a low height, he'll stop in the center of
the room and will crash down, causing a line of large blue flames to appear
on the floor. Jump up one of the walls to dodge them. He will also sometimes
fire out six blue energy beams from one of the corners of the room. Jump
between the gap in the beams to dodge them. He largest attack will be him
flying up to a corner of the room and then he'll fire out his fists which
will fly across the screen. While they fly around, blue energy rings will
fire out from his arms. To defeat him, hit his head with a blast from the
Twin Slasher. You can safely hit him from the opposite wall when he performs
his fist attack as well as jumping on top of the fists to get a closer shot,
and you can hit him when he flies low. Make sure your energy tanks are high
as you'll most likely need them.
Weakness: Twin Slasher.

Sigma's First Form:
Guide: Sigma's first form will be
a grim reaper-style form. He will often appear and disappear during the
battle. When he appears, he'll fire out several energy balls that will
strike the walls and crawl down along the floor and then back up the walls.
Try to jump up the walls to dodge them. He will also sometimes appear on the
left or right wall and will then fly across the screen with his scythe
extended. Dodge this attack by jumping up the opposite wall and staying at
the very top until he disappears. To defeat him, use the Rising Fire. Each
time you hit him he'll disappear and then reappear. When he reappears the
third time, he'll be in one corner and will perform the scythe attack.
Repeat this process to eventually destroy him without getting hit. Once you
defeat him he'll taunt you be saying "Are you ready for round two?"
Weakness: Rising Fire.
Sigma's Second
Form:
Guide: Sigma's second form will
look similar to his forms in previous MMX games. He'll use his scythe again
as his primary weapon. He'll begin by jumping to the center of the screen
and will throw his scythe so that it spins around the room. Dash under him
and stay in the corner behind him to dodge it. He will then perform one of
two random attacks. He will throw his scythe straight at X and once it hits
the ground, it will generate green electric bolts that will flow across the
floor. Sigma will then fire out four small spinning blades that will home in
on X. Stay up the wall to dodge the blades and electric bolts. The other
attack involves Sigma throwing the scythe into one corner of the room, then
it will generate electric bolts up and down the wall. He will then jump to
the other corner and will fire out two eye lasers that will cover the rest
of the room. Dodge it by jumping up on the wall above Sigma and wait until
he stops firing. To defeat him, use the Lightning Web. Try to hit his head
so that you can easily dash under him when he jumps up. Keep hitting him
with the Lightning Web and try to dodge his attacks as best you can. Once
you defeat him the ground below X will explode and you'll reach the final
room where Sigma's third form awaits.
Weakness: Lightning Web.
Sigma's Final Form:
Guide: Sigma's final form will
consist of five individual parts and will be extremely difficult to defeat.
The two main parts are a giant robot head that appears in the lower left
corner of the room and a large robot manning a gun that appears on the right
side of the room. These two parts have their own energy bars, and both will
need to be defeated in order to defeat Sigma. There will be three smaller
heads, yellow, red and blue ones which will randomly perform their own
attacks. The order of attacks will be as follows:
The three colored heads
will attack first, one of the heads will randomly attack while the other two
are idle. The red head will fire out four sequences of fireballs. Jump up
the other two heads to dodge the first two shots, then drop down to dodge
the third, and then jump over the fourth. The yellow head will fire out
energy balls at X from the top-middle of the screen that will become energy
bolts once they hit a wall or the floor and will flow along the surface.
Jump on top of one of the other two heads and jump and dash through the fire
to avoid the balls. The blue head will be on one side of the room and will
fire out a large ice-freeze blast. Jump up the other two heads to avoid it.
After the three heads disappear, the large robot head will appear in the
lower left corner. It will perform one of two random attacks. The first
involves it blowing air against X to try and blow him into the spike wall on
the right. Dash towards the head to evade the spikes. The other attack
involves it sucking in large rocks to try and damage X. Stand close to the
right wall so that if it sucks in the rocks, the blue head will appear in
front of you and will block X from the head. Fire at the head with a fully
charged shot to create the plasma field over the head and it will destroy
most of the rocks before they fly out at X. Once the giant head disappears,
the three heads will perform an attack again.
The large robot on the
right will next appear. If the blue and yellow heads appear lined up with
each other on the left and you hear Sigma shout "The End!," quickly jump up
the heads as he'll fire out a huge beam that will strike along the ground.
His other attack will be a normal blast from his gun that will be directed
toward the position X is standing. Lure the gun up to the yellow head so
that it will fire straight ahead so you can fire off charged shots at the
head of the robot. The sequence will then repeat itself.
You will need to
use charged shots on the giant robot head and the head of the large robot on
the right of the room. Each one has their own power level, so you will have
to destroy both of them individually. Follow the directions above to survive
the three robot heads and keep firing charged shots at the two main parts.
Once you destroy both parts Sigma will (for the fourth time) admit defeat
and will explode, leaving X to escape from the Final Weapon before it blows.
It will take a lot of practice and a few tries to beat Sigma, as out of the
first four MMX games, this would have to be the toughest battle against
Sigma.
Weakness: X-Buster.
CONGRATULATIONS!!!
You finished Mega Man X4 with X.
Web Spider:
Guide: Web Spider can be defeated by using normal jump
attacks with the Beam Saber or by using the Sky Waltz attack. Whenever he
appears, jump and attack him once and then back away to dodge the blue web
that he fires. Try to jump up the wall and then over the web so that you can
get another shot in. Once he comes down, just keep hitting him with jump
attacks or the Sky Waltz, and dodge the blue webs. Use normal Beam Saber
attacks on the small spiders he fires out.
Weakness: Sky Waltz.
Technique Learned: Thunder God
Attack.
![]()
Storm Owl:
Guide: Storm Owl can be defeated
by using the Fallen Phoenix Crush. Try to stay in the center of the screen
during this battle so that when he appears you can use the attack to hit him
easily. You'll have to use the Beam Saber or take a few hits from him as the
energy of the Fallen Phoenix Crush will run out before his energy does. If
he hits you the energy of the weapon will increase. Use the Sky Waltz or
normal Saber attacks to inflict further damage on him.
Weakness: Fallen Phoenix.
Technique Learned: Sky Command.
Frost Walrus:
Guide: Frost Walrus can be
defeated by either using standard Beam Saber attacks or the Dragon Flame
Blade. Try to hit him with the Dragon Flame Blade before he performs his
slide attack, or use the three-hit Beam Saber attack before he moves. You
can hit him when he's firing up the icicles but make sure that you're free
to dash away when the spikes begin to fall. Jump over him when he does his
slide attack and hit him from behind.
Weakness: Flame Blade.
Technique Learned: Ice Stab.
Slash Beast:
Guide: Slash Beast can be
defeated by using the Sky Waltz attack. Normal Beam Saber attacks will also
work on him while he's on the ground. Just make sure that you're not in the
middle of an attack when he performs his jump attack. It will come in handy
if you have an energy tank in reserve, as he'll be moving fast and you need
to be quick to avoid his attacks. If he performs his charge attack, jump up
the wall to dodge him. A good time to use the three-swing attack is when he
is standing still and roars before performing a new attack.
Weakness: Sky Waltz.
Technique Learned: Hurricane
Fang.
Colonel:
With
Zero you won't fight the colonel. There will be a movie clip that will
show Zero and the Colonel fight and then Iris will come and separate
between them.
Magma Dragoon:
Guide: Magma Dragoon can be
defeated by using the Raiden Armor, but if you don't have it or he destroys
it, use the Hurricane Fang or the Thunder God Attack. The Thunder God Attack
will heavily damage him, so its probably the best weapon to use. Try to
dodge his flame attacks and hit him from behind. He'll often breathe fire
across the room that won't give you mush room to move, so try to jump on one
of the walls to dodge it. Each time you hit him with the Thunder God Attack,
he'll jump over you to one corner of the room. Time it right and you can hit
him just as he lands so that he'll jump to the other side of the room.
Repeat this until he's destroyed.
Weakness: Thunder God.
Technique Learned: Dragon Flame
Blade.
Split Mushroom:
Guide: Split Mushroom can be
defeated by using the Thunder God Attack. When he jumps up and begins to
create clones of himself, fire the attack so that you destroy two of the
clones at a time, and before destroying the last two that fall, wait for him
to fall off the wall and then fire it to damage him. If he manages to create
the other clone of himself, just try to hit the real one to damage them
both. Stay in the middle of the screen while the two of them jump around.
Weakness: Thunder God.
Technique Learned: Sky Waltz.
Jet Stingray:
Guide: Jet Stingray will be
difficult to beat using Zero. His weakness is the Ice Stab, but you'll need
to get up high to hit him, so I recommend that you first obtain the Sky
Waltz so that you can jump twice in the air to reach him. When he begins to
fire out the small stingrays, double jump and then use the Ice Stab just in
front of him to freeze him. If he comes down into the water, jump up next to
him and use it, making sure that you won't land on top of him. If you're
skilled with this attack, you should be able to trap him on one side of the
screen for the entire battle.
Weakness: Ice Stab.
Technique Learned: Flying Jump.
Cyber Peacock:
Guide: Cyber Peacock can be
defeated by using the Dragon Flame Blade. Try to stay in the center of the
screen so that you can easily dash away from him when he appears and then
quickly perform the attack next to him before he moves. If he appears to the
left or right in mid-air, dash over to him and hit him from below before he
gets a chance to perform his missile attack. You can tell when he's going to
lock on to Zero because his feathers will glow first. Just remember to keep
moving as he'll try to appear right on top of you most of the time.
Weakness: Flame Blade.
Technique Learned: Fallen Phoenix
Crush.
Colonel:
Guide: Colonel can be defeated by
using the Sky Waltz attack as well as normal Beam Saber attacks. Try to
double-jump when he disappears so that his slash attack will miss, or you
can also jump up the wall to dodge it. When he uses his lightning attack,
stand between the bolts and close to him so that you can attack him while
he's standing there and dodge the lightning. When he performs his blue
energy bolt attack, jump up the wall and wait for the second beam to pass.
Jump out towards him and the third one should pass under you so then you can
deal him some more hits. If he performs his purple beam attack, jump up the
wall and once it passes jump down to continue hitting him.
Weakness: Sky Waltz..

Iris:
Guide: Iris will use a heavily
armored suit to attack you with. She'll be often flying towards Zero to try
and hit him physically, and if you strike her she'll fall back and two air
mines will fly out of her. The two mines will then eventually begin to fly
towards Zero. They can be easily destroyed will a single blow. After dealing
her a few hits with the Sky Waltz, a large purple crystal will appear and
hover above Iris. Use the double-jump to reach the crystal and use the Sky
Waltz on it and try not to hit Iris as she'll just fire out more mines. If
she moves down to the lower right of the room, she'll fire out a large
purple energy beam that will fly across the screen. Once she fires the beam,
the purple crystal will fire the same beam in a vertical direction, and this
doesn't give you much room to move around in. Stay away from the left wall,
and then when the crystal stops moving below you, jump up to the wall to
dodge the attack. Keep focusing on the purple crystal and eventually you'll
defeat her.
Weakness: Sky Waltz .
General:
Guide: General will be difficult
to hit, as his head is his only weak point. You'll mostly have to use the
Sky Waltz to attack his head with. When he lowers down and moves across the
screen, jump up the wall and then when he's close enough, jump over him and
use the Sky Waltz so that you can hit him while falling to the floor. If he
uses his fist attack, jump up the fists and dodge the blue energy rings he
fires. When the fists move towards him, jump out and hit him again so that
you'll fall down between him and his fists to avoid getting hit. If he uses
his six-beam energy attack, just jump through the middle of them to dodge
them. You can also jump up the wall behind him before he moves up against
the wall so that you can deal out more damage to his head. Once you defeat
him you'll advance to the final stage of the game.
Weakness: Sky Waltz .
Sigma's First Form:
Guide: Sigma's first grim
reaper-form can be defeated by using the Dragon Flame Blade. Hit him with it
from underneath two times, and then on the third, he'll appear on the side
and perform his scythe attack, so you'll have to jump up the opposite wall
to dodge it. Keep repeating this process to eventually defeat him and try
not to take any damage during this first part of the battle.
Weakness: Flame Blade.
Sigma's Second
Form:
Guide: Sigma's second form can be
defeated by using the Sky Waltz. When he jumps up and throws his scythe,
dash behind him to dodge it and once he lands deal him out some more blows.
If he uses his eye-laser attack, dash behind him again to dodge the scythe
and then jump up the wall above him to dodge the attack. If he uses his
other attack, lure the scythe up the wall so that the energy beams it
creates will flow up and down one of the walls and not the floor. Dodge the
four spinning blades and keep hitting him with the Sky Waltz. Repeat this
process to defeat him, and try not to take too much damage or use any energy
tanks during this battle, as the next stage will be the hardest.
Weakness: Sky Waltz .
Sigma's Final Form:
Guide: Sigma's final form will be
extremely difficult to defeat. First, refer to X's Bosses descriptions for
the attack patterns of each of the five parts. When the giant head appears,
dash towards it if it tries to blow you into the spikes, and then use the
Hurricane Fang to inflict damage on it. If it sucks you in, let the blue
head block you, and use the Thunder God Attack to destroy it when the rocks
stop flying around. Keep attacking the head once it spews out the rocks to
destroy the rocks and damage the head. When the giant robot appears, use the
double-jump and the Sky Waltz to attack it, jump up on the large gun barrel
as you'll pass through it and it won't cause any damage. This way you can
deal out damage to the head of the robot without having to worry about the
gun. Remember to try and not get hit during the attacks the three heads
make. Use energy tanks if you have to, but it will take a lot of practice
and skill (chance doesn't play a part in this battle!) and eventually you'll
destroy Sigma and as well as beating the game, you'll give Zero his first
victory over Sigma!
Weakness:
Colored Heads: Beam Saber and Sky Waltz .
Giant Head: Hurricane Fang.
Giant Robot: Sky Waltz .
CONGRATULATIONS!!!
You finished Mega Man X4 with Zero.
Armor Parts
Locations:
![]() Leg Upgrade - Allow X to dash and hover in mid-air - Found in Web
Spider's stage.
Leg Upgrade - Allow X to dash and hover in mid-air - Found in Web
Spider's stage.
 The Leg
upgrade is found in Web Spider's stage. Just after falling down the waterfall
area near the start of Area 1, jump into an opening in the right wall and
continue on to find the capsule. The leg upgrade will allow X to hover in the
air for a short amount of time. It will also allow him to execute a mid-air dash
while jumping.
The Leg
upgrade is found in Web Spider's stage. Just after falling down the waterfall
area near the start of Area 1, jump into an opening in the right wall and
continue on to find the capsule. The leg upgrade will allow X to hover in the
air for a short amount of time. It will also allow him to execute a mid-air dash
while jumping.
![]() Arm Upgrade - Allow X to shoot the Plasma
Shot or to charge 4 special shots - Found in Storm Owl's stage.
Arm Upgrade - Allow X to shoot the Plasma
Shot or to charge 4 special shots - Found in Storm Owl's stage.
 The X-Buster
upgrades are found in Storm Owl's stage. You'll need the Lightning Web to reach
them. Near the start of Area 2, just before the first purple door, you'll see an
opening in the ceiling which is lined with spikes. Use the Lightning Web to
shoot a web as high as possible and from the right position to make it land in
front of the spikes on the left. Jump on the web and jump up to grab onto the
ledge to find the capsules. There are two possible weapon upgrades, but neither
is permanent, they are interchangeable. The capsule on the right will allow X to
charge up four normal charged shots and fire them off rapidly. The second
capsule on the left will give him the ability to charge up a more powerful shot
which will rip through anything and if it strikes an enemy it will leave behind
a plasma ball that will continue to damage the target. Both upgrades will allow
you to charge up X's special weapons.
The X-Buster
upgrades are found in Storm Owl's stage. You'll need the Lightning Web to reach
them. Near the start of Area 2, just before the first purple door, you'll see an
opening in the ceiling which is lined with spikes. Use the Lightning Web to
shoot a web as high as possible and from the right position to make it land in
front of the spikes on the left. Jump on the web and jump up to grab onto the
ledge to find the capsules. There are two possible weapon upgrades, but neither
is permanent, they are interchangeable. The capsule on the right will allow X to
charge up four normal charged shots and fire them off rapidly. The second
capsule on the left will give him the ability to charge up a more powerful shot
which will rip through anything and if it strikes an enemy it will leave behind
a plasma ball that will continue to damage the target. Both upgrades will allow
you to charge up X's special weapons.
![]() Body Upgrade - Allow X to perform the Nova
Strike - Found in Magma Dragoon's stage.
Body Upgrade - Allow X to perform the Nova
Strike - Found in Magma Dragoon's stage.
 The Armor
upgrade is found in Magma Dragoon's stage. You will need one of the X-Buster
upgrades to find this. In Area 2, dash jump to the right off the cliff just
before the Raiden Armor. Try to use a mid-air dash or the Lightning Web to reach
the ledge on the right, but once you do, use a charged shot of the Twin Slasher
to destroy the rocks blocking the way and you'll find the capsule. The Armor
upgrade will give you the Nova Strike Giga Attack, which causes X to jump up and
fly forward while executing a devastating attack to destroy any enemies he hits.
The energy must be full for the attack to work, and it can recharge its energy
when X is hit or if he picks up a weapon capsule.
The Armor
upgrade is found in Magma Dragoon's stage. You will need one of the X-Buster
upgrades to find this. In Area 2, dash jump to the right off the cliff just
before the Raiden Armor. Try to use a mid-air dash or the Lightning Web to reach
the ledge on the right, but once you do, use a charged shot of the Twin Slasher
to destroy the rocks blocking the way and you'll find the capsule. The Armor
upgrade will give you the Nova Strike Giga Attack, which causes X to jump up and
fly forward while executing a devastating attack to destroy any enemies he hits.
The energy must be full for the attack to work, and it can recharge its energy
when X is hit or if he picks up a weapon capsule.
![]() Helmet Upgrade - Infinite special weapons
(not when charged) - Found in Cyber Peacock's stage.
Helmet Upgrade - Infinite special weapons
(not when charged) - Found in Cyber Peacock's stage.
 The Helmet
upgrade is found in Cyber Peacock's stage. You will need to gain an "S" rank in
the third area to find it. Use the Soul Body to destroy the yellow orbs to
quickly finish the area. The Helmet upgrade will allow X to use all his special
weapons without losing any weapon energy. This gives the weapons an unlimited
use and the energy will only drain if a charged shot is used.
The Helmet
upgrade is found in Cyber Peacock's stage. You will need to gain an "S" rank in
the third area to find it. Use the Soul Body to destroy the yellow orbs to
quickly finish the area. The Helmet upgrade will allow X to use all his special
weapons without losing any weapon energy. This gives the weapons an unlimited
use and the energy will only drain if a charged shot is used.
Ride Armor
Locations:
Ride Armor - Assist in battle - Found in
Slash Beast and Magma Dragoon's stages.

Raiden Armor:
The Raiden Armor is found in Slash Beast and Magma Dragoon's stages. This carrier can walk through lava and can withstand many blows before it explodes. It has three forms of attacks, a standard drill-punch attack, a large swipe attack which deals out more damage, and a charge attack which can drill through most enemies.

Eagle Armor:
The Eagle
carrier is found in Storm Owl's stage and the second Final Weapon stage.
This carrier can fire large energy bolts, it can jump and execute dash
attacks, and it can also fly in the air to glide over large holes. This
carrier can withstand may hits before overloading and can safely carry X or
Zero over dangerous areas. You can also charge up its weapon to fire off a
large charged shot that will home in on enemies.
Jet Bike Locations:
 Jet Bike - Allow to drive fast - Found only in Jet Stingray's
stage.
The Jet Bike
is found in Jet Stingray's stage only. X or Zero will be riding the bike for
most of this level. This vehicle can jump, fire an energy weapon and execute a
devastating dash attack where a beam of energy from the bike's underside will
destroy anything that touches it. A dash-jump can be made as well as being able
to perform the dash attack once the bike jumps. This can also enable the bike to
glide over large pits and holes.
Jet Bike - Allow to drive fast - Found only in Jet Stingray's
stage.
The Jet Bike
is found in Jet Stingray's stage only. X or Zero will be riding the bike for
most of this level. This vehicle can jump, fire an energy weapon and execute a
devastating dash attack where a beam of energy from the bike's underside will
destroy anything that touches it. A dash-jump can be made as well as being able
to perform the dash attack once the bike jumps. This can also enable the bike to
glide over large pits and holes.
Heart Tank
Locations:
Heart Tank - Increase the energy bar - Found in all 8 stages.

The first heart can be found in Frost Walrus' stage. You will need the Rising Fire/Ryuenjin (Dragon Flame Blade) to get this heart. Near the beginning of the stage just after the first large robot, you should see an ice block in the ceiling with the heart resting on it. Destroy the ice block with a flame attack to retrieve the heart.

The second heart can be found in Jet Stingray's stage. In Area 1, when you reach the third hole in the ground, instead of jumping over it, dash off the cliff and you will land on the platform where the heart is waiting.

The third heart is found in Slash Beast's stage. In Area 2, once you find the Raiden Armor, use it to destroy the large red train carts, the second one should have this heart hidden inside it.

The fourth heart is in Web Spider's stage. You'll need the Rising Fire/Ryuenjin (Dragon Flame Blade) to find this heart. In Area 2 where there are a lot of the electronic spider webs around, find the second brown block that looks like a tree trunk. Burn it to reveal the heart.

The fifth heart is found in Split Mushroom's stage. In Area 2, after you exit from the tower, you should see this heart up high on a ledge. Walk forward and once the spikes cause part of the room to fall, jump on top of it when it falls and then jump up to the heart.

The sixth heart is in Cyber Peacock's stage. You need to get an "S" rank in certain areas to find the heart. Do this by beating the areas as fast as possible. For X, you need to get the "S" rank in the first area, and for Zero, you'll need to get it in the second area. Use the Soul Body or Kuuenbu (Sky Waltz) to destroy the large yellow orbs.

The seventh heart is found in Storm Owl's stage. In Area 1, just after you get the Eagle Armor, you should see the heart on a platform that a huge laser cannon destroys from above. You'll need to jump-dash on foot or dash using the Eagle Armor to get the heart before the cannon fires.

The eighth
heart is in Magma Dragoon's stage. In Area 2, when you reach the area where the
large fireballs fall from the sky on an angle, go to the left and dash jump off
the cliff to reach a ledge where the heart is waiting. If you have X, use the
Lightning Web or the mid-air dash, and with Zero, just dash and jump to the
ledge.
Sub-Tank Locations:
Sub-Tank - Stores health - Found in Jet Stingray's and Cyber
Peacock's stages.
The first energy tank is in Jet Stingray's stage. In Area 2, just before the end of the area, keep jumping and then using the dash attack on the bike and eventually you'll fly over a platform with boxes. If you are using the dash attack or firing the bike's gun you'll destroy the boxes and grab the exposed energy tank.

The second
energy tank is in Cyber Peacock's stage. Similar to the heart, you'll need to
gain an "S" rank in certain areas. For X, you need to get an "S" in the second
area and for Zero you'll need to get it in the third section. Remember that the
Soul Body or Kuuenbu (Sky Waltz) will destroy the yellow orbs.
Weapon Tank
Locations:
 Weapon Tank - Stores weapon energy - Found in Frost Walrus' stage.
The weapon
tank is in Frost Walrus' stage. This is hidden within one of the ice blocks
about halfway through Area 2. To pinpoint its location, just destroy all the ice
blocks you see until you find the one that conceals the tank.
Weapon Tank - Stores weapon energy - Found in Frost Walrus' stage.
The weapon
tank is in Frost Walrus' stage. This is hidden within one of the ice blocks
about halfway through Area 2. To pinpoint its location, just destroy all the ice
blocks you see until you find the one that conceals the tank.
EX Tank Locations:
 EX Tank - More lives per continue - Found in Frost Walrus' stage.
The EX tank is
also found in Frost Walrus' stage. When you reach the area with the sloping ice
sheets above the spike beds, dash to the right until you reach the cliff. Jump
up the wall and use either the Lightning Web with X or the Kuuenbu (Sky Waltz)
to jump twice with Zero to reach the tank which is waiting on a ledge. This tank
will give X or Zero four lives instead of two whenever you restart the game.
EX Tank - More lives per continue - Found in Frost Walrus' stage.
The EX tank is
also found in Frost Walrus' stage. When you reach the area with the sloping ice
sheets above the spike beds, dash to the right until you reach the cliff. Jump
up the wall and use either the Lightning Web with X or the Kuuenbu (Sky Waltz)
to jump twice with Zero to reach the tank which is waiting on a ledge. This tank
will give X or Zero four lives instead of two whenever you restart the game.
![]()

X-Buster:
You will
begin the game with X's standard weapon, the X-Buster. This can fire small
energy balls that cause standard damage to enemy targets. The X-Buster can
also be charged up to fire off a larger, stronger shot which will cause much
more damage to enemies than the normal blast. Once you find one of the
X-Buster upgrades, you will be able to fire off enhanced shots that can
cause greater damage to enemies. Almost all the enemies in the game can be
successfully damaged and destroyed by the X-Buster.
![]()
Lightning Web:
The
Lightning Web is gained once Web Spider is defeated. This weapon will fire
out a small energy ball that will become a small spider web after traveling
a short distance. This can damage any enemies it strikes, and it can also be
used to allow X to jump off the spider web the same way as a wall. This can
allow him to reach higher areas. The charged-up shot will fire out a large
web which will travel a small distance and then will multiply and spread out
in a circular fashion which will damage any enemies it strikes.
![]()
Frost Tower:
The Frost
Tower is gained once you defeat Frost Walrus. This weapon will create a
large ice-shield around X once activated, and will damage and sometimes
freeze enemies who touch it. It can be used to protect X from heavy attacks.
The charged-up shot will create huge ice blocks that will rise up and drop
down from the sky, first one, then two, three and finally four. This enables
X to cover a larger range of fire to strike all the enemies on screen.
![]()

Soul Body:
The Soul
Body is gained once you defeat Split Mushroom. This weapon will create a
holographic clone of X that will project itself a short distance from X and
follow X as he moves around. If any enemies touch the hologram, they will
sustain damage. The charged-up shot will create an orange clone of X that
will act the same way as the primary fire but if the fire button is pushed
the clone will fire off shots. This can act as an offensive barrier for X.
![]()
Rising Fire:
The Rising
Fire is gained once Magma Dragoon is defeated. This weapon will fire a large
fireball that will fly directly up from X. The disadvantage is that it
cannot hit enemies in front of X unless he is standing right next to them,
but it does allow him to directly strike enemies above him. The secondary
fire will make X perform a large uppercut attack while covered in flames.
This will damage any enemies that touch X.
![]()
Ground Hunter:
The Ground
Hunter is gained once Jet Stingray is defeated. This weapon will fire out a
small stingray that will crawl along the ground until it strikes a target
and will then cause damage. The charged-up shot will fire out a large energy
beam shaped like a stingray but this one will fly straight forward and will
damage any enemies it strikes.
![]()
Aiming Laser:
The Aiming
Laser is gained once Cyber Peacock is defeated. This weapon will create a
large rotating target that will project itself a small distance from X. If
an enemy passes through the target, it will lock on to the enemy, and if
fire is pushed, X will fire a green laser directly at the enemy target and
will cause damage. The charged-up shot will fire out a huge green beam-ray
that will fire straight ahead and cover a large range of the screen.
![]()
Double Cyclone:
The Double
Cyclone is gained once you defeat Storm Owl. This weapon will fire out two
small energy balls either side of X. The two balls will generate energy and
will gradually float away from X and up to the top of the screen. This can
allow X to strike targets high up. The charged-up shot will fire out two
huge tornado tunnels either side of X that will fly both left and right of
the screen and will damage any enemies that they strike.
![]()
Twin Slasher:
The Twin
Slasher is gained once you defeat Slash Beast. This weapon will fire out two
wave-shaped energy beams that will fly out in diagonal directions and damage
any enemy targets they strike. The angle shots allow X to hit enemies high
up on the screen. The charged-up shot will fire out several large
energy-waves which will fly out in a circular fashion, creating a full range
of fire in front of X. The charged shot can also be used to destroy some
rock barriers in certain stages.

Z-Saber:
Unlike the
previous Mega Man X games, Zero only has his Beam Saber available to be used
as a weapon. He can perform a single blade swing while standing, jumping,
climbing up a ladder or wall, and if the fire button is pushed rapidly while
he is standing still, Zero will perform a three-swing blade technique that
can cause multiple damage to targets. Most of the techniques learned from
defeated bosses will involve Zero using his Beam Saber, and some of them
will cause it to become a different type of weapon.

Rakuhouha (Fallen
Phoenix Crush):
While
standing, press the Giga Attack button to execute this attack.
The Fallen Phoenix Crush is gained once Cyber Peacock is defeated. This
weapon fires out nine large energy balls that will fly out from Zero in a
circular fashion, creating a large range of fire. Most enemies on screen
will not be able to dodge this attack. This is the only technique that has
an energy bar.
Kuuenbu (Sky Waltz):
After jumping, press the
jump button again to jump higher. For the Spin Attack, while jumping, press
the fire button.
The Sky Waltz is gained once you defeat Split Mushroom. This technique will
allow Zero to jump twice in the air, giving him a higher jump to gain access
to out-of-reach areas. It will also allow Zero to perform a spinning attack
while in mid-air that will damage any enemy he strikes.
Raijingeki (Thunder God Attack):
While standing still, press the S.M button.
The Thunder God Attack is gained once Web Spider is defeated. This weapon
will cause Zero to slash out his beam saber. When this attack is executed,
the beam saber will become electrified and will fire out a long electrical
beam that will electrocute any enemy it strikes.
Hienkyaku (Flying Jump):
While jumping, press the dash button to perform this technique.
The Flying Jump is gained once Jet Stingray is defeated. This technique will
allow Zero to perform a mid-air dash while jumping, similar to X's when he
has the leg upgrade.
Ryuenjin (Dragon Flame Blade):
While standing still, press up and S.M at the same time to perform this
attack.
The Dragon Flame Blade is gained once Magma Dragoon is defeated. This weapon
causes Zero to jump up with his beam saber extended. The beam will be
changed to a large fire-wave that will damage any enemies that it strikes.

Tenkuuha (Sky Command):
Used normally in the same way as the Beam Saber.
The Sky Command is gained once you defeat Storm Owl. This weapon enhances
the abilities of the Beam Saber. Its color will be changed to purple, and
you will now be able to block energy beam shots from enemies by swing it at
them. It will also strengthen the power of the weapon.

Hyouretsuzan (Ice Stab):
While in mid-air, press down and S.M to perform this attack.
The Ice Stab is gained once you defeat Frost Walrus. This technique will
cause Zero to stab down with his beam saber when falling from a jump. The
beam saber will become a large ice-sword and can cause heavy damage to enemy
targets below.
Shippuuga (Hurricane Fang):
While dashing, press the S.M button to perform this attack.
The Hurricane Fang is gained once you defeat Slash Beast. This weapon will
allow Zero to slash out his beam saber while dashing to cause a dash attack
and can damage any enemies that touch him.


X's Ultimate Armor:
As there are several
different versions of Mega Man X4, there are several different codes to do
this. The initial code simply gives X a darker tint. This does nothing for
you other than set you up for the Ultimate Armor later on.
Start a new game and keep
the selection on Mega Man X. While there, press Circle, Circle, Left, Left,
Left, Left, Left, Left. Then hold R1 and L1 and press the X button. After
this is accomplished, battle your way through the opening stage, and go to
Web Spider's stage. In the area that would normally give you the Leg
Upgrade, there will be a capsule that will instead give you the Ultimate
Armor. It looks a lot different than your normal armor, and gives you all
the upgrades at the same time. Also, it lets you use the Nova Strike attack
infinitely.

Zero's Black Armor:
Unlike the Ultimate Armor
trick for X, this does no real good to Zero. There are no new powers, no
amazing abilities, no infinite powerful attacks. This is more of a wink to
long-time fans of the series, who will recognize Zero's black armor from
MMX2, when X had to battle Zero.
Start a new game and keep
the selection on Zero. While there, hold down R1, and then press Right,
Right, Right, Right, Right, Right. Stop holding R1, and press the X button.
Anime Movies:
There are ways to watch
the Anime sequences of Mega Man X4 whenever you want, without even
finishing the game.
Leave the game on the
Start screen for 10 minutes, and the game will show all of the anime
sequences in order. First X's, and then Zero's.