






| Here is a complete guide for Mega Man Xtreme 2. Choose the tab you want in order to view its content. |

|
Release Date: |
Developer: |
|
Systems: |
Genre: |
Intro: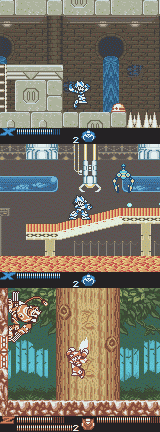
Continuing the action on the Game Boy Color, Mega Man Xtreme 2 brings back the
action that Xtreme had, as well as new features and a unique storyline for X and
Zero. Unlike the previous title, you'll be able to play as either X or Zero for
the entire game, utilizing new parts, weapons and techniques to defeat the
Maverick threat.
Game Specs:
You'll take control of X or Zero on their quest to find the Mavericks
responsible for the loss of all the worker Reploids. Along the way you'll have
to battle through eight familiar stages, each reconstructed ones from past
battles. Iris will pipe in often to inform you of the current situation. This
game has two modes, one for X and one for Zero, as well as a third Extreme mode,
only accessible once you'll played through the game with X and Zero. You'll have
to battle your way past the eight resurrected Mavericks before confronting the
new menace, in the form of two new Mavericks, bent on fulfilling their masters
wishes, and both waiting eagerly for their chance to defeat X and Zero. Behind
them is the answer to the reason for their stealing of Reploid DNA Souls, as
well as their master, awaiting the final battle...


Mode
Explanation:
There are four modes in Mega Man Xtreme 2. The first two modes go hand in hand.
There is X Mode and Zero Mode. In X Mode, you battle (as X) against Neon Tiger,
Launch Octopus, Volt Catfish, and Flame Mammoth. In Zero Mode, you battle (as
Zero) against Overdrive Ostrich, Wire Sponge, Tunnel Rhino, and Blast Hornet.
These two are combined in Xtreme Mode, where all 8 bosses are present and the
player can switch between X and Zero freely during stages. After beating Xtreme
Mode, a special Boss Attack mode becomes available, where the player can battle
against bosses from both this and the first Xtreme game using all the weapons
available to them in this game. For the purposes of this walkthrough, I'll
assume Xtreme Mode is being used.
-There are three separate modes in this game, X's Mode, Zero's Mode and Extreme
mode. Extreme mode contains X's and Zero's modes.
-If you start the game with X, once you beat his mode, you'll then move on to
Zero's mode. Once you beat Zero's mode you'll then have access to Extreme mode
and vice versa.
-If you beat the game first in X's mode, Zero will get the four techniques from
X's bosses at the start of the game, and vice versa.
-Once you beat the game on Extreme mode, you'll gain access to the secret Boss
Attack mode, where you can choose to fight all eight bosses from either this
game or the ones from Mega Man Xtreme. You'll have all the special weapons and
techniques, but no armor upgrades or sub tanks. You'll also have available all
the special upgrade parts. Once you start, go in the capsule on the left to face
the bosses from Xtreme 1, or in the right capsule to face the bosses from Xtreme
2. Remember that you can switch between X and Zero at any time

Mega Man X:
X returns to action, this time to investigate the mysterious mass
malfunction of Reploids on the Reploid Research Island, and to discover who
is stealing the DNA Souls from the Reploids. Along with his pal Zero, X will
have to battle restored Mavericks from his past, as well as the new Maverick
leaders commanding the operation. Along the way, X will be receiving
assistance from Zero, Iris and Dr. Light to help him complete this new and
challenging mission.

Zero:
Along with X, Zero is also involved in the investigation of Laguz Island,
teaming up with X to help restore the DNA Souls to the damaged reploids and
to find and retire the Mavericks responsible. This time Zero will have to
face four Mavericks from X's past, as well as one of the mysterious Maverick
leaders, but with his Beam Saber (a.k.a Z-Saber), X, Iris and Dr. Light's
help, he can be almost guaranteed success in his part of this mission.

Dr Light:
Dr. Light will be waiting for X and Zero in the special hidden upgrade
capsules, where once found he'll give X and Zero new enhancements for their
armor to help them succeed in battle. As well as giving X the normal
upgrades, Dr. Light will also enhance Zero's capabilities for battle.

Iris:
As her first mission with the Maverick Hunters, Iris takes leave from the
Repliforce to assist X and Zero in their mission on Laguz Island. She'll
play an important role by providing them with useful information and hints
to further their progress, as well as building new upgrade parts with the
DNA Souls X and Zero collect throughout the island.

The Soul Eraser - Gareth:
Gareth, a 'Soul Eraser,' is one of the two Mavericks leading the DNA Soul
operation. He first pretends to be a destroyer of evil Mavericks, but X and
Zero see right through his disguise for what he really is. Hiding away in
the Reploid Research Laboratory, he waits there for a final showdown with
Zero, but his arrogance and oversized ego will be his downfall and Zero's
advantage.

Berkana:
Berkana is the second Maverick in charge of the DNA Soul operation. As the
first female-type Maverick, Berkana believes that she can succeed where so
many other Mavericks have failed, by finally defeating X. As well as
taunting X and Zero throughout their journey on the island, she waits in the
Reploid Research Laboratory for a final showdown with X, eagerly awaiting
her chance to defeat him once and for all.

Sigma:
As always, Sigma is behind the entire DNA Soul operation, giving Berkana and
Gareth command of the island. Sigma's reason for stealing the DNA Souls is
not completely known, but it seemed that he was trying to utilize the Souls
and Reploid's bodies to create stronger Mavericks than ever before, to then
launch a huge campaign against Earth from Laguz Island. Hiding away in the
core of the operation, the Reploid Research Laboratory, Sigma watches from
there X and Zero moving through the island, but he's certain that Berkana
and Gareth will fail to stop them reaching him, so he's prepared a new
battle body just in case...
Maverick Skull:
 Guide: This
first boss will appear once you reach the end of the first stage. It'll
take up most of the screen so you won't have much room to move around
in. For most of the battle it'll move around, trying to line it's head
up with X. The head will often fire down a large blue energy beam, dash
away to dodge it, as it causes heavy damage. The head will also
sometimes spit out two smaller orange heads that follow X, just shoot
them to get rid of them. If the head flashes white, it'll send down a
large spinning razor blade that will move across the ground towards X,
just madly blast at it to destroy it. To defeat this boss, use charged
shots on the head. You'll have to jump up to hit the head, so try to
avoid being cornered before jumping. This boss shouldn't be too
difficult to beat.
Weakness:
X-Buster.
Neon Tiger:
![]() Guide: Neon
Tiger will jump up onto the walls often during this battle. First, he'll
jump up to one of the walls and pause for a few seconds. He'll then
perform one of two attacks. The first one is where he jumps down
straight at X. Try to stay near the opposite wall as a jumps, but move
forward a little so that when he jumps down you can dodge him by dashing
into the corner. Once he lands he'll jump up to the other wall. The
other attack is where he fires out energy balls from his tail. The balls
will home in on X, so dash and jump out of their way. When he's on the
ground he might also sometimes perform a charge attack, be very careful
and try to jump over him, as this attack causes heavy damage. He has no
apparent weakness, but the X-Buster works well against him. When he
jumps up on a wall, charge up the X-Buster, jump up the opposite wall
and fire at him. Just remember to be careful of his jump attacks, and
you shouldn't have any problem beating him. Once you defeat Neon Tiger
you'll receive the Ray Claw.
Guide: Neon
Tiger will jump up onto the walls often during this battle. First, he'll
jump up to one of the walls and pause for a few seconds. He'll then
perform one of two attacks. The first one is where he jumps down
straight at X. Try to stay near the opposite wall as a jumps, but move
forward a little so that when he jumps down you can dodge him by dashing
into the corner. Once he lands he'll jump up to the other wall. The
other attack is where he fires out energy balls from his tail. The balls
will home in on X, so dash and jump out of their way. When he's on the
ground he might also sometimes perform a charge attack, be very careful
and try to jump over him, as this attack causes heavy damage. He has no
apparent weakness, but the X-Buster works well against him. When he
jumps up on a wall, charge up the X-Buster, jump up the opposite wall
and fire at him. Just remember to be careful of his jump attacks, and
you shouldn't have any problem beating him. Once you defeat Neon Tiger
you'll receive the Ray Claw.
Weakness:
X-Buster.
Weapon Received:
Ray Claw.
Launch Octopus:
![]() Guide: Launch
Octopus will float down into the water-filled chamber before attacking.
He'll often be firing out missiles in two-wave formations, so you'll
have to either dash under them, jump over them or you can easily destroy
them with the X-Buster. He'll also often try to jump down on top of X.
Just dash to the left or right to dodge him. Quite often he'll jump up
to a corner and create a huge swirling wave-vortex which will try to
draw X into it. If you get caught, Launch'll begin to suck X's energy
away. Just continuously dash away from him to dodge this attack. To
defeat him, use the Ray Claw. You'll need to come in close to deal out a
blow, but once you hit him, his tentacles will blow off and he'll only
be able to fire missiles. He'll fire out a few, then try to jump on top
of X, so dash to the side when he jumps, them attack once he lands.
You'll probably run out of weapon energy before he blows, just finish
him off with the X-Buster. Dodge his missiles and his jump attacks, and
you should finish him off fairly easily. You'll gain the Marine Tornado
weapon once he's defeated.
Guide: Launch
Octopus will float down into the water-filled chamber before attacking.
He'll often be firing out missiles in two-wave formations, so you'll
have to either dash under them, jump over them or you can easily destroy
them with the X-Buster. He'll also often try to jump down on top of X.
Just dash to the left or right to dodge him. Quite often he'll jump up
to a corner and create a huge swirling wave-vortex which will try to
draw X into it. If you get caught, Launch'll begin to suck X's energy
away. Just continuously dash away from him to dodge this attack. To
defeat him, use the Ray Claw. You'll need to come in close to deal out a
blow, but once you hit him, his tentacles will blow off and he'll only
be able to fire missiles. He'll fire out a few, then try to jump on top
of X, so dash to the side when he jumps, them attack once he lands.
You'll probably run out of weapon energy before he blows, just finish
him off with the X-Buster. Dodge his missiles and his jump attacks, and
you should finish him off fairly easily. You'll gain the Marine Tornado
weapon once he's defeated.
Weakness:
Ray Claw.
Weapon Received:
Marine Tornado.
Flame Mammoth:
 Guide: Flame
Mammoth will battle you in the large conveyer belt room. As soon as you
enter the room, his energy bar will appear and he'll jump in from the
right, so quickly dash to the left to dodge him. If he roars he'll
change the direction of the moving conveyer belt, so make sure you know
which way it's going to successfully dodge his jump attacks. He'll be
performing his jump attacks quite often, just remember to dash under him
and jump up as he lands, otherwise you'll be stunned for a second and
won't be able to move. He'll also sometimes fire out a series of
fireballs, jump up a wall to dodge them. He often also fires out several
flames out of the screen, once they reappear they'll fall down on top of
X, so dash to the side to dodge them. If he fires out a glob of oil
which is then later hit by his fire, it'll engulf and create a wall of
flames, so try to stay away if this happens. To defeat him, use the
Marine Tornado. Wait until he jumps at you, then fire the weapon,
Flame'll jump straight into the vortex and be thrown back by the blast.
Keep up this sequence and you should defeat him very easily. You'll
receive the Fire Wave once he's defeated.
Weakness:
Marine Tornado.
Weapon Received:
Fire Wave.
Volt Catfish:
![]() Guide: Volt
Catfish will be using a lot of heavy electric attacks during this
battle. He'll quite often jump around and try to ram into X, dash under
him to dodge his attacks. If he jumps into one of the corners of the
room, he'll fire out two small energy balls that fly out, one on the top
of the screen and one on the bottom. He'll them try to suck X in. The
two balls will follow X and generate energy bolts up and down them. Try
to move towards Catfish to dodge the bolts, but don't get too close. He
also often sends out two large energy balls which crawl along the floor
and walls, just jump over them when they come close. Use the Ray Claw to
defeat him. When he jumps, dash to the side and hit him as he lands. If
he performs the sucking attack, just whack him in the face. Once his
health is nearly gone, he might begin to flash blue. If he does you
won't be able to hit him, try to stay away as he'll launch another heavy
electrical attack. Keep pounding him and you shouldn't have much trouble
in finishing him off. You'll receive Tri-Thunder once you defeat him.
Guide: Volt
Catfish will be using a lot of heavy electric attacks during this
battle. He'll quite often jump around and try to ram into X, dash under
him to dodge his attacks. If he jumps into one of the corners of the
room, he'll fire out two small energy balls that fly out, one on the top
of the screen and one on the bottom. He'll them try to suck X in. The
two balls will follow X and generate energy bolts up and down them. Try
to move towards Catfish to dodge the bolts, but don't get too close. He
also often sends out two large energy balls which crawl along the floor
and walls, just jump over them when they come close. Use the Ray Claw to
defeat him. When he jumps, dash to the side and hit him as he lands. If
he performs the sucking attack, just whack him in the face. Once his
health is nearly gone, he might begin to flash blue. If he does you
won't be able to hit him, try to stay away as he'll launch another heavy
electrical attack. Keep pounding him and you shouldn't have much trouble
in finishing him off. You'll receive Tri-Thunder once you defeat him.
Weakness:
Ray Claw.
Weapon Received:
Tri-Thunder.
Velgauder:
![]() Guide: Remember
Velgauder from X1? Well, you'll have to fight him again here, but it
won't be too difficult. Once you reach the end of the first final
Maverick stage, he'll jump down the walls of the room before attacking.
For most of the battle Velgauder will just try to run into X, try to
jump over him to dodge this attack as it causes heavy damage. If you
jump up the walls he'll also jump up after you so be careful. He'll also
often fire out several energy balls that fly out in wavy directions, so
try to jump up a wall to dodge them. If he fires out a large fire-wave,
jump up the walls to dodge it. Defeat Velgauder with the Ray Claw
weapon. As he charges you, just whack him in the face, and try to attack
him as he jumps up over you. Keep hitting him and try to dodge him as
best you can. He shouldn't be too difficult to beat.
Guide: Remember
Velgauder from X1? Well, you'll have to fight him again here, but it
won't be too difficult. Once you reach the end of the first final
Maverick stage, he'll jump down the walls of the room before attacking.
For most of the battle Velgauder will just try to run into X, try to
jump over him to dodge this attack as it causes heavy damage. If you
jump up the walls he'll also jump up after you so be careful. He'll also
often fire out several energy balls that fly out in wavy directions, so
try to jump up a wall to dodge them. If he fires out a large fire-wave,
jump up the walls to dodge it. Defeat Velgauder with the Ray Claw
weapon. As he charges you, just whack him in the face, and try to attack
him as he jumps up over you. Keep hitting him and try to dodge him as
best you can. He shouldn't be too difficult to beat.
Weakness:
Ray Claw.
Sphinx Tank:
 Guide: This
annoying boss will be extremely difficult to defeat. First, you'll
notice that a small purple moving pillar will appear above you, you can
use this to reach the upper head on the tank. The tank will begin by
moving slowly towards X, jump up on top of the pillar to avoid being
cornered. The upper head will be constantly firing out energy balls that
are difficult to dodge. Try to jump them as they come close. The lower
head will sometimes fire out large missiles that will disappear off the
top of the screen and then come down on X, move from side to side to
dodge them. Make sure that you never touch the large drill on the front
of the tank, as it causes massive damage. Once the tank moves all the
way to the left, it'll stay there for a few seconds before retreating
back to the right. You'll need to destroy both heads to defeat this
boss. The top head's weakness is the Fire Wave weapon. Jump up onto the
pillar, then fire out towards the head. The small fireball should strike
the head and cause heavy damage. Keep this up and keep dodging the
energy balls to blow the first head. The lower head's weakness is the
Ray Claw weapon. It will be extremely difficult to hit the head without
taking damage from the drill, so here I recommend that you switch to
Zero. Once you have Zero, you'll notice that if you slash out at any
part of the tank, it'll reel back. Keep doing this, then jump up and
carefully hit the head without touching the drill. Dodge the missiles
and keep up this attack to finish it off.
Weakness:
Fire Wave/Ray Claw.
Berkana:
![]() Guide: Once
you reach the end of the final Reploid Research Laboratory stage,
Berkana will appear for the final battle. She'll taunt X at first, then
the battle will begin. She'll be floating around the top of the screen
for the entire battle, so you'll easily be able to move around safely on
the ground. She has two main forms of attacks, both can be deadly. The
first one involves her firing out red balls from her staff that bounce
around the room. If one hits you, spikes will appear on one of the walls
and she'll send down small fireballs. Each time one hits the ground, two
flames will crawl out along the ground and up the walls. The problem
here is that you won't be able to jump or charge up the X-Buster. You'll
just have to hold out until she stops firing. Once the attack stops, the
spikes will disappear and you'll be able to jump again. She also often
fires out a large blue energy ball from her staff. If it hits you,
spikes will line the floor, so jump up the opposite wall to her to avoid
them. A platform will appear in the center of the room so you'll be able
to dodge her attack. She'll then fire down large blue ice spikes, try to
move around as much as you can to dodge them. Eventually the spikes will
disappear and she'll start firing out the red and blue balls again. She
might also sometimes drop down a large spiked ball that rolls around the
ground, just jump over it to dodge it. Her weaknesses are the Marine
Tornado, Fire Wave and Tri-Thunder weapons, but you can only damage her
with the Marine Tornado and Fire Wave weapons when you've been hit by
one of the energy balls. If you get hit by the blue ball, her weakness
will be the Marine Tornado, if you're hit by the red ball, it'll be the
Fire Wave weapon. It'll be extremely easy to hit her with the Marine
Tornado, just position X under her then fire the weapon to cause heavy
damage, but be careful as she sometimes dives down to hit X. Jump up
near her and fire out the Fire Wave to hit her. To make it much easier,
use only the Tri-Thunder weapon, she'll always be vulnerable to it. Just
remember to try and dodge the energy balls, if one hits you try to hold
out until the attack ends. Use the other two weapons if you run out of
weapon energy. She'll be very difficult to beat, but once you defeat
Berkana, sit back, enjoy the finale and get ready to go through Zero's
normal mode, or if you've already been through it, Extreme mode!
Guide: Once
you reach the end of the final Reploid Research Laboratory stage,
Berkana will appear for the final battle. She'll taunt X at first, then
the battle will begin. She'll be floating around the top of the screen
for the entire battle, so you'll easily be able to move around safely on
the ground. She has two main forms of attacks, both can be deadly. The
first one involves her firing out red balls from her staff that bounce
around the room. If one hits you, spikes will appear on one of the walls
and she'll send down small fireballs. Each time one hits the ground, two
flames will crawl out along the ground and up the walls. The problem
here is that you won't be able to jump or charge up the X-Buster. You'll
just have to hold out until she stops firing. Once the attack stops, the
spikes will disappear and you'll be able to jump again. She also often
fires out a large blue energy ball from her staff. If it hits you,
spikes will line the floor, so jump up the opposite wall to her to avoid
them. A platform will appear in the center of the room so you'll be able
to dodge her attack. She'll then fire down large blue ice spikes, try to
move around as much as you can to dodge them. Eventually the spikes will
disappear and she'll start firing out the red and blue balls again. She
might also sometimes drop down a large spiked ball that rolls around the
ground, just jump over it to dodge it. Her weaknesses are the Marine
Tornado, Fire Wave and Tri-Thunder weapons, but you can only damage her
with the Marine Tornado and Fire Wave weapons when you've been hit by
one of the energy balls. If you get hit by the blue ball, her weakness
will be the Marine Tornado, if you're hit by the red ball, it'll be the
Fire Wave weapon. It'll be extremely easy to hit her with the Marine
Tornado, just position X under her then fire the weapon to cause heavy
damage, but be careful as she sometimes dives down to hit X. Jump up
near her and fire out the Fire Wave to hit her. To make it much easier,
use only the Tri-Thunder weapon, she'll always be vulnerable to it. Just
remember to try and dodge the energy balls, if one hits you try to hold
out until the attack ends. Use the other two weapons if you run out of
weapon energy. She'll be very difficult to beat, but once you defeat
Berkana, sit back, enjoy the finale and get ready to go through Zero's
normal mode, or if you've already been through it, Extreme mode!
Weakness:
Marine Tornado/Fire
Wave/Tri-Thunder.
Extreme Mode:
Sigma's First Form:
![]() Guide: Try
to make sure that you haven't used X's Marine Tornado while fighting the
eight bosses, as you'll need it here. Sigma will confront you once you
beat the eight bosses and reach the end of the laboratory. He'll be in
his X2 form, his attacks will also be very similar to the ones he used
in X2. Sigma'll taunt you before the battle begins. He'll start by
charging at you, he'll be slashing at you with his claws quite often,
try to jump out of his way or up a wall to dodge it. He also often fires
out five large energy balls which, one at a time, home-in on your
character so try to dodge each one as they move. If he glows, he'll fire
out a huge electrical-wall which causes heavy damage, so try to stay up
high on a wall as the electric-wall covers part of the lower screen.
You'll probably find using X in this battle easier than using Zero. If
you use Zero, Sigma's weakness will be the Drill Crush and Dash
techniques, but it'll be very difficult to hit him without taking heavy
damage. If you find it too difficult, use X. Use the Marine Tornado,
jump up a wall and air-dash over the top of Sigma, once you're directly
over him, fire off the weapon to cause heavy damage. Try to dash off to
a wall or land on the ground away from Sigma once you hit him. Try to
stay up the walls above Sigma, he won't be able to hit you as easily as
if you were on the ground. Keep jumping and air-dashing
across the room while firing off the Marine Tornado to eventually
destroy him.
Guide: Try
to make sure that you haven't used X's Marine Tornado while fighting the
eight bosses, as you'll need it here. Sigma will confront you once you
beat the eight bosses and reach the end of the laboratory. He'll be in
his X2 form, his attacks will also be very similar to the ones he used
in X2. Sigma'll taunt you before the battle begins. He'll start by
charging at you, he'll be slashing at you with his claws quite often,
try to jump out of his way or up a wall to dodge it. He also often fires
out five large energy balls which, one at a time, home-in on your
character so try to dodge each one as they move. If he glows, he'll fire
out a huge electrical-wall which causes heavy damage, so try to stay up
high on a wall as the electric-wall covers part of the lower screen.
You'll probably find using X in this battle easier than using Zero. If
you use Zero, Sigma's weakness will be the Drill Crush and Dash
techniques, but it'll be very difficult to hit him without taking heavy
damage. If you find it too difficult, use X. Use the Marine Tornado,
jump up a wall and air-dash over the top of Sigma, once you're directly
over him, fire off the weapon to cause heavy damage. Try to dash off to
a wall or land on the ground away from Sigma once you hit him. Try to
stay up the walls above Sigma, he won't be able to hit you as easily as
if you were on the ground. Keep jumping and air-dashing
across the room while firing off the Marine Tornado to eventually
destroy him.
Weakness:
Drill Crush/Dash/Marine Tornado.
Sigma's Final Form:
 Guide: Once
you defeat Sigma's first form, he'll reappear in this huge armored suit.
The large armor is completely invincible to all weapons/techniques
except the X-Buster. This final form of Sigma has several attacks. If
his armor is a yellow and purple color, he'll fire out several green
energy balls, one at a time, which home in on X. Try to jump them just
before they hit you and dash around on the ground to dodge them. If he
becomes completely purple, green energy balls will appear in the air and
will fly straight at X, try to dodge as many as you can before they stop
coming. If he becomes a light blue color, he'll fire out the green
energy balls again, but he might also stop and fly up out of the screen.
He'll then come down on the opposite side of the room, jump up just as
he lands has X'll be stunned for a second if you're on the ground when
he lands. Be careful if Sigma begins flashing, as he'll fly across the
room, creating a large green blast in front of him which is difficult to
avoid. If he takes off on a diagonal path out of the screen, he'll come
back down on the opposite side and fire off several huge green energy
beams that can cause heavy damage. Try to dodge them by dashing under
them as they fly across the screen. He might also fly across the top of
the screen and pump down a huge green beam which is difficult to dodge,
try to stay away from him as best you can until he stops firing, if he
stops firing for a split second, quickly dash past. Sigma will probably
use the heavy energy beam attacks quite often, so you'll need some
practice in dodging them before avoiding them successfully. You'll need
to use both X and Zero to successfully defeat Sigma. First, use X to
take down the armor's defense by using charged shots from the X-Buster.
When he's either yellow or blue, jump up and use a mid-air dash straight
up so that you can reach the large face on the chest-plate of the armor.
Fire off a charged shot (it must be either the yellow shot or one of the
double-shots) and you'll notice that when it hits the large face the
entire armor will flash. Hit the chest-plate with four charged shots and
Sigma will freeze and begin to flash. When this happens, quickly press
Start and switch to Zero. When you return, you'll notice that the armor
will disappear and Sigma's first form will appear, motionless and
defenseless. Whack him with the Beam Saber to cause heavy damage. You'll
have to be quick, as after about a second the armor will reappear again.
Make sure you have sub-tanks full, as when the armor is purple you won't
be able to damage it, and Sigma will most likely use his energy beam
attacks then. If you have to, use Zero while trying to avoid Sigma's
attacks if he's purple to conserve X's energy. Once he becomes blue or
yellow again, continue using X. This will be a very tough battle, but
it's one like no other as you can switch between X and Zero at any time.
Keep dodging his attacks, it might take a few tries, but once you manage
to defeat Sigma, congratulations, you'll have completely finished the
game and you'll now get access to the secret Boss Attack game mode!
Weakness:
X-Buster/Z-Saber/Marine Tornado.
Maverick Skull:
 Guide: This
first boss will appear once you reach the end of the first stage. It'll
take up most of the screen so you won't have much room to move around
in. For most of the battle it'll move around, trying to line it's head
up with Zero. The head will often fire down a large blue energy beam,
dash away to dodge it, as it causes heavy damage. The head will also
sometimes spit out two smaller orange heads that follow Zero, just whack
them to get rid of them. If the head flashes white, it'll send down a
large spinning razor blade that will move across the ground towards
Zero, just madly hack at it to destroy it. To defeat this boss, use
jump-slash attacks on the head. You'll have to jump up to hit the head,
so try to avoid being cornered before jumping. This boss shouldn't be
too difficult to beat.
Weakness:
Z-Saber.
Blast Hornet:
 Guide: Blast
Hornet will be constantly trying to hit you during this battle. He'll
use two main forms of attack, one where he fires out two smaller
hornets, and a charge attack. If he fires out the small hornets, they'll
slowly home in on Zero, just whack at them to destroy them. If he
extends his stinger in an attacking pose, get ready to dash to the left
or right or jump up a wall, as he'll fly down and charge at Zero. Make
sure you dodge him as this attack can cause heavy damage. To defeat him,
just slash at him with the Beam Saber whenever you can, jump up and hit
him, then back away in case he performs the charge attack. Keep this up
and you should defeat him without much trouble. You'll receive the Earth
Gaizer technique once you defeat him.
Weakness:
Dash.
Weapon Received:
Earth Gaizer.
Tunnel Rhino:
![]() Guide: Tunnel
Rhino will be using a lot of charging attacks during this battle. First,
he'll probably fire out two small drills that fly across the room at
Zero, either jump over them or dash under them to dodge it. He'll also
often charge without warning, so get ready to jump up the walls if he
does. If he charges and flashes green, he'll pump out two rock boulders
as he moves across the room, try to stay up a wall and wait for them to
disappear. He might also sometimes ram his large arm-drill into the
ground, if he does, smaller drills will appear out of the floor and
ceiling, try to stay out of their way and wait for them to stop coming.
To defeat him, use the Earth Gaizer technique. Each time you use it,
he'll take heavy damage, but you'll probably run out of weapon energy
before his health's completely gone. Once that happens, just strike at
him when he stops charging or when he isn't moving. A tough battle,
you'll need to be quick to dodge his attacks. You'll gain the Drill
Crush once he's defeated.
Guide: Tunnel
Rhino will be using a lot of charging attacks during this battle. First,
he'll probably fire out two small drills that fly across the room at
Zero, either jump over them or dash under them to dodge it. He'll also
often charge without warning, so get ready to jump up the walls if he
does. If he charges and flashes green, he'll pump out two rock boulders
as he moves across the room, try to stay up a wall and wait for them to
disappear. He might also sometimes ram his large arm-drill into the
ground, if he does, smaller drills will appear out of the floor and
ceiling, try to stay out of their way and wait for them to stop coming.
To defeat him, use the Earth Gaizer technique. Each time you use it,
he'll take heavy damage, but you'll probably run out of weapon energy
before his health's completely gone. Once that happens, just strike at
him when he stops charging or when he isn't moving. A tough battle,
you'll need to be quick to dodge his attacks. You'll gain the Drill
Crush once he's defeated.
Weakness:
Earth Gaizer.
Weapon Received:
Drill Crush.
Wire Sponge:
![]() Guide: Wire
Sponge will be using his vine whip quite often during this battle. He'll
begin by throwing the whip up to the ceiling to suspend himself in the
air, he'll then fire out several small green seeds that try to land on
Zero, so you'll have to keep moving to dodge them. Once the last one
lands, it'll become a small thorn vine in the ground or wall, so quickly
destroy it. He might also sometimes whip out at Zero, so get ready to
jump up the walls to dodge it. He'll also jump around the room so get
ready to move. His weakness is the Drill Crush technique, but it'll be
hard to hit him without taking damage yourself, if you take too much
damage, just use the Beam Saber and strike when he's hanging from the
roof or not moving. Once his health is nearly out, he'll probably become
red. If he does, stay in the opposite corner as he'll shoot down several
electric bolts from the ceiling which can cause heavy damage. He
shouldn't be too difficult to finish off. Once he's defeated you'll
receive the Lightning technique.
Guide: Wire
Sponge will be using his vine whip quite often during this battle. He'll
begin by throwing the whip up to the ceiling to suspend himself in the
air, he'll then fire out several small green seeds that try to land on
Zero, so you'll have to keep moving to dodge them. Once the last one
lands, it'll become a small thorn vine in the ground or wall, so quickly
destroy it. He might also sometimes whip out at Zero, so get ready to
jump up the walls to dodge it. He'll also jump around the room so get
ready to move. His weakness is the Drill Crush technique, but it'll be
hard to hit him without taking damage yourself, if you take too much
damage, just use the Beam Saber and strike when he's hanging from the
roof or not moving. Once his health is nearly out, he'll probably become
red. If he does, stay in the opposite corner as he'll shoot down several
electric bolts from the ceiling which can cause heavy damage. He
shouldn't be too difficult to finish off. Once he's defeated you'll
receive the Lightning technique.
Weakness:
Drill Crush.
Weapon Received:
Lightning.
Overdrive Ostrich:
![]() Guide: Overdrive
Ostrich will battle you in an outdoor desert area. He'll be constantly
trying to dash into Zero, so be ready to dash out of the way or jump
over him. If he jumps straight up, he'll fire out a flying disc at you,
be ready to dodge it quickly as it moves fast. He might also sometimes
jump up and fire out several purple discs that fly out above the screen
and then straight down. Dodge them by dashing out of the disc's range,
but they might also sometimes home-in on Zero, so get ready to move. If
he begins hopping around the screen, he'll leave and you'll see him
running around in the background. Once he's level with Zero he'll jump
back into the screen and try to land on top of him, so dash to the side
just as he re-enters the screen. Overdrive's weakness is the Lightning
technique, but as you perform the attack, the electric bolts will come
down at random locations, so you might miss him. If you keep missing,
just attack him with the Beam Saber every time he stops moving. Not too
tough a battle, once you defeat him you'll receive the Dash technique.
Guide: Overdrive
Ostrich will battle you in an outdoor desert area. He'll be constantly
trying to dash into Zero, so be ready to dash out of the way or jump
over him. If he jumps straight up, he'll fire out a flying disc at you,
be ready to dodge it quickly as it moves fast. He might also sometimes
jump up and fire out several purple discs that fly out above the screen
and then straight down. Dodge them by dashing out of the disc's range,
but they might also sometimes home-in on Zero, so get ready to move. If
he begins hopping around the screen, he'll leave and you'll see him
running around in the background. Once he's level with Zero he'll jump
back into the screen and try to land on top of him, so dash to the side
just as he re-enters the screen. Overdrive's weakness is the Lightning
technique, but as you perform the attack, the electric bolts will come
down at random locations, so you might miss him. If you keep missing,
just attack him with the Beam Saber every time he stops moving. Not too
tough a battle, once you defeat him you'll receive the Dash technique.
Weakness:
Lightning.
Weapon Received:
Dash.
Velgauder:
![]() Guide: Remember
Velgauder from X1? Well, you'll have to fight him again here, but it
won't be too difficult. Once you reach the end of the first final
Maverick stage, he'll jump down the walls of the room before attacking.
For most of the battle Velgauder will just try to run into Zero, try to
jump over him to dodge this attack as it causes heavy damage. If you
jump up the walls he'll also jump up after you so be careful. He'll also
often fire out several energy balls that fly out in wavy directions, so
try to jump up a wall to dodge them. If he fires out a large fire-wave,
jump up the walls to dodge it. Defeat Velgauder with the Drill Crush
technique. You'll need to get very close to hit him, so you'll probably
get hit yourself while performing the attack. If your health isn't too
low, just keep whacking him, otherwise be careful and time your attacks.
He shouldn't be too difficult to beat.
Guide: Remember
Velgauder from X1? Well, you'll have to fight him again here, but it
won't be too difficult. Once you reach the end of the first final
Maverick stage, he'll jump down the walls of the room before attacking.
For most of the battle Velgauder will just try to run into Zero, try to
jump over him to dodge this attack as it causes heavy damage. If you
jump up the walls he'll also jump up after you so be careful. He'll also
often fire out several energy balls that fly out in wavy directions, so
try to jump up a wall to dodge them. If he fires out a large fire-wave,
jump up the walls to dodge it. Defeat Velgauder with the Drill Crush
technique. You'll need to get very close to hit him, so you'll probably
get hit yourself while performing the attack. If your health isn't too
low, just keep whacking him, otherwise be careful and time your attacks.
He shouldn't be too difficult to beat.
Weakness:
Drill Crush.
Sphinx Tank:
 Guide: Once
again, this poor excuse for a boss will be extremely difficult to beat.
He'll be using the same attacks as in X's mode, but it will help if
you've already got the Fire Wave technique from X's mode. Using the Fire
Wave, stand on the pillar and perform the attack from there so that the
flame strikes the upper head. If you don't have the Fire Wave technique,
while standing on the pillar, use the Dash technique to inflict damage
on the upper head, or switch to X and use charged shots on the head
until it blows. Use a sub-tank if your health goes down, but once the
upper head is gone it'll be easier from here on. The lower head has a
variety of weaknesses, but the best and easiest way to defeat it is to
stay on the pillar and madly slash away with the Beam Saber, when the
tank comes close you'll smack the lower head and any missiles it fires.
Keep slashing and the missiles it fires should miss you. Keep this up
and you should finish it off quickly.
Weakness:
All Techniques.
Gareth:
![]() Guide: Once
you reach the end of the final Maverick stage, Gareth will appear for
the final battle. He'll be using a large spear-type weapon often during
this battle. First, he'll probably jump up and throw down his spear at
Zero, so get ready to dash or jump out of its way, as the spear will fly
down and stick in the ground for a second. He might also jump up out of
the screen, if he does he'll throw down several spears, but you
shouldn't have much trouble in dodging them. His weakness is the Drill
Crush technique, so again you'll need to get very close to inflict
damage. He sometimes creates a small shield that blocks you attack, but
if you can hit him as he jumps up and is just about to throw a spear,
you should inflict heavier damage then from a normal shot. He'll be
constantly trying to block your shots with his shield, so you'll need to
hit him just after he throws a spear. Keep in mind the most of the time
he'll drop down into the left corner once he's finished throwing down
spears from above. A tough battle, but you'll probably find Gareth a
little easier to beat than Berkana. Once you beat him, enjoy the finale,
and get ready to play through X's mode, but if you've already done so,
you'll now have access to the Extreme mode!
Guide: Once
you reach the end of the final Maverick stage, Gareth will appear for
the final battle. He'll be using a large spear-type weapon often during
this battle. First, he'll probably jump up and throw down his spear at
Zero, so get ready to dash or jump out of its way, as the spear will fly
down and stick in the ground for a second. He might also jump up out of
the screen, if he does he'll throw down several spears, but you
shouldn't have much trouble in dodging them. His weakness is the Drill
Crush technique, so again you'll need to get very close to inflict
damage. He sometimes creates a small shield that blocks you attack, but
if you can hit him as he jumps up and is just about to throw a spear,
you should inflict heavier damage then from a normal shot. He'll be
constantly trying to block your shots with his shield, so you'll need to
hit him just after he throws a spear. Keep in mind the most of the time
he'll drop down into the left corner once he's finished throwing down
spears from above. A tough battle, but you'll probably find Gareth a
little easier to beat than Berkana. Once you beat him, enjoy the finale,
and get ready to play through X's mode, but if you've already done so,
you'll now have access to the Extreme mode!
Weakness:
Drill Crush.
Extreme Mode:
Sigma's First Form:
![]() Guide: Try
to make sure that you haven't used X's Marine Tornado while fighting the
eight bosses, as you'll need it here. Sigma will confront you once you
beat the eight bosses and reach the end of the laboratory. He'll be in
his X2 form, his attacks will also be very similar to the ones he used
in X2. Sigma'll taunt you before the battle begins. He'll start by
charging at you, he'll be slashing at you with his claws quite often,
try to jump out of his way or up a wall to dodge it. He also often fires
out five large energy balls which, one at a time, home-in on your
character so try to dodge each one as they move. If he glows, he'll fire
out a huge electrical-wall which causes heavy damage, so try to stay up
high on a wall as the electric-wall covers part of the lower screen.
You'll probably find using X in this battle easier than using Zero. If
you use Zero, Sigma's weakness will be the Drill Crush and Dash
techniques, but it'll be very difficult to hit him without taking heavy
damage. If you find it too difficult, use X. Use the Marine Tornado,
jump up a wall and air-dash over the top of Sigma, once you're directly
over him, fire off the weapon to cause heavy damage. Try to dash off to
a wall or land on the ground away from Sigma once you hit him. Try to
stay up the walls above Sigma, he won't be able to hit you as easily as
if you were on the ground. Keep jumping and air-dashing
across the room while firing off the Marine Tornado to eventually
destroy him.
Guide: Try
to make sure that you haven't used X's Marine Tornado while fighting the
eight bosses, as you'll need it here. Sigma will confront you once you
beat the eight bosses and reach the end of the laboratory. He'll be in
his X2 form, his attacks will also be very similar to the ones he used
in X2. Sigma'll taunt you before the battle begins. He'll start by
charging at you, he'll be slashing at you with his claws quite often,
try to jump out of his way or up a wall to dodge it. He also often fires
out five large energy balls which, one at a time, home-in on your
character so try to dodge each one as they move. If he glows, he'll fire
out a huge electrical-wall which causes heavy damage, so try to stay up
high on a wall as the electric-wall covers part of the lower screen.
You'll probably find using X in this battle easier than using Zero. If
you use Zero, Sigma's weakness will be the Drill Crush and Dash
techniques, but it'll be very difficult to hit him without taking heavy
damage. If you find it too difficult, use X. Use the Marine Tornado,
jump up a wall and air-dash over the top of Sigma, once you're directly
over him, fire off the weapon to cause heavy damage. Try to dash off to
a wall or land on the ground away from Sigma once you hit him. Try to
stay up the walls above Sigma, he won't be able to hit you as easily as
if you were on the ground. Keep jumping and air-dashing
across the room while firing off the Marine Tornado to eventually
destroy him.
Weakness:
Drill Crush/Dash/Marine Tornado.
Sigma's Final Form:
 Guide: Once
you defeat Sigma's first form, he'll reappear in this huge armored suit.
The large armor is completely invincible to all weapons/techniques
except the X-Buster. This final form of Sigma has several attacks. If
his armor is a yellow and purple color, he'll fire out several green
energy balls, one at a time, which home in on X. Try to jump them just
before they hit you and dash around on the ground to dodge them. If he
becomes completely purple, green energy balls will appear in the air and
will fly straight at X, try to dodge as many as you can before they stop
coming. If he becomes a light blue color, he'll fire out the green
energy balls again, but he might also stop and fly up out of the screen.
He'll then come down on the opposite side of the room, jump up just as
he lands has X'll be stunned for a second if you're on the ground when
he lands. Be careful if Sigma begins flashing, as he'll fly across the
room, creating a large green blast in front of him which is difficult to
avoid. If he takes off on a diagonal path out of the screen, he'll come
back down on the opposite side and fire off several huge green energy
beams that can cause heavy damage. Try to dodge them by dashing under
them as they fly across the screen. He might also fly across the top of
the screen and pump down a huge green beam which is difficult to dodge,
try to stay away from him as best you can until he stops firing, if he
stops firing for a split second, quickly dash past. Sigma will probably
use the heavy energy beam attacks quite often, so you'll need some
practice in dodging them before avoiding them successfully. You'll need
to use both X and Zero to successfully defeat Sigma. First, use X to
take down the armor's defense by using charged shots from the X-Buster.
When he's either yellow or blue, jump up and use a mid-air dash straight
up so that you can reach the large face on the chest-plate of the armor.
Fire off a charged shot (it must be either the yellow shot or one of the
double-shots) and you'll notice that when it hits the large face the
entire armor will flash. Hit the chest-plate with four charged shots and
Sigma will freeze and begin to flash. When this happens, quickly press
Start and switch to Zero. When you return, you'll notice that the armor
will disappear and Sigma's first form will appear, motionless and
defenseless. Whack him with the Beam Saber to cause heavy damage. You'll
have to be quick, as after about a second the armor will reappear again.
Make sure you have sub-tanks full, as when the armor is purple you won't
be able to damage it, and Sigma will most likely use his energy beam
attacks then. If you have to, use Zero while trying to avoid Sigma's
attacks if he's purple to conserve X's energy. Once he becomes blue or
yellow again, continue using X. This will be a very tough battle, but
it's one like no other as you can switch between X and Zero at any time.
Keep dodging his attacks, it might take a few tries, but once you manage
to defeat Sigma, congratulations, you'll have completely finished the
game and you'll now get access to the secret Boss Attack game mode!
Weakness:
X-Buster/Z-Saber/Marine Tornado.
Armor
Parts and Item Locations:
X's
Upgrades:
 X's Leg Upgrade - Allows X to air
dash - Found in Volt Catfish's stage.
 The
boots upgrade is in Volt Catfish's stage. You will eventually come
across a large shaft leading up with waterfalls gushing down. Jump up
the shaft, destroying any enemies you come across. Once you reach the
top, the rest of the stage will head off to the right, but before going,
continue to jump up the wall on your left. You'll eventually see an
opening on the right, head in to find the capsule. This upgrade will
allow X to perform a horizontal and vertical dash in mid-air.
 X's Arm Upgrade - Allow X to fire a more powerful X-Buster
shot - Found in Flame Mammoth's stage.
 The
X-Buster upgrade is found in Flame Mammoth's stage. You'll need the
Helmet and Boots upgrades to reach this one. Just before the large lava
area with the mattock-throwing robots, you should see a group of strange
looking blocks up on the ceiling. Jump up and using the vertical mid-air
dash, begin breaking through them. Jump up the wall on the left to
destroy the remaining ones to reach the capsule. This upgrade will give
X two different types of stronger X-Buster shots, once you charge him up
past purple and then onto white, release fire to fire off a charged
shot, then press fire again to fire a second. If the two shots overlap,
four smaller energy balls will fly out in diagonal directions.
 X's Body Upgrade - Allows X to do Giga Crush - Found in
Launch Octopus' stage.
 The
Armor upgrade is found in Launch Octopus' Stage. Eventually you'll come
across the large green sub similar to the one found in X1, jump up the
swirling vortex on the left of it to reach the sub. Jump up onto it and
blast away at the glass cockpit in front of you. Once the sub blows,
fall down into the deep chasm it creates, then go right. You'll reach a
large room filled with spikes, and a large red serpent will appear. Ride
on it's back and blast away at the head or tail to eventually destroy
it. Once it blows head right to find the capsule. This upgrade will
enhance X's defensive capabilities by reducing damage inflicted from
enemies to half the normal rate. You'll also receive the G-Crush weapon,
but to fill up weapon energy for it you'll need to take damage from
enemies. Once the energy bar is full, select it from the sub-screen to
discharge a huge energy blast that destroys all enemies on-screen.
 X's Helmet Upgrade - Allow X to do head butt - Found in
Neon Tiger's stage.
 The
helmet upgrade is found in Neon Tiger's stage. After traversing across
the moving platforms with gun turrets, you'll cross the ravine and see
the capsule hidden behind a wooden wall. You'll need the Fire Wave
weapon to reach it. Using the Fire Wave weapon, destroy the wall
blocking the capsule to reach it. This upgrade will allow X to destroy
certain blocks with a head-butt.
Zero's
Upgrades:
 Zero's Leg Upgrade - Allow Zero to
break bricks with kicks - Found in Wire Sponge's stage.
 The
boots upgrade is in Wire Sponge's stage. Once you reach the indoor area
where large platforms are rising up a tall shaft, wait for the next one
to clear, then drop down the hole in the ground and fall down to the
right. You'll land on a platform below, head right to find this capsule.
This upgrade will allow Zero to destroy certain blocks by jumping off
them.
 Zero's Arm Upgrade - Allows Zero Final - Found in Tunnel
Rhino's stage.
 The
X-Buster upgrade is found in Tunnel Rhino's stage. You'll need the
Lightning technique to reach this one. Once you reach the armored
carrier in the cavern with breakable floor, get in the carrier and drop
down through the crumbling floor. Once you reach the bottom of the
shaft, head left. You should reach an opening in a wall too small for
the carrier, so jump out and go into the opening. You'll see a metal
wall blocking your way, use the Lightning technique to destroy it to
reach the capsule. This upgrade gives Zero his strongest technique, Zero
Final, which can destroy smaller enemies easily or heavily damage
bosses.
 Zero's Body Upgrade - More powerful defense - Found in
Blast Hornet's stage.
 The
Armor upgrade is found in Blast Hornet's Stage. You'll need the Drill
Crush technique to reach this one. Once you reach the large flying ship
with the array of gun turrets, make your way to the right. Once you
reach the area where if you shoot out the two turrets and the flame
thrower, the floor breaks away, destroy the first turret and the flame
thrower, but leave the last turret. Jump up and dash over it, then
continue on. You'll come across a large wall. Use the Drill Crush to
destroy it to find the capsule. This upgrade will enhance Zero's
defensive capabilities, reducing the amount of damage inflicted from
enemies.
 Zero's Helmet Upgrade - Allow Zero to do head butt - Found
in Overdrive Ostrich's stage.
 The
helmet upgrade is found in Overdrive Ostrich's stage. Once you reach a
ladder leading down that has a huge wide chasm to the left of it (just
after the area with the instant-death vortex pillars), Stand on the edge
of the ladder, then jump out to the left and mid-air dash. You should
see another ladder leading up, just as you hit the lower part of it
press up to grab on to the ladder. Climb up to find this capsule. This
upgrade will allow Zero to destroy certain blocks with a head-butt.
Heart
Tanks Locations:
Heart Tanks - Increase the energy
bar - Found in all the maverick's stages.

The first heart with X can be found in Neon Tiger's stage. Near the beginning of the stage, you'll come across an armored carrier. Jump in and walk forward. You'll see large trees ahead which you can break open with the carrier's fists. Once you reach the seventh tree, stand on the left of it and jump up. Hold A to hover up and you'll notice another breakable section further up the trunk. Blow it open to find this heart.

The second heart with X is in Flame Mammoth's stage. Once you reach the large area filled with lava and the mattock-throwing robots, stay low on the platforms and head right. Eventually you'll come up to a large wall, you should notice the heart just below the platform you're standing on. To reach it, jump down one of the holes on the left created by the fireballs, then quickly run right and grab the heart. You'll take damage, but it will help if you've already beaten the stage so that you can quickly escape once you get the heart.

The third heart with X is in Launch Octopus' stage. You'll need the Boots Upgrade to reach this one. As you proceed in this underwater stage, you'll eventually come across vents in the ground which shoot up huge wave-vortex bars which can allow you to jump up. Once you reach the third one, jump up to the top of it, then using the vertical mid-air dash, jump over to the platform above the water on the right to find this heart.

The fourth heart with X is in Volt Catfish's stage. You'll need to have beaten this stage already before you can safely reach this heart (but you can still make it if you're quick). Once you reach the second area with the deadly waves that streak across the screen, you should see the heart just below the platform you're standing on. Go right, then wait for the waves to appear. Once they pass, jump down and quickly head left to the heart. Grab it and quickly exit the stage before the waves come back, or if you time it right you should be able to grab the heart and get back to safety before the waves reappear.

The first heart with Zero can be found in Blast Hornet's stage. Once you reach the second open area with the suspended green robot bugs that you must climb over to reach the next area, on the platform before the first bug robot, slide down the edge of it on the right and you'll notice a robot bug below. Jump down onto it and make your way to the right. Climb over the next few bugs and you should see this heart sitting on one.

The second heart with Zero is in Tunnel Rhino's stage. Eventually you'll find an armored carrier in one of the long caverns, jump in and move forward. Knock down any of the enemy carriers that get in your way, but look out for the crumbling rocks in the floor below. You should easily spot it, jump up and hover over it. You'll have to jump a second one before reaching the dead-end. Once you reach a large wall, stand back from it and jump straight up. You should easily see the heart high up on a platform, hover up, then jump out of the carrier to reach the heart.

The third heart with Zero is in Wire Sponge's stage. This heart is extremely easy to find. Once the stage begins, just jump up to the top corner of the wall behind you to find the heart hidden in a small alcove.

The fourth heart with Zero is in Overdrive Ostrich's stage. This heart will be difficult to reach safely. Once you reach the second area where you have to ride on the jet bike, eventually you'll reach an area where you should see an enclosed room below a large platform, you'll need to drop down into the hole on the left and land inside the room to reach the heart, then charge at the door blocking you in to get out of the room. This heart will be tricky to get to, it might take some practice, try to jump so that when you fall down the hole you land on the platform without touching the edge of the upper platform.
Sub-Tanks
Locations:
Sub-Tanks - Stores health - Found in Flame Mammoth's and
Wire Sponge's stages.

The sub-tank with X is in Flame Mammoth's stage. You'll need the boots upgrade to reach this one. Once you reach the large lava-filled room with the mattock-throwing robots, jump up the platforms, and make your way up to the highest on the left. Once you reach the highest platform, jump off the edge of it and mid-air dash to the left. You'll land on a high wall and should spot the sub-tank behind a wall. Break the blocks by jumping off them to reach the tank.

The sub-tank with Zero is in Wire Sponge's stage. Once you reach the area with spikes lining the floor and the floating pillars, jump up to the first pillar, then jump back onto the wall on the left. Jump up to the platforms above, then make your way to the right to find the sub-tank.
Parts:
The Part Shop can be
accessed via the stage selection screen. You'll see three rows of parts,
the top level has common parts which both X and Zero can use, the second
row has parts only X can use, and the third only Zero can use. Each part
will have a certain amount of DNA Souls to build, they can be found in
each stage as small yellow and blue energy balls which enemies
occasionally drop. The yellow balls also give your character more life
energy, while the blue ones also give you weapon energy. The more balls
in the group, the more DNA Souls you'll get. They look similar to energy
capsules but are rounder and more common. Each time you defeat a stage
boss you'll receive a hefty amount of them. You'll also have a new item
available each time a stage boss is defeated, and the parts available in
the current game mode will be available at the start of the next.
Normally, X and Zero can equip two to three parts at a time, but keep in
mind that once one character has a common part active, the other will
not be able to use it. Read on below for specific part details.
Normal Parts:
![]()
Hyper Dash:
Cost:
1000.
This
will increase the speed and distance of the dash move, it'll also
make your character invincible while dashing.
![]()
Super Recover:
Cost:
200.
This
doubles the amount of life/weapon energy you receive from
energy/weapon capsules.
![]()
Energy Saver:
Cost:
100.
This
halves the amount of energy used up from special weapons/techniques.
![]()
Barrier Extender:
Cost:
100.
This
halves the damage taken from enemies.
![]()
Extreme Mode:
Cost:
2000.
This
will activate Extreme mode in the main menu (will not be available
in Extreme mode).
![]()
Boss Attack Mode:
Cost:
200.
This
will activate Boss Attack Mode in the main menu (will not be
available if already enabled).
X's Parts:
![]()
Buster Plus 1:
Cost:
200.
Enhances shots from the X-Buster - causes more damage to enemies.
![]()
Buster Plus 2:
Cost: 200.
Strengthens the X-Buster to the next level after Buster Plus 1.
![]()
Speed Shot:
Cost: 100.
X-Buster shots fly across the screen faster.
![]()
Ultimate Buster:
Cost: 500.
Every
time you fire the X-Buster will fire off a charged shot.
![]() Hyper Charge:
Hyper Charge:
Cost: 1000.
This will enable the X-Buster to charge faster than normal.
![]() Armor:
Armor:
Cost: 2000.
This will give X all the armor upgrades at once (will not be
available if you've already found all the armor capsules).
Zero's
Parts:
![]()
Saber Plus 1:
Cost:
200.
This
enhances the Z-Saber's damage inflicted upon enemies.
![]()
Saber Plus 2:
Cost: 500.
Increases the Z-Saber to the next level after Saber Plus 1.
![]()
Ultimate Saber:
Cost: 800.
Gives
Zero the strongest enhancement to his Z-Saber.
![]() X-Buster:
X-Buster:
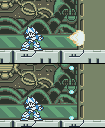
You
will begin the game with X's standard weapon, the X-Buster. This can
fire small energy balls that cause standard damage to enemy targets.
The X-Buster can also be charged up to fire off a larger, stronger
shot which will cause much more damage to enemies than the normal
blast. Once you find the X-Buster upgrade, you'll be able to fire
off two types of enhanced shots that can cause greater damage to
enemies, the special four-blast shot, and you'll be able to charge
up the special weapons.
X's Mode Weapons:
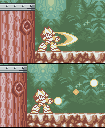
![]() Ray
Claw:
Ray
Claw:
The Ray Claw is
gained once you defeat Neon Tiger. This weapon will fire out a
small arc-blade in front of X. The blade will remain positioned
directly in front of X, and will damage any targets that strike
it. The charged-shot will blast out many small energy balls
which fire out in different directions from X, and can cover a
larger range to the primary fire.
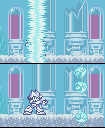
![]() Marine
Tornado:
Marine
Tornado:
The Marine
Tornado is gained once Launch Octopus is defeated. This weapon
will create a huge water-wave vortex which will fly up and down
the screen over X. Any enemies caught in the wave will receive
heavy damage from the blast. The charged-up shot will fire out
four small torpedoes that fly out in different directions from
X. This creates a larger range of fire.
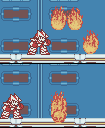
![]() Fire
Wave:
Fire
Wave:
The Fire Wave
is gained once you defeat Flame Mammoth. This weapon fires out
several large fireballs which move out in front of X. The flames
will continue to cross the screen, engulfing any enemies along
the way. The charged shot will cause large fireballs to fall
down from the top of the screen, they'll slowly advance forward
in front of X and will heavily damage any targets caught in the
flames.
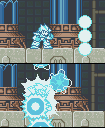
![]() Tri-Thunder:
Tri-Thunder:
The Tri-Thunder
is gained once Volt Catfish is defeated. This weapon fires out
three large electric balls that fly out in different directions
from X. Any enemies caught in the electricity will be fried. The
charged shot will cause X to charge up electrical energy in his
body, then once releasing the energy, huge electrical balls will
fly out in random directions, wiping out any enemies on screen.
Extra Weapons:
You'll only be
able to use these following weapons if you've played through
Zero's mode first and then through X's straight after, or if you
beat Zero's bosses in Extreme mode with X.
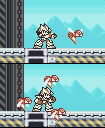
![]() Bomb Bee:
Bomb Bee:
The Bomb
Bee is gained once you defeat Blast Hornet. This weapon will
fire out a small hornet from the X-Buster, it will then
home-in on any on-screen enemy target to destroy or heavily
damage them. The secondary fire will create three hornets
that will spin around X, acting as a shield to dangerous
enemies, any targets touching the hornets will be heavily
damaged.
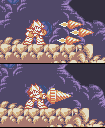
![]() Tornado Fang:
Tornado Fang:
The Tornado
Fang is gained once Tunnel Rhino is defeated. This weapon
fires out three small drill-type projectiles which will
launch out from X and damage any enemies they strike. The
secondary fire will create a larger single drill which will
remain attached to X, this can then be used to charge at any
enemies.
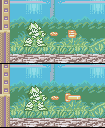
![]() Strike Chain:
Strike Chain:
The Strike
Chain is gained once you defeat Wire Sponge. This weapon
will fire off a small extended chain which will grab on to
walls and items as well as causing damage to targets. X can
grab onto a wall and drag himself towards it and can also
retrieve items with this weapon. The charged-up shot will
fire out a longer and bigger chain to reach further objects.
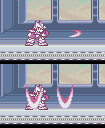
![]() Sonic Slicer:
Sonic Slicer:
The Sonic
Slicer is gained once Overdrive Ostrich is defeated. This
weapon will fire out a razor-disk which will bounce off any
walls it hits. This can be useful for striking enemies who
move around a lot. The secondary fire will fire out four
large energy disks above X which will fly up out of the
screen and then straight down to strike any targets
on-screen.
![]() Z-Saber:
Z-Saber:
Zero will has his
trusty Beam Saber (aka Z-Saber) as his primary weapon. While
standing still, Zero can perform a quick three-strike slash attack
that can cause heavy damage to most enemies in the game. The only
disadvantage is that you'll have to be very close to a target to hit
it, but the Saber is deadly and destroys most non-boss enemies with
a few strikes. As well as utilizing the Beam Saber, Zero will also
be able to use effective special attacks gained from defeated
bosses.
 Zero Final:
Select this from
the sub-screen.
(Uses weapon energy)
You'll receive this special technique once you find the capsule
upgrade for the X-Buster. This technique uses up a lot of weapon
energy, so only use it if you absolutely have to. Once selected from
the sub-screen, Zero will dash forward with his Beam Saber extended,
then if he hits an enemy, he'll fly straight up the screen,
performing an uppercut swipe. Any enemies caught in the fire will be
destroyed.
Zero's Mode Techniques:
 Earth
Gaizer:
Select this
from the sub-screen.
(Uses weapon energy)
The Earth Gaizer is gained once Blast Hornet is defeated. This
technique causes Zero to punch the ground where he's standing,
then a huge wave of minor explosions will sweep across the
screen from left to right, destroying or heavily damaging any
enemies caught in the blast on-screen.
 Drill
Crush:
After jumping
up, press and hold down, then press fire (B) to perform the
attack.
(Does not use weapon energy)
The Drill Crush is gained once you defeat Tunnel Rhino. This
technique allows Zero to perform a downward drill-stab attack.
You'll need to be very close to an enemy to hit them, so
practice will be needed before mastering this technique. Usually
causing heavy damage or destruction to a target, this is an
effective attack.
 Lightning:
Select this
from the sub-screen.
(Uses weapon energy)
The Lightning technique is gained once Wire Sponge is defeated.
This technique causes Zero to summon several electric bolts that
streak down from the top of the screen and can destroy or
heavily damage targets they strike. The positioning of the bolts
seems to be random so it might be difficult to hit specific
target, but they usually drop down near Zero.
 Dash:
Dash:
Select this
from the sub-screen.
(Uses weapon energy)
The Dash technique is gained once you defeat Overdrive Ostrich.
This technique causes Zero to dash straight out in front of his
current position with his Beam Saber extended, allowing him to
destroy any targets in the fire range. When you select it from
the sub-screen, all the enemies on-screen will freeze while Zero
performs the attack so any in range will be trapped. Once the
attack finishes, Zero will return to the position he started
from.
Extra Techniques:
You'll only be able to use these following
techniques if you've played through X's mode first and then
through Zero's straight after, or if you beat X's bosses in
Extreme mode with Zero.
 Rising:
Hold up
while standing still then press attack (B).
(Does not use weapon energy)
The Rising technique is gained once you defeat Neon Tiger.
This technique will allow Zero to perform an upward slice
attack which can damage or destroy any targets above him.
You'll need to get close to successfully hit the target, so
try to avoid taking damage yourself.
 Fish Fang:
Jump up,
then while holding up, press attack (B).
(Uses weapon energy)
The Fish Fang is gained once Launch Octopus is defeated.
This technique will allow Zero to fire out two small
missile-type projectiles while jumping. The two missiles
will fly down from Zero on a diagonal path, so it'll be good
for striking enemies below Zero or ones in awkward
positions.
 Fire Wave:
While
standing still, press and hold down while pressing attack
(B).
(Uses weapon energy)
The Fire Wave is gained once Flame Mammoth is defeated. This
technique allows Zero to fire out six large fire-balls which
will burn any enemies in their path. You can also use this
attack while in the air, if you do a small fireball will fly
out and hit the ground, then the larger flames will appear.
 Tri-Thunder:
Select this
from the sub-screen.
(Uses weapon energy)
The Tri-Thunder is gained once you defeat Volt Catfish. This
technique will cause Zero to punch the ground, then several
large electric balls will fly out from that point into the
air in different directions. Any enemies caught in the range
of fire will be either destroyed or heavily damaged.