
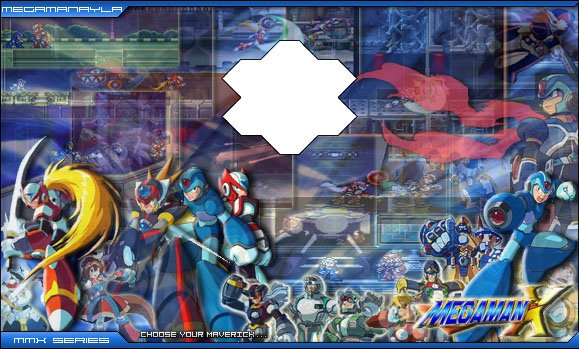


| Here is a complete guide for Mega Man X3. Choose the tab you want in order to view its content. |

|
Release Date: |
Developer: |
|
Systems: |
Genre: |
Intro:
As the final MMX game to appear on the SNES, Mega Man X3 continues the immense
storyline with larger stages, more enemies and enhanced graphics once again made
possible by the special C4 chip. This time, players will be able to play as Zero
for a short time during the game, using his special Z-Saber (aka Beam Saber) in
battle.
Game Specs:
X returns to defend all humans and Reploids from evil, but this time you'll be
able to select Zero form the weapon select screen in various stages. Zero has
his Z-Saber and Z-Buster, allowing you for the first time get a feel of playing
as Zero. Doppler's new Mavericks are far stronger and more challenging than any
in the past. Dr. Light will once again offer X new body enhancements, as well as
four new special microchip upgrades, each one having their own special ability.
Two new Mavericks known as Bit & Byte will try their luck against X, you'll have
to face them in certain stages of the game as well as a final showdown before
confronting Dr. Doppler. As well as having to deal with Doppler's two henchmen,
X will also have to face a nightmare from the past, resurrected by Doppler, this
once-dead Maverick is madder than ever at X and Zero, but he doesn't realize
that X has grown much stronger since the day of their first battle...


![]()
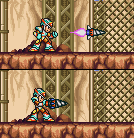
Mega Man X:
Reploid leader of
the 17th Unit, Maverick Hunters. His creation is shrouded in mystery; nobody
knows why he was built and then buried. X is famous among Maverick Hunters
for defeating Sigma twice and leading to its ultimate demise. X understands
his role, and believes deeply in the need to protect reploids and humans
alike. But he has an inner conflict about fighting and violence. It is up to
X and Zero to locate and destroy Dr Doppler before all is lost.
![]()
Zero:
Zero is Mega Man
X's best friend and partner. His creation is a mystery as well, yet many
rumors and much speculation have arisen. Recently destroyed to protect X
against the maverick Vile, Zero has been revived to continue the aid he has
offered X in the past. Once part of the 17th Unit, Maverick Hunters, Zero
now leads a Special #0 Class Unit. Always cool and calm, Zero takes quick
action against the evil forces he hates so much.
![]()
Dr Cain:
Dr Cain is the main
core advisor of the Maverick Hunters. He was the one who found X encased in
the capsule, and was the one who began the construction of the new reploids.
Deeply concerned about the current situation, he will provide X and Zero
with as much information as possible about the mavericks to ensure their
final and ultimate demise.
![]()
Dr Light:
Dr Light is the
mysterious creator of X. Once again he will be found in the secret capsules
found throughout the stages of the game. He will provide X with new upgrades
for his armor to greatly enhance his components and give him further
advantages over the mavericks.

Mac:
Mac is a service
reploid in operation at the Maverick Hunter headquarters. When the Doppler
force invaded the HQ, he was captured and infected with the maverick virus.
Now he lies in wait of Mega Man X and has been programmed to exterminate any
resistance to the mavericks.

Bit:
Bit is one of
Doppler's loyal henchmen. Created by Doppler for high-performance missions,
Bit has a destructive mind and will follow orders closely. Bent on
destruction of humans, Bit is built for war and has been programmed to
destroy Mega Man X and Zero.

Byte:
Byte is Bit's
larger partner. Also built for war, Byte has massive destructive power and
is extremely confident in his ability to destroy Mega Man X. To confront
Doppler, X must first deal with Bit and Byte.

Vile:
Once a top henchman
for Sigma, Vile was destroyed at the hands of Mega Man X and Zero. When
Doppler became virus-infected, its' first move was to revive Vile. When Vile
became infected with the same computer virus it went completely nuts.
Doppler could not control Vile. Vile went on a rampage, and has become so
stricken with hatred for Mega Man X and Zero, and is waiting for the right
moment to attack them for his revenge.

Dr Doppler:
A scientist reploid
created to support humans in creation of reploids. Equipped with a
high-performance Neuro-computer, Doppler was instrumental in determining the
cause of the recent Maverick outbreak. It's anti-virus was revolutionary and
once again brought peace to the world. Re-programmed to build a utopian
world called Doppler Town where humans and reploids lived in harmony. It
grew too quickly and became infected with the same virus it was believed to
remedy. Doppler incited a new Maverick outbreak and created chaos in Doppler
Town. It changed its computer body into one geared for battle and gathered
all the reploids in its' first move in war against humans.

Sigma:
Sigma has returned
again, this time by infecting Dr Doppler with the maverick virus and then
slowly building up his army. Once infected, Doppler secretly created new war
bodies for Sigma to posses and use to rule the world. Once again at the helm
of the mavericks, Sigma's true form has been discovered to be that of a
computer virus and the cause of all the mavericks. Sigma knows that X and
Zero are after him, but he cannot wait for the moment where he can finally
attempt to destroy Mega Man X, but he still underestimates the power X has.
The destruction of Sigma is now more important than ever, as if the Sigma
virus is destroyed, the maverick revolt will end forever.

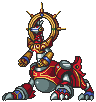
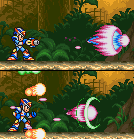
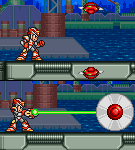
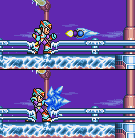
Blizzard Buffalo:
Guide: Blizzard
Buffalo will begin by charging at you. He will do this often. If he makes
his horns glow gold and then grabs you, he will push you up against the
opposite wall and will cause heavy damage. Dodge him by jumping up the wall
and over him as he passes. He will also often fire out three ice projectiles
that will become large ice shards when they hit the ground. If he begins to
charge up his body, jump high up on the opposite wall as he will fire out a
long ice beam that will freeze you if it hits you, and he will then charge
at you and cause damage. To defeat him, use the Parasitic Bomb or the
X-Buster. With the X-Buster, jump up over him as he hits a wall and shoot
him from behind with a charged shot. Dash across to the other side of the
room and wait for him there and then repeat the process to finish him off.
Weakness:
Parasitic Bomb.
Weapon Received:
Frost Shield.

Tunnel Rhino:
Guide: Tunnel Rhino
will be obsessed with charging towards you all the time during this battle.
He will begin by charging at you and will slam into the wall. He will then
turn around and repeat the same for the other wall. He will often stop and
fire out three large drills that will slowly fly forward into the wall. He
will also sometimes fire one drill from his gun and two from his shoulders.
To defeat him, use the Acid Burst. Each time he slams into a wall, shoot him
in the back before he turns around. Once his health is about half gone, he
will begin to charge across the room glowing and will be invincible until he
stops glowing. Keep shooting him in the back when he hits a wall to finish
him off.
Weakness:
Acid Burst.
Weapon Received:
Tornado Fang.

Neon Tiger:
Guide: Neon Tiger
will be moving around often during this battle. He will begin by firing out
several energy balls from his tail. Try to dodge them as they will only
travel in straight lines. He will also often slash at you with his claws if
you come too close. He will occasionally jump up one of the walls and fire
off energy beams from there. To defeat him, use the Spinning Blade. Try to
fire it away from his direction when he is high up on the wall so that the
upper blade will fly around and hit him. Just remember to keep out of his
way and to fire the Spinning Blade from the right position.
Weakness:
Spinning Blade.
Weapon Received:
Ray Splasher.

Volt Catfish:
Guide: Volt Catfish
will begin by charging towards you. He will bounce to one end of the room
and will fire off an electric ball to the other end of the room. He will
also sometimes fire out three electric balls and then fire out three more
that will grab the first three and draw them back in to him. He will then
fire out two electric bolts above him. Dodge the electric balls by jumping
up to the top of the wall. To defeat him, use the Tornado Fang. As he jumps
around shoot him before he hits you. When his health is down to about half,
he will jump to the center of the screen and call down large electric bolts
that will cause him to begin charging with electricity. He will then fire
out small sparks which will cause damage if they hit you. He will then
charge to one end of the room and repeat the process. As he jumps back to
the center of the room, shoot him as he lands and he won't be able to use
the electric charge attack.
Weakness:
Tornado Fang.
Weapon Received:
Triad Thunder.

Gravity Beetle:
Guide: Gravity
Beetle will be jumping around often during this battle. He will also often
fire out two energy balls that will bounce around the room. Try to dodge
them as they will cause huge damage to X if you hit them. He will also
occasionally glow and charge towards you into the wall. To defeat him, use
the Ray Splasher. Once his health is taken down to about half, he will
create a swirling vortex in the ceiling which will begin to suck objects
into it. Make sure that you don't touch the portal as it will also cause
heavy damage. Dodge it by dashing under Gravity Beetle when he jumps. Just
make sure that you don't take many hits during this battle as his weapons
are very strong.
Weakness:
Ray Splasher.
Weapon Received:
Gravity Well.

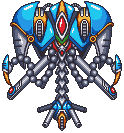
Blast Hornet:
Guide: Blast Hornet
will be flying around the top of the screen most of the time during this
battle. He will often extend his large sting tail and will charge down at X.
Dash away from him to dodge it. He will also often fire out several bee-type
projectiles that will stick to you and cause damage if they hit X. To defeat
him, use the Gravity Well. When you fire it out, Blast Hornet will begin to
take damage even if the vortex isn't touching him. Make sure that you don't
get hit by the small bees.
Weakness:
Gravity Well.
Weapon Received:
Parasitic Bomb.

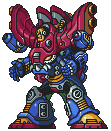
Crush Crawfish:
Guide: Crush
Crawfish will be constantly trying to grab you during this battle. He will
begin by charging at you. If he ever grabs you he will cause continuous
damage with his claw until he lets go. He will also often fire off one of
his claws to try and hit you with. If you climb up one of the walls he will
fire off two small objects that will cause you to fall down if they hit you,
giving him a chance to dash and grab you. To defeat him use the Triad
Thunder. When you fire it, jump up close to him so that the bottom left or
right blast will strike him. Try to jump out of his way and make sure that
he does not grab you. Be careful if he hits you when he's charging as you'll
fly against the wall and take damage.
Weakness:
Triad Thunder.
Weapon Received:
Spinning Blade.

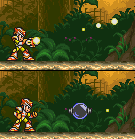
Toxic Seahorse:
Guide: Toxic
Seahorse will be jumping around often during this battle. He will begin by
jumping towards you. Dash under him before he lands. He will then fire a
small acid bubble that will bounce around the room dropping small bubbles
and will eventually burst when it reaches the roof. He will also sometimes
glow and melt into the ground. He will then reappear in a different
position. To defeat him, use the Frost Shield. When he jumps up shoot it
below him so that he lands on it. When you take his health down to about
half he will begin to fire out three acid bubbles that will explode and
cover a larger range. Keep shooting him as he falls from a jump to finish
him off.
Weakness: Frost Shield.
Weapon Received:
Acid Burst.
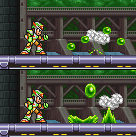
After you finish two mavericks Bit and Byte will start to show up in the empty rooms at the 8 mavericks stages. If you want to find Vile search for the hidden capsule.
![]()
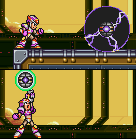
Bit:
Guide: You will
fight Bit in one of the rooms with the large doors in a random stage as you
proceed through the game. He will be moving around often during the battle.
He will begin by flying across the screen towards you. Jump up the wall and
then over him to evade him. He will then fire out one or two orange disks
that will completely immobilize you if they hit you. They will bounce off
the walls so be ready to dodge them more than once. He will also often fire
out one or two energy beams that will home in on X. Try to dodge them by
jumping over the beam as it passes. Bit will also fly at you from one side
of the screen depending on your position. To defeat him, use the X-Buster or
the Frost Shield. With the X-Buster, you can fire charged shots at him as he
passes to successfully defeat him. If you defeat him with the X-Buster he
will escape and you will have to fight him again at the end of the game. If
you defeat him with the Frost Shield he will explode and you won't see him
again during the game.
Weakness:
Frost Shield.

Byte:
Guide: Byte will
battle you in one of the empty rooms in a random stage. He will begin by
firing a small mine against one of the walls. He will then charge at it and
slam into the wall. If he charges at you and hits you, he will punch X up to
the ceiling and then across to the mine which will throw X back at Byte and
will cause a few rounds of damage. Try not to let this happen. Jump up the
wall and then over him to evade this attack. To defeat him, use charged-up
shots from the X-Buster from behind him when he charges at the wall. If you
use the Ray Splasher against him it will cause more damage. If you defeat
Byte with the X-Buster he will escape and you'll have to fight him again
later in the game. If you defeat him with the Ray Splasher, he'll explode
and you won't see him again. If you have defeated both Bit and Byte with the
special weapons, you will have to fight a different boss instead of them
later in Doppler's lab.
Weakness:
Ray Splasher.

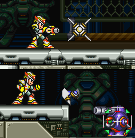
Vile Inside The Robot:
Guide: In the
secret factory level which can be gained from a hidden teleporter located in
each stage, you will have to battle Vile. He will begin in his Armored
Carrier. It will only have the standard charge and punch attacks. Jump up
the wall and jump over him as he charges towards you. To defeat him, use
charged-up shots from the X-Buster and shoot him from behind when he punches
a wall. If you have the Spinning Blade, use that as it is his weakness. Once
you destroy his carrier he will jump out and attack you on foot.
Weakness:
Spinning Blade.
![]()
Vile:
Guide: Vile will
now attack you on his own. He will often jump from one corner of the room to
another, dropping down a small fireball which will become a large fire-wall
that will charge towards you when it hits the ground. Jump up the wall and
over it to evade it. He will also often fly up into a corner and fire down
small bullets that will home in on you in straight lines. Jump up the wall
to lure them up there and drop down to avoid them. To defeat him, use the
X-Buster or the Ray Splasher if you have it. Shoot him as he lands on the
ground and wait for him to move again before firing. If you defeat him with
the X-Buster he will escape and you will have to fight him again at the end
of the game. If you destroy him with the Ray Splasher, he will explode and
you will have to fight a different boss instead of him later in the game.
Once you defeat him you will have about 60 seconds to escape the factory
before it explodes.
Weakness:
Ray Splasher.
Junk Robot:
Guide: You will
only have to fight this boss if you have already defeated both Bit and Byte
earlier with the special weapon that is their weakness. This boss will take
up most of the room, with the main part up in the top right hand corner.
There will be a conveyer belt on the floor which will lead into the spike
wall at the rear. The device at the top of the screen will often drop down
large pieces of junk that will eventually fall into the spikes on the right.
During the battle the main part will often come down to the floor and fire
out several acid bubbles at you. To defeat it, use the X-Buster or Ray
Splasher to first destroy the long nose-shaped part of the main robot. Once
it is gone, a large arm will often reach out to X and if it grabs him it
will reel him in to the boss and he will cause damage. Try not to let this
happen. The boss will also release a green liquid which will fill the room a
little so you won't be able to go on the floor anymore as the liquid will
cause damage. Continue to shoot the head of the robot with the Ray Splasher
while up on the left wall and slide down the wall quickly when the arm comes
towards X.
Weakness:
Ray Splasher.
Bit And Byte Combo:
Guide: You will
only have to fight this form of Bit and Byte if one or both of them survives
during the earlier battles. They will become a larger form which has a high
defense level. It will have two main attacks. The first will be one of its
hands will come out and fly a X, if it grabs you, it will throw X up to the
ceiling and bring you back down so that the other hand can fire off and
damage you. Try to dodge the first hand before it grabs X. It will also
occasionally take out an energy sword and fire off a large energy beam at
you which will go up and down the left wall when it hits it. If you are high
up on the wall it will fly up to release the weapon. Do not try to dash
under it as you lose a life instantly if it crushes X. If you go behind it,
it will fire off two energy balls that will home in on X. To defeat it, use
the Ray Splasher and shoot the upper part of the body. If the hand grabs
you, keep firing at it as you won't be able to move but you can still fire.
Weakness:
Ray Splasher.
Doppler Octopus:
Guide: You will
only have to fight this boss if you have already beaten Vile in the secret
factory with the Ray Splasher. This boss will battle you in an underwater
room. It will have two main attacks, one where to bottom part will open and
will fire out several missiles that will home in on X. It will also often
fire off one of the two fins on its sides that will also fly towards X. Its
weak spot is the area just under the face. To defeat it, use the Triad
Thunder. Stand below the boss and activate the weapon, and then jump up a
little so that you don't hit the boss but the upper Triad Thunder blast will
hit the weak spot. Continue this to defeat it.
Weakness:
Triad Thunder.
Vile Inside The Huge
Robot:
Guide: Vile will
first battle you in a large armored carrier. You will only have to fight him
here if you did not find the secret factory level or if you did not use the
Ray Splasher to defeat him in the factory. He will begin by glowing and then
firing out a large energy beam. Jump up the wall to dodge it. He will also
be charging around the room often, and will cause you to fall off the walls
if he hits it while you're up on one. He will also occasionally fire out
three small pellets which will become walls in the room that will trap you
if they surround you. Try to jump over him as he charges by first jumping up
the walls. To defeat him, use the Parasitic Bomb. When he charges to one
side of the room, jump down behind him and fire. Dash to the other side of
the room and repeat this process to beat him.
Weakness:
Parasitic Bomb.
![]()
Vile:
Guide: When you
destroy Vile's armored carrier, he will jump out and attack. He will start
by jumping up and firing out a fireball which will become a large fire-wall
and will fly across the room. Try to jump over it to dodge the fire. He will
also occasionally fire out several ice balls that will freeze you to the
ground and he will run up and grab you, causing damage. He will also often
jump up and fire out several projectiles that will fly towards you depending
on where you are standing. To defeat him, use the Ray Splasher. When he
lands shoot him and prepare to dodge the fire-wall again. When he shoots the
ice balls jump away to dodge them. When you beat him he will finally admit
defeat.
Weakness:
Ray Splasher.
![]()
Dr Doppler:
Guide: This is it,
the final battle with Dr Doppler himself. He will taunt you at first and
will then attack. He will begin by firing three energy balls at you which
will fly in straight lines so you can easily dodge them after they are
launched. He will then create a red energy field around himself and will fly
across the room at you depending on your current position. Jump up high on
the wall and drop down to avoid him. He will then hit the wall and drop
down. Do not shoot him when he is standing still as he will create a green
energy field around himself which will convert your weapon blasts into
energy for himself. To defeat him, use the Acid Burst. Only shoot him when
he is firing the energy balls or shoot him from behind when he is flying
across the room. Just remember not to shoot him when is not moving as he'll
regain his health. Once you defeat him he will return to normal and will
inform you of Sigma's location.
Weakness:
Acid Burst.

Sigma:
Guide: Sigma will
be his usual self and will taunt X before the battle begins. He will start
by firing off several fireballs one at a time which will cause heavy damage
to X if they hit you. Try to jump up the wall and off again to dodge them.
After firing off about seven or eight fireballs, he will jump up to the
center of the screen and fire down about three fireballs. He will then jump
down to the other side of the room. He will also occasionally throw his
shield and it will fly around the room and return to him. To defeat him, use
the Spinning Blade. If you try to shoot him when his shield is raised it
will block your shot. Try to hit him when he fires as his shield will move
out of the way. Shoot him from behind when he jumps up before he lands
again. Also try to use a charged-up shot when he jumps up as it will cause
much more damage than a normal shot. You can also hit him by jumping up
above him when he's standing still and then fire out behind him and the
lower blade will fly around and hit him from behind. Try to stay out of
contact with him and be careful of his fireballs. Remember to use sub-tanks
if your health is low. When you defeat him his final form will appear.
Weakness:
Spinning Blade.
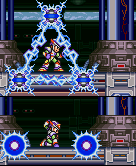
Kaiser Sigma:
Guide: Sigma's
final form will be that of a huge armored suit that almost takes up half of
the screen. He will begin by hovering up into the air and will fly over to
the left side of the room. He will then land and fire out a small mine
projectile. If it hits you it will cause heavy damage. He will then fire out
several missiles from his armor that will home in on X. He will then hover
up again and move to the right side of the screen. He will be continually
firing out the small mine weapon. From the right side of the room he will
fire out a large purple beam weapon which will be fired either up high or
directed down depending on your position. Try to stay out of the beam's
range as it will cause continuous damage. He will then fly over to the left
side again and repeat the sequence again. To defeat him, you will have to
successfully hit his head with a charged-up shot from the X-Buster. When he
lands, jump up the wall and fire at his shoulder pads and the blast should
fly through them and hit his head, causing damage. You will need to hit him
many times before he goes down. Just make sure that you stay out the range
of the large beams and try to avoid the mines and missiles. You will need to
use sub-tanks often during the battle. When you manage to defeat him, he
will reappear as the virus form he had in MMX2. The battle will be over, but
the game will continue. The room will begin to fill with lava and the screen
will move up, leading you up a tall shaft. Jump up the walls but be careful
of Sigma as he will often charge at you and cause you to fall down. If you
fall in the lava, try to jump up out of it onto the right wall or use the
mid-air dash to escape it. Eventually there will be a large opening on the
right and once you get up to the platform the final cut scene will roll and
Sigma will be destroyed by either Zero or Dr Doppler depending on wither or
not Zero was damaged earlier in the game. Once Sigma is destroyed X and Zero
will escape the lab.
Weakness:
X-Buster.
CONGRATULATIONS!!!
You finished Mega Man X3.
Armor Part locations:
![]() Leg Upgrade - Allow X to do a mid-air dash and an upward dash -
Found in Blizzard Buffalo's stage.
Leg Upgrade - Allow X to do a mid-air dash and an upward dash -
Found in Blizzard Buffalo's stage.
 The Leg upgrade is found in
Blizzard Buffalo's stage. Near the end of the level in the area where snow is
falling, go under the large platform and destroy the snow machine so that the
snow stops falling. Go to the far right upper platform, and use a dash-jump and
jump off to the right from the very edge of the platform. If done correctly, you
should grab onto the edge of another platform on the right. Go into the hidden
room to find the capsule. This upgrade will allow X to execute mid-air dashes
left and right, and he will also be able to dash straight up as well.
The Leg upgrade is found in
Blizzard Buffalo's stage. Near the end of the level in the area where snow is
falling, go under the large platform and destroy the snow machine so that the
snow stops falling. Go to the far right upper platform, and use a dash-jump and
jump off to the right from the very edge of the platform. If done correctly, you
should grab onto the edge of another platform on the right. Go into the hidden
room to find the capsule. This upgrade will allow X to execute mid-air dashes
left and right, and he will also be able to dash straight up as well.
![]() Arm Upgrade - Allow X to fire a double X-Buster shot - Found in
Found in Neon Tiger's stage.
Arm Upgrade - Allow X to fire a double X-Buster shot - Found in
Found in Neon Tiger's stage.
 The X-Buster upgrade is
found in Neon Tiger's stage. Go up to the area where the sub-tank was found, and
you will notice a ladder leading up in the top left-hand corner. Climb up the
ladder and go to the right. You will find a ladder leading down, but instead go
up to the wall on the right and fire the Tornado Fang against it to destroy the
wall and find a hidden room. Use the mid-air dash to jump up to the platform
with the capsule on it. The X-Buster upgrade will allow X to fire a wave-type
beam and then fire a second shot after releasing the first. He can also charge
up to a red glow and release the wave beam, and if you release the second beam
quick enough it will cross-lap with the other one and create a huge blast that
covers a larger range. The special weapons will also be able to be charged up
with this upgrade.
The X-Buster upgrade is
found in Neon Tiger's stage. Go up to the area where the sub-tank was found, and
you will notice a ladder leading up in the top left-hand corner. Climb up the
ladder and go to the right. You will find a ladder leading down, but instead go
up to the wall on the right and fire the Tornado Fang against it to destroy the
wall and find a hidden room. Use the mid-air dash to jump up to the platform
with the capsule on it. The X-Buster upgrade will allow X to fire a wave-type
beam and then fire a second shot after releasing the first. He can also charge
up to a red glow and release the wave beam, and if you release the second beam
quick enough it will cross-lap with the other one and create a huge blast that
covers a larger range. The special weapons will also be able to be charged up
with this upgrade.
![]() Body Upgrade - Defense field - Found in Volt Catfish's stage.
Body Upgrade - Defense field - Found in Volt Catfish's stage.
 The Armor upgrade is found
in Volt Catfish's stage. One of the elevators in this stage will lead up to an
area where there is the normal way to continue on in the level as well as
leading you up to a higher area where a motionless platform lies. You cannot
climb up the walls as there are spikes all over them, so you will need to use
the charged-up Gravity Well to activate the platform and take you up to the room
where the capsule is. The Armor upgrade will cut damage to X's systems by 50%
and create an energy field around him to reduce the damage inflicted.
The Armor upgrade is found
in Volt Catfish's stage. One of the elevators in this stage will lead up to an
area where there is the normal way to continue on in the level as well as
leading you up to a higher area where a motionless platform lies. You cannot
climb up the walls as there are spikes all over them, so you will need to use
the charged-up Gravity Well to activate the platform and take you up to the room
where the capsule is. The Armor upgrade will cut damage to X's systems by 50%
and create an energy field around him to reduce the damage inflicted.
![]() Helmet Upgrade - Level radar - Found in Tunnel Rhino's stage.
Helmet Upgrade - Level radar - Found in Tunnel Rhino's stage.
 The Helmet upgrade is found
in Tunnel Rhino's stage. In the area with rocks falling from the roof you will
notice another boulder hanging from the ceiling blocking a path to the left.
Destroy the rock with the charged-up Triad Thunder and continue on to the left
to find the capsule. The helmet upgrade will allow X to view a large map of each
stage whenever you enter one in which the Maverick boss has been defeated. It
will also tell you what items can be found in each level on the map screen and
will show you their locations on the map of the stage.
The Helmet upgrade is found
in Tunnel Rhino's stage. In the area with rocks falling from the roof you will
notice another boulder hanging from the ceiling blocking a path to the left.
Destroy the rock with the charged-up Triad Thunder and continue on to the left
to find the capsule. The helmet upgrade will allow X to view a large map of each
stage whenever you enter one in which the Maverick boss has been defeated. It
will also tell you what items can be found in each level on the map screen and
will show you their locations on the map of the stage.
The chip upgrades shown below will only be able to be used if you have the corresponding armor upgrade that matches the chip. X will only be able to use one of the four chips unless you find the secret Gold Armor shown below.
Chip Part Locations:
Leg Chip - Allow X to dash twice - Found in Toxic Seahorse's
stage.
 The Leg chip
can be found in Toxic Seahorse's stage. In the watery area with the floating
green enemies, use the Frog carrier to destroy the large spinning fans on the
far right of the room. Once they are destroyed, jump up the wall and out of the
water. Continue right to find the capsule. This chip will allow X to dash twice
in the air instead of only once.
The Leg chip
can be found in Toxic Seahorse's stage. In the watery area with the floating
green enemies, use the Frog carrier to destroy the large spinning fans on the
far right of the room. Once they are destroyed, jump up the wall and out of the
water. Continue right to find the capsule. This chip will allow X to dash twice
in the air instead of only once.
Arm Chip - Continuous X-Buster charge - Found in Gravity Beetle's
stage.
 The Arm chip
can be found in Gravity Beetle's stage. Near the end of the stage just before
the shaft leading up to the last door is a wall which will ping when you shoot
it. Go to the robot ride armor platform and use either the Kangaroo, Chimera or
Hawk and destroy the wall. Continue on to find the capsule. This chip will give
X a new weapon in which he can fire off continuous charged shots without having
to charge up his weapon, but it will cost weapon energy.
The Arm chip
can be found in Gravity Beetle's stage. Near the end of the stage just before
the shaft leading up to the last door is a wall which will ping when you shoot
it. Go to the robot ride armor platform and use either the Kangaroo, Chimera or
Hawk and destroy the wall. Continue on to find the capsule. This chip will give
X a new weapon in which he can fire off continuous charged shots without having
to charge up his weapon, but it will cost weapon energy.
Body Chip - Increased defense - Found in Crush Crawfish's stage.
 The Body chip
is found in Crush Crawfish's stage. You will need one of the Robot Ride Armor
vehicles to find this. Just after the area with the falling platforms, one of
the large holes is hiding a secret area. Jump down the hole in an armored
carrier and destroy the wall on the left to find the capsule. This chip will
further enhance X's defensive capabilities, reducing damage he receives greater
than before by creating a stronger energy field around him.
The Body chip
is found in Crush Crawfish's stage. You will need one of the Robot Ride Armor
vehicles to find this. Just after the area with the falling platforms, one of
the large holes is hiding a secret area. Jump down the hole in an armored
carrier and destroy the wall on the left to find the capsule. This chip will
further enhance X's defensive capabilities, reducing damage he receives greater
than before by creating a stronger energy field around him.
Helmet Chip - Health regeneration - Found in Blast Hornet's stage.
 The Energy
chip can be found in Blast Hornet's stage. In the large room with the conveyer
belts, go to the top right wall of the roof and you will notice an opening with
spikes up the wall. To successfully reach the opening, you will need to jump out
in front of the spikes from the wall and then use the upward dash to reach the
top and find the capsule. This might take a while to get. The Energy chip will
allow X to slowly regain his health if he stands still for a while.
The Energy
chip can be found in Blast Hornet's stage. In the large room with the conveyer
belts, go to the top right wall of the roof and you will notice an opening with
spikes up the wall. To successfully reach the opening, you will need to jump out
in front of the spikes from the wall and then use the upward dash to reach the
top and find the capsule. This might take a while to get. The Energy chip will
allow X to slowly regain his health if he stands still for a while.
Ride Armor
Locations:
Ride Armor - Assist in battle - Found in the stages of Blast
Hornet's, Gravity Beetle's, Crush Crawfish's and Toxic Seahorse's stages.

The Chimera armor can be found in Blast Hornet's stage. You will need to first find this armor before you can use any of the others from the platforms. When you come to the area outside, destroy the large crates up on top of the buildings and fall down below. Destroy the wall on the left with the Tornado fang and go down the hole you find to find the armor. Destroy the machine holding it to reach it. This armor has the standard punching attack and can also charge ahead.


The Frog carrier is found in Gravity Beetle's stage. In the area where you come outside, you will notice the item on a small platform attached to the wall on the left. Use the mid-air dash and dash up to reach the item. This carrier can be accessed from the robot ride platform and can be used underwater. It cannot execute a charge attack, but it can fire small homing mines on enemy targets.


The Hawk carrier is found in Crush Crawfish's stage. This one is found near the start of the stage. At the bottom of the large area you will see a small platform above what looks like a shaft leading down. Destroy the platform by standing on it and using the charge-up Triad Thunder. Below is the Hawk armor. This carrier can fire off missiles to destroy targets and can also execute a charge attack, as well as being able to hover in the air for a short time.


The Kangaroo
carrier is found in Toxic Seahorse's stage. In the large room filled with water,
destroy the large spinning blades with the Frog carrier and jump up the wall. To
find the item, jump onto the water to the left and as X just falls in the water
jump again and he should jump out of the water. Continue doing this to the left
and use the mid-air dash if necessary and you will eventually find the Kangaroo
armor on a platform to the left. This carrier will be able to move and jump
faster and further, and it will have the drills on its hands similar to the
armored carrier in MMX2. These can be used to destroy certain walls and targets.
Heart Tanks
Locations:
Heart Tank - Increase the energy bar - Found in all 8 stages.
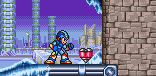
The first heart can be found in Blizzard Buffalo's stage. Near the start of the level you will find a robot ride armor platform. A little further down will be a large number of ice blocks leading down into the ground. Using either the chimera armored carrier or the Tornado Fang, punch or fire a drill into each block to destroy it. Continue down to find the heart.
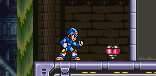
The second heart can be found in Toxic Seahorse's stage. This heart is easy to find. Just after the area where you are climbing up the shaft with all the water flowing around, once at the top on the right will be the opening to continue on in the stage, but you will also notice an opening in the ceiling. Go up there to find the heart.

The third heart is found in Tunnel Rhino's stage. Near the start of the stage you will find the heart in a room with spikes on the floor and a large boulder blocking the heart. You will need the Triad Thunder and X-Buster upgrade to get this. Charge up the Triad Thunder and punch the ground to destroy the large boulder. Jump up to the ledge to get the heart.
The fourth heart is in Volt Catfish's stage. When going up one of the elevators, you will notice that the elevator will keep going up once it passes the opening on the left. Keep going up and then go to the right. You will see the heart lying just above a bed of spikes. To reach it, slide down the wall on the left and jump across to the other wall. Slide down to grab the heart and try to jump back across to the left wall before X falls into the spikes.
The fifth heart is found in Crush Crawfish's stage. Near the start of the stage there will be an area where one of the chain-ball enemies will crush several platforms. Use an armored carrier from the platform at the start of the stage and go down this area. On the last outcropping on the right side of the wall where the platforms are destroyed, you will notice that the wall has cracks in it. Punch open the wall or use missiles from the Hawk carrier to find the heart inside.
The sixth heart is in Neon Tiger's stage. At the very end of the level, just before the last door there will be one of the flying enemies which you can ride on. Jump on top of it and dash jump to the right. Grab onto the wall above the door and climb up to find the heart.

The seventh heart is found in Gravity Beetle's stage. You will probably notice the heart behind a wall high up in the top left corner of the large room at the start of the stage. Once you have beaten Blast Hornet, the wall here should disappear, giving you access to the heart.

The eighth
heart is in Blast Hornet's stage. When you find the Chimera carrier, ride it out
of the underground room and continue going right. When you reach the tunnel
which is too small for the Chimera to enter, go to the edge of the opening, jump
up with the carrier and then jump out of it to reach the wall. You can also use
the Leg upgrade and dash upwards to reach this. Climb up the wall and continue
right to find this heart.
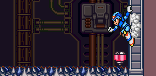
Sub-Tanks Locations:
Sub-Tank - Stores health - Found in the stages of Blizzard
Buffalo's, Tunnel Rhino's, Volt Catfish's, and Neon Tiger's stages.

The first sub-tank is in Blizzard Buffalo's stage. You will need the Leg upgrade to reach this. Once you exit the indoor area and enter the outside area which has snow falling, use the mid-air dash to reach the sub-tank which is high up on the left wall.
The second sub-tank is in Tunnel Rhino's stage. This one is in clear view. As you proceed in the stage, in the area with the devices in the roof that drop down rocks, go to the far right of the tunnel where it continues down. Just above the shaft leading down you will see the sub-tank.
The third sub-tank is found in Neon Tiger's stage. Near the start is a large open area with industrial-type walls either side. Use the mid-air dash to jump up to the wall on the left and climb up. You will see a lot of platforms in the air to the right with the chain-ball enemies on top. Climb across these platforms and on the far right of the room, use the flying enemies to reach the sub-tank which is in the top-right corner.
The fourth sub-tank is in Volt Catfish's stage. When you come to the area with the electric balls going up and down the walls, climb up the opening in the roof and go to the left. You will find a robot ride platform. Use either the Chimera, Kangaroo or Hawk and go back to the right. Fall down the hole, and you will land on the ground and fall through it into a secret area. Go to the left to find the sub-tank.
![]()
X-Buster:
The X-Buster is the
standard weapon of the game and you begin the game with it. The normal fire
will fire the usual standard shot which will cause minimal damage to
targets. The charged-up shot will fire a larger beam which causes more
damage to targets. Once you find the X-Buster upgrade, X will be able to
fire out a wave-type beam and then fire a second shot after the first. If
you charge up the X-Buster until X glows red, release the fire button and
then quickly fire a second shot which will hit the first one and create a
huge blast which causes massive damage to targets.
![]()

Z-Buster:
Zero has two weapons
available, his standard "Z-Buster," and his Beam Saber. His blaster has the
normal firing shot, as well as the charged-up state. To use his triple saber
attack, charge up the weapon until he glows green. When you release the fire
button he will fire off one shot and continue to glow green. Fire again and
he will shoot another blast. One more time will cause him to take out his
Beam Saber and strike out in front of him at any targets.
![]()
Acid Burst:
The Acid Burst is gained
once Toxic Seahorse is defeated. This weapon will fire out a small acid
bubble which will corrode and damage any target it hits. The bubble will fly
out and then land on the ground, spreading out smaller bubbles. The
charged-up shot will fire out more than one bubble and will cover a larger
area when they hit the ground.
![]()
Parasitic Bomb:
The Parasitic Bomb is
gained once Blast Hornet is defeated. This weapon will fire out a large
spike-ball projectile which will trap any enemy it hits. Once the target has
been captured, X can walk through them without taking damage. After a few
seconds the target will explode. Some enemies will fly around once trapped
and fly into other enemies, destroying themselves and the other target. The
secondary fire will display four cross-hairs around X that will home in one
enemies. Once they find a target, a small mechanical bee will fly out of X
and slam into the target, destroying it.
![]()
Triad Thunder:
The Triad Thunder is gained
once Volt Catfish is defeated. This weapon will create three large electric
mines around X which will fire out large electric lines to each other and
then out in an upward and diagonal directions. The charged-up shot will make
X punch the ground and cause everything on the screen to shake. He will then
fire out two electric balls either side of him. This technique can be used
to destroy some platforms and can destroy the large hanging boulders in
Tunnel Rhino's stage.
![]()
Spinning Blade:
The Spinning Blade is
gained once you defeat Crush Crawfish. This weapon will fire out two
spinning blade projectiles which will fly out from X and then fly back
towards him and then behind him. This weapon will take practice to use, but
it can be effective for striking high-up targets. The secondary fire will
shoot out a large spinning blade attached to X by a long green chain. It
will cause heavier damage to targets.
![]()
Ray Splasher:
The Ray Splasher is gained
once Neon Tiger is defeated. This weapon will fire out small rapid energy
balls which will fly out on slightly diagonal lines. The secondary fire will
cause X to shoot out a crystal ball above him which will randomly fire out
small energy balls in different directions, giving him a larger range of
fire.
![]()
Gravity Well:
The Gravity Well is gained
once you defeat Gravity Beetle. This weapon will fire out a small energy
ball which will create a large energy barrier around itself. This weapon
will only damage some enemies, and is more effective against some bosses.
The secondary fire will shoot a large energy ball straight up and cause all
the objects on the screen to fly up. This can be used to raise some
platforms in certain stages.
![]()
Frost Shield:
The Frost Shield is gained
once you defeat Blizzard Buffalo. This weapon will fire out a small
icicle-type projectile, which will slowly accelerate forward and will strike
through any targets. If it hits something and breaks apart, the debris of
the projectile will create a small spike object when it hits the ground and
will damage anything that touches them. The charged-up shot will create a
large ice block attached to X which can be used to charge against enemies
without taking damage.
![]()
Tornado Fang:
The Tornado Fang is gained
once you defeat Tunnel Rhino. This weapon will fire a small drill-projectile
which will fly straight ahead and damage any enemies it strikes. This weapon
can also be used to destroy crumbling walls found in some stages. The
charged-up shot will make a drill appear in front of X and can be used to
charge into enemies without taking damage from them. You can also grab onto
a wall and stay in position if you activate the secondary fire and jump onto
a wall.
|
1 |
6 |
4 |
8 |
Bosses defeated: None |
|
2 |
8 |
3 |
4 |
Energy
hearts: 0 |
|
3 |
1 |
4 |
1 |
Body Upgrades: None |
|
2 |
2 |
4 |
1 |
Armored Carriers: None |
|
1 |
6 |
7 |
8 |
Bosses defeated: Blizzard Buffalo |
|
2 |
8 |
3 |
8 |
Energy
hearts: 0 |
|
7 |
1 |
4 |
6 |
Body Upgrades: Leg |
|
2 |
2 |
4 |
1 |
Armored Carriers: None |
|
5 |
6 |
6 |
5 |
Bosses defeated: Blizzard Buffalo, Toxic Seahorse |
|
4 |
8 |
8 |
4 |
Energy
hearts: 1 |
|
5 |
3 |
5 |
6 |
Body Upgrades: Leg |
|
4 |
2 |
4 |
1 |
Armored Carriers: None |
|
5 |
6 |
6 |
5 |
Bosses defeated: Blizzard Buffalo, Toxic Seahorse, Tunnel Rhino |
|
4 |
8 |
8 |
8 |
Energy
hearts: 1 |
|
2 |
3 |
5 |
8 |
Body Upgrades: Leg |
|
1 |
2 |
4 |
1 |
Armored Carriers: None |
|
8 |
7 |
7 |
1 |
Bosses defeated: Blizzard Buffalo, Toxic Seahorse, Tunnel Rhino, Volt Catfish |
|
5 |
2 |
3 |
1 |
Energy
hearts: 2 |
|
2 |
5 |
4 |
8 |
Body Upgrades: Leg |
|
3 |
4 |
5 |
8 |
Armored Carriers: None |
|
4 |
6 |
6 |
8 |
Bosses defeated: Blizzard Buffalo, Toxic Seahorse, Tunnel Rhino, Volt Catfish, Crush Crawfish |
|
4 |
8 |
8 |
8 |
Energy
hearts: 2 |
|
2 |
3 |
2 |
8 |
Body Upgrades: Leg |
|
7 |
2 |
4 |
7 |
Armored Carriers: None |
|
8 |
7 |
7 |
3 |
Bosses defeated: Blizzard Buffalo, Toxic Seahorse, Tunnel Rhino, Volt Catfish, Crush Crawfish, Neon Tiger |
|
5 |
2 |
5 |
5 |
Energy
hearts: 3 |
|
4 |
5 |
8 |
8 |
Body Upgrades: Leg, Arm |
|
3 |
4 |
5 |
8 |
Armored Carriers: None |
|
8 |
8 |
7 |
5 |
Bosses defeated: Blizzard Buffalo, Toxic Seahorse, Tunnel Rhino, Volt Catfish, Crush Crawfish, Neon Tiger, Gravity Beetle |
|
1 |
3 |
5 |
7 |
Energy
hearts: 5 |
|
6 |
5 |
8 |
2 |
Body Upgrades: Leg, X-Buster, Helmet |
|
3 |
3 |
5 |
6 |
Armored Carriers: Frog |
|
4 |
8 |
7 |
4 |
Bosses defeated: Blizzard Buffalo, Toxic Seahorse, Tunnel Rhino, Volt Catfish, Crush Crawfish, Neon Tiger, Gravity Beetle, Blast Hornet |
|
5 |
3 |
6 |
5 |
Energy
hearts: 6 |
|
4 |
4 |
6 |
2 |
Body Upgrades: Leg, X-Buster, Helmet, Armor |
|
7 |
3 |
8 |
6 |
Armored Carriers: Frog, Normal |
|
2 |
3 |
7 |
7 |
Bosses defeated: Blizzard Buffalo, Toxic Seahorse, Tunnel Rhino, Volt Catfish, Crush Crawfish, Neon Tiger, Gravity Beetle, Blast Hornet |
|
5 |
1 |
6 |
3 |
Energy
hearts: 8 |
|
6 |
4 |
6 |
2 |
Body Upgrades: Leg, X-Buster, Helmet, Armor |
|
7 |
8 |
4 |
7 |
Armored Carriers: Frog, Normal, Hawk, Kangaroo |
![]()

The Gold Armor:
The
Gold Armor can be found in the first level of Dr Doppler's lab. Just after
the robot ride armor platform and before the room with the falling spiked
balls will be a large hole. Drop down the left of the hole and slide down
the wall until you find the secret room. To actually see the capsule you
will need to have full health and you must not have gotten any of the four
energy chips. This capsule will give X all of the energy chips and it will
turn his armor to a gold color. X will now have all of the chip's upgrades
in one, which will make the game much easier. Just remember to not get any
of the upgrade chips in the other levels if you want to find this.


The Z-Saber:
Zero's Beam Saber can be used by X, and here's how! First, you must have
defeated Vile in the secret factory level using the Ray Splasher against him
so that he explodes and doesn't just run away. In Dr. Doppler's first stage,
you will find in the large, normally empty room a bug-type boss will be
waiting. Use Zero to defeat it and the boss will fly into him and cause all
of his energy to disappear. X will teleport down and Zero will say that he's
failed. Zero will then go back to Dr. Cain and will give X his Beam Saber!
You can now use it the same way Zero did, by charging up until X glows
green. This time when X fires it he will shoot a large green energy beam
forward as well. The only disadvantage is that Zero won't appear in the
finale at the end of the game.
![]()