
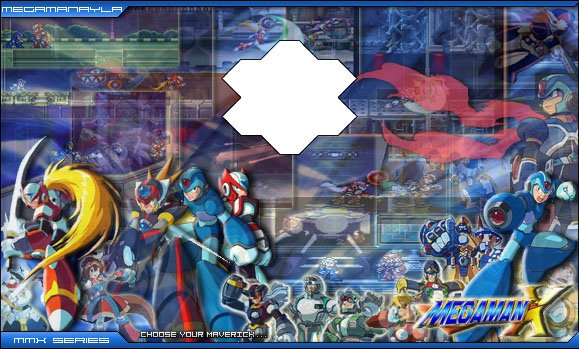


| Here is a complete guide for Mega Man X5. Choose the tab you want in order to view its content. |

|
Release Date: Japan: 2000 USA: 2001 Europe: 2001 |
Developer: Capcom |
|
Systems: Playstation PC |
Genre: Action |
Intro:
The sequel of the hit Mega Man X4, Mega Man X5 continues the legend, introducing
new characters, loads of new features and an all-new battle system. Once again,
you'll take the role of X or Zero in their never-ending quest for peace against
the relentless Mavericks and their leader Sigma.
Game Specs:
Continuing the action, Mega Man X5 utilizes the magnificent graphics, gameplay
and music introduced in X4, but at a much larger scale. You'll be able to play
as Mega Man X or Zero in the game, but unlike X4, you'll be able to switch
between either character before you enter a stage in the game. New items, parts,
weapons and techniques will add to X and Zero's arsenal. Huge bosses stand in X
and Zero's way to reaching the special parts for the Enigma, you'll need all the
skill to conquer them all before confronting Sigma for the toughest showdown
yet. As this time, he'll be much tougher to beat this time. And this time,
Sigma's main target isn't X, its Zero. More of Zero's past will return to haunt
him, and will test X and Zero's friendship to the point where they face each
other in battle...
![]()
Mega Man X:
X returns for his toughest battle against Sigma yet! Still a strong leader
of the Maverick Hunters, after the unfortunate death of General and the
Repliforce, X has begun to add new Hunters to the ranks, four of which are
introduced in X5. Maintaining his strong sense of justice, X is prepared to
do whatever it takes to crush the Sigma virus and stop the space colony from
destroying Earth. This time though, those haunting messages that have
appeared from the previous episodes may finally come true, and X might find
himself battling someone possibly stronger and more dangerous than Sigma
himself...

Zero:
Along for the ride, Zero returns to fight for justice and crush Sigma.
Utilizing his new Z-Buster, Zero now can fire energy blasts to combat
Mavericks as well as using his trusty Z-Saber. As a fellow leader of the
now-enormous Maverick Hunters, Zero can learn new techniques from defeated
bosses, allowing him to perform awesome moves to crush his enemies. This
time, the nightmares and visions Zero had in X4 about his creation (Dr
Wily????) will re-surface and will test his true strength and loyalty to his
friends. A past event may even return and repeat history for Zero...
![]()
Dr Light:
Dr. Light returns to give X new enhancements, this time ever more cautious
with his devices and more concerned for X's well-being. The situation with
Sigma has become so chaotic, that Dr. Light feels the need to take stronger
action than ever before, especially now that it is almost certain that his
former rival Dr. Wily has been behind the entire Maverick revolt. Unlike
previous X games, this time Dr. Light will interact a lot more and will play
a vital role in X and Zero's survival.

Alia:
Alia is head of data analysis and navigation systems of Maverick Hunter HQ.
She will greatly assist you during the game as X or Zero progress through
each stage. She'll give you heaps of information about each stage, any
dangerous traps, items and a rundown on the boss at the end of each stage.
Always listen to Alia, everything she has to say is important, and she has
earned her place and respect as one of the top Maverick Hunters.

Signas:
Signas is the new leader and commander of Maverick Hunter HQ. Bearing a
similar resemblance to Colonel of Repliforce, Signas is just as strong and
resourceful. Signas commands every mission executed by the Hunters, and he
also often plans out major operations, overseeing them carefully. Very loyal
to humans and reploids, Signas will stop at nothing to ensure that all
Mavericks are eliminated, as he has already proven to be a worthy leader and
valuable Hunter.

Douglas:
Douglas is the HQ's top mechanic and engineer. He has earned his place in
the ranks of the Maverick Hunters by always being prepared and supplying the
Hunters with valuable devices and equipment vital to their missions.
Douglas' main role in X5 is to prepare and rebuild the Enigma cannon once X
and Zero gain the parts required, as well as the preparations of the
Shuttle's mission to destroy Eurasia.

Lifesaver:
Lifesaver (aka Lifesaver) is the repair mechanic of Maverick Hunter HQ. A
well respected member, Lifesaver's job becomes more important than ever when
Sigma spreads the Maverick Virus, as he is responsible for repairing any
infected reploids, he is also trying to discover an antibody to combat to
virus. As he monitors the conditions of X and Zero when they go on field
missions, Lifesaver is always suspicious of them, as he has been unable to
decipher their body systems, and worries about Zero's unusual reaction to
the virus.

Dynamo:
Dynamo is a rogue reploid who at first seems to be a true mercenary, but is
actually working with Sigma to spread the Maverick Virus all over Earth. He
doesn't pose as much a threat to the Hunters as Vile and Sigma's previous
henchmen have, but he mainly intends to disturb their progress and waste
precious time. Overconfident and arrogant, Dynamo gives X and Zero more
trouble than he's worth, giving them only a hint of what to expect from the
battle against Sigma.

Sigma:
Sigma's back, and this time he's got his sights set on Zero rather than X.
Not regretting the downfall of Repliforce, Sigma has devised his most
devious plan ever, to infect the entire world with the Maverick Virus, as
well as causing the space colony Eurasia to crash and destroy most life on
the planet. Sigma's main intention was to flood Zero's body with the virus,
as he knew that Zero was the only one who's body would use the virus to grow
stronger. Hoping that Zero would then become his "true self," Sigma could
then use him to crush the Hunters once and for all. Sigma knows the truth
behind Zero's creation, but he holds back hoping that hiding the truth will
draw Zero further in. As always, his arrogance and overconfidence is his
weakness, and due to his attention fixed fully on Zero, he doesn't realize
the fact that X is also growing stronger in his fight against the Mavericks
- this time fighting X will be Sigma's own challenge.
Intro Stage:
A fairly
straightforward stage, you'll just need to make your way across the highways
and through a ruined building before reaching the statue. The highway part
is easy, just blast any enemies that get in your way. Once you reach the
ruined building, watch out for the falling blocks, there's two single ones
and a long beam. When you can see small rocks falling down from part of the
roof, it means that part of the roof will fall, so get ready to dash out
from under it as it falls. Once you reach the statue, climb the ladder and
jump up the closing walls. Just jump up as fast as you can and you should
easily avoid getting crushed. Go through the door at the top to face Sigma.
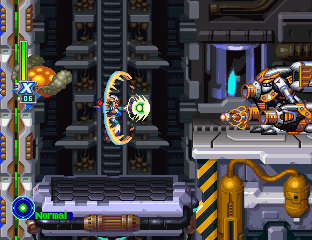
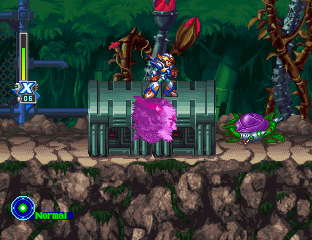
Grizzly Slash Stage:
You'll start
out on a moving truck. Make your way across the first one, and make sure you
don't fall in the gaps between each carriage. Once you reach the front of
the truck, wait for a gap in the firing of the blue energy beam on the nose,
then jump down and crouch. Blast or hack into the core of the truck to
destroy it. Once it blows, you'll notice a small timer appears in the corner
of the screen. Jump to the next truck before the timer reaches zero. You'll
have to traverse across a few more trucks, eventually you'll jump onto a
truck that's already exploding. The timer will appear and you'll need to get
to the other truck quickly. There aren't too many enemies on the exploding
trucks, so you shouldn't have too much trouble getting across them. At the
end of the second exploding truck is an energy tank, if you've got time,
jump down and grab it before jumping to the next truck. The next truck won't
be exploding, so just jump up to the front of it and another truck will come
and ram it head-on, you'll then enter the second area of the stage.
The second cave area is very easy to get through.
Right at the start you'll notice a hole in the ceiling, jump up it to find
Dr Light's capsule. Keep going deeper into the cave, there'll be a Maverick
taxi blocking your way, just blast it and move on. Jump up the tunnel and
finish off the two remaining enemies. Go through the door on the right, then
drop down the hole to enter Grizzly Slash's room. An easy stage, you
shouldn't have trouble getting through it.
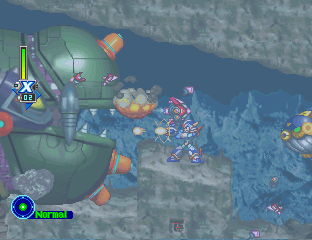
Duff McWhalen
Stage:
For most of
Duff McWhalen's stage, you'll be fighting against the huge submarine
"U-555." As soon as you enter the stage the sub will come up from the left
with its front facing you. The screen and the sub will be moving to the
right, so you'll have to be fast to keep up. The sub will use the four laser
ports on its upper and lower front to fire at you, so try to destroy them
quickly. The lasers will reappear after a few seconds, so keep firing at the
bare hull, you'll notice that it'll flash. Keep firing to eventually destroy
it completely so that the lasers won't reappear. Do the same for the lower
two. The mouth of the sub will also often fire out three homing missiles,
you should easily be able to destroy them. It might also fire out a captured
Maverick Hunter, quickly touch them before the sub covers them. Try to dodge
the moving spike mines, and quickly blast the fish before they eat you. If
they do, just keep firing to break out. Eventually, the sub will release a
large canon in its mouth and will fire out a huge energy beam. Jump up high
or stay low until the beam disappears, but you'll need to be quick as the
sub will keep firing the beam. Once you reach an open area the sub will stop
and an energy bar will appear. It'll begin to fire out the three missiles as
well as the beam, so try to stay low and don't jump when the beam appears.
Fire away at the mouth to damage it, once the energy bar runs out, the sub
will leave.
Go to the right and the sub will
reappear, this time with it's rear engine facing you. The screen will begin
to move down, and you'll have to move down through the tunnel. Four missile
ports on the sub will continuously fire out missiles that fly down or up
toward you when they're level with your character, so try to blast the
missile ports to get some relief from the barrage. Eventually you'll reach
the bottom of the tunnel and the sub's energy bar will appear. You'll need
to hit the red part of the engine to damage it, charged shots or the
three-strike attack will do fine. Keep blasting away and you'll eventually
destroy it. The sub will leave, and you'll enter a sunken ship area. Make
your way through the old ship, but be careful of the spikes. once you reach
the end you'll notice the capsule on the left, but you'll need X and Duff
McWhalen's weapon to reach it. Continue on and the sub will make it's final
appearance. This time you'll be fighting the top part of the sub and the
screen will move up. Make sure that you don't get caught under any of the
rock platforms. Four laser ports will be firing at you, with X, crouch down
and fire off a charged shot to hit them, with Zero just hack away or use the
C-Sword to hit them. Once you reach the top the energy bar will appear
again. The fish robots will appear and harass you, just ignore them unless
they get too close. You'll need to hit the protected part of the ship
attached to the fin. Destroy the small object below the fin to remove the
shield, then blast away at the core. Once you destroy it you can move on to
Duff McWhalen's room.
Squid Adler Stage:
Squid Adler's
stage will be tough to get through, you'll need practice to beat it
successfully. You'll instantly start off on the Ride Chaser, and the terrain
and speed of the screen will be intense, so be ready to have to try this
area over again. Try to follow these instructions on how to get through
successfully and also be able to grab all eight energy items along the way.
First jump to the first platform, then the next, then jump up and again,
fire away to destroy the walls blocking your way. Jump down, then up a bit
to grab the first item, go down low on the platforms to reach the second
one. Once you jump back up to the red terrain, jump up onto the first higher
platform, jump up to grab the item then dash to fly across the screen.
You'll grab the next item and land in the tunnel. Jump up over the
depression and blast away at the barrage of walls, but jump up to grab the
item hiding above. When you reach the next hole, the item will be in mid-air
in the center of the hole. Do a small jump and you should grab it and land
on the other side. Jump up into the tunnel and blast away at the walls. When
you reach the cliff, just drop off and you'll grab the item in mid-air.
Quickly dash through the final three walls to reach the end. If you got all
eight energy items, the wall ahead will blow open and you can get to the
capsule. Drop down the hole to continue on.
The
next area's main challenge will be all the locked shutters. Hit the locks
and they'll begin to close in on themselves. Once the lock closes, the door
will open, but rush through the door before it closes. When there's two
locks, hit one, then hit the other, alternating between the two so you can
get them both open at the same time. You'll be faced with many of these
locks, but just take it in turns to hit each one and you should be able to
get them open. Right before the last two locks is a single lock leading to
the heart, but you'll need X with the Gaea Armor to reach it. After passing
through the last two doors, you'll reach Squid Adler's room.
Izzy Glow Stage:
Izzy Glow's stage won't be too hard to get through.
First, knock down the bridge over the hole and jump over. Down the hole is a
Maverick Hunter and a heart, but you'll need the Gaea Armor to reach it.
Keep going and you'll eventually reach the moving spiked platforms. Wait for
them to retract back into the roof, then quickly dash under them. You'll
notice the EX tank up in the roof, but you'll need the Ground Fire to
destroy the wood blocks. Continue on and you'll eventually reach an area
with spikes on the floor. Wait for the platforms to lower, then jump across
the tops of them to reach the other side. Keep winding your way around the
platforms and you'll eventually reach a door. Blow it open to enter the
second area of the stage.
You'll now be in a
tower similar to the tower areas of Split Mushroom's stage in MMX4. As you
walk forward, the tower will spin, so you'll be effectively climbing the
tower. Blast all the enemies that come down, and try to destroy the energy
barriers. Dodge the Sigma Virus drones, and you'll eventually reach the top.
You'll now have to fight a mini boss. Three heads will come spinning down
the poles, eventually coming to a halt. They'll face you and then fire out a
large blue beam. Try to get in a gap to dodge the beams, you can also dodge
them by staying between them. You'll need to blast away at the face of the
black head to destroy it. The boss will take damage, and another set of
heads will come down. Keep destroying the black head to eventually defeat
the boss. You'll then enter the final area. The last area will have a lot of
the auto-defense systems that fire out large yellow energy balls. You can
destroy the cannons with the C-Shot or the C-Sword. Keep climbing up the
tower, remember that above one of the energy barriers is a hole in the roof
leading to a capsule. Once you reach a long tower leading up, jump up and
dodge the energy balls, or you can also destroy the cannons to make it
easier. Reach the top and you'll find Dr. Izzy Glow's room.
Dark Dizzy Stage:
Dark Dizzy's
stage runs straight ahead, there aren't many ups and downs to it. In the
first area you'll notice that when the large swirling void appears in the
background, the speed of the game will slow down, this is part of the stage,
similar to the effect of Dark Dizzy's special weapon. Be careful when you
walk around the constellations in the background, as the annoying bats will
often appear. The Falcon Armor will greatly help you in this stage. Once you
reach the open hole with the moving platforms, jump on it and get ready for
a long ride. Be very careful when the bats appear, as they'll also drop down
a set of killer spikes, don't touch them. Flying around with the Falcon
Armor will help here. The platform will sometimes backtrack around the still
platforms, jump on top of them and wait for the moving platform to continue
on. Eventually you'll reach the end and you'll notice the energy tank up on
a high platform. Use the Falcon Armor or double-jump with Zero to reach it.
Jump down on the platform to reach the second area.
The
second area will have a lot of spikes and the gravity-reversing beams. Jump
through the first beam and make your way through to the next one, but only
jump back into the fourth one so that you can get to the heart which will be
uncovered from the purple blocks. Try to dodge the Sigma Virus drones,
there'll be a few of them, so the Virus Buster will help here. Eventually
you'll reach the end of the corridor, you can jump down the hole near the
door to find the capsule, through the door will be Dark Dizzy's room.
The Skiver Stage:
The Skiver's
stage will have a lot of the exploding bombs, you'll need to quickly destroy
them otherwise you'll take heavy damage. The Falcon Armor will greatly help
you in this stage. When the stage begins, go right and quickly destroy the
first bomb before it blows. Go through the opening, and get ready to destroy
the next bomb hiding behind one of the Repliforce robots. Go through to the
next room and destroy the next bomb. when you reach the next room, quickly
jump up to the upper platform and destroy the bomb hiding behind the
Repliforce robot enemy before it blows. Jump up the tunnel and quickly
destroy the next bomb. Once it's gone, an opening in the roof will appear.
Jump up to continue on. Once you reach the top, head right to reach a large
platform. Your character will automatically walk onto it, the platform will
then begin to move down. When you've got enough room, jump off it so you can
get to the items below. Once the platform reaches the crumbling ground,
it'll smash through it and continue downward. After it plows through the
second ground, jump down to grab the Weapon tank before the platform gets
too close. After the third platform is broken through, jump down to the
right and head through the door.
You'll now
be in an open area with a platform to the right which slowly takes you up to
the next area. With the Falcon Armor, jump and fly directly up to find the
capsule. When you step on the platform, it'll move up on a diagonal path,
stand on the right edge of it and crouch down so the spikes miss you. Ignore
the Sigma Virus drone that appears, it won't catch you. Once at the top,
head into the large building and onto another moving platform. This one will
move up, and there'll be more bombs to destroy. Jump into the first corridor
on the right and grab the two Maverick Hunters, destroy the bomb in the
corner. Go back on the platform and head up to the next corridor. Jump in
and head down to the corner to find a heart. Get back to the platform
quickly before it takes off. Once you reach the top, you'll find the door
that leads to the airship where you battle The Skiver.
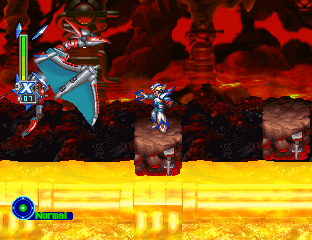
Mattrex Stage:
Mattrex's
stage will have a lot of fire and lava traps, many of them will beat you
instantly, so you'll have to be careful here. At the start, you'll need to
head down a large tunnel. There'll be several large dragon-shaped heads that
breath our fire. Make sure you don't get caught by the fire. The flames will
appear in two ways, one will breathe out a continuous flame, wait until it
stop before moving. The other will fire out short breaths, but will
eventually stop. Once you get to the bottom of the tunnel, head right to
reach the lava area. Alia will warn you about the lava, and you'll be able
to see it fly across the screen below. Stand next to the hole and wait for
the lava to stop. Jump down and head left to find the heart, then go right
and hide behind the first rock you find to escape the lava. Once the lava
stops, head right and keep hiding behind rocks to dodge the lava. Once you
reach the end of the tunnel, quickly blast the door to get to the second
area.
The second area will have a huge sea
of lava, and you can choose two paths to get to Mattrex's room. The first
one is straight ahead, use the Raiden Armor sitting just ahead of you to
jump over the hole. You'll need to leave the armor and continue across the
rocky platforms. The Falcon Armor will greatly help you here. Once you start
heading across the rocks, a large red dragon will appear on the left and
will follow you. Ignore it and blast the fire balls it fires out. Keep going
right, blast any bats that appear and blast the walls that block your way.
Eventually you'll reach two moving platforms and a door. The dragon's energy
bar will appear, and you'll have to fight it. Dodge it as it flies into the
wall, and keep hitting it, use the Gel Shaver to easily beat it, you
shouldn't have any trouble beating it. Continue on and you'll reach the
large room just outside Mattrex's room. The capsule is down to the right,
the Falcon Armor will help you reach it. Jump up the poles to reach
Mattrex's room. If you choose to take the Raiden Armor down into the
lava-filled area, you'll have to make sure that you don't get hit by many
enemies, otherwise the armor will blow and you'll lose instantly. Make your
way through the lava tunnels, and eventually you'll reach the room outside
Mattrex's.
Axle The Red Stage:
Axle The
Red's stage is fairly straightforward, you'll have to mainly deal with a lot
of enemies here. Once the stage begins, head right until you reach a cliff.
In the right corner are a few v-blocks, use the Gaea Armor to get through
them and on to find the heart. Jump up the poles to the top and continue on
to the right. When you see the rose-shaped enemies, stay away from them as
they will often lash out and grab you. Two charged shots or sustained damage
from the Beam Saber will destroy them. Keep going until you reach a tunnel
leading down. Along the way you'll pass through a tunnel where large
vine-type objects will fly out of the floor or roof, you can just see the
green tip of them sticking out of the roof or floor, so slow down when you
get close and destroy the eye at the base of them when they appear. Once you
reach the hole leading down, Alia will warn you of a large hole below, as
you jump down, fall to the left to land on a platform next to the hole.
A long pole will extend over the hole, grab it and
head right. Try to avoid the small spike enemies moving along the poles.
When you reach the end of the pole area, if you have the Falcon Armor, fly
up to find the capsule. Once you reach the end of the hole, jump back onto
solid ground and head right. You'll now need to jump over spiked areas, look
up above the spikes and you'll see the green tips of the vines, so jump
forward then back, so that you can destroy the vines when they appear. Keep
heading right and you'll eventually reach Axle The Red's room.
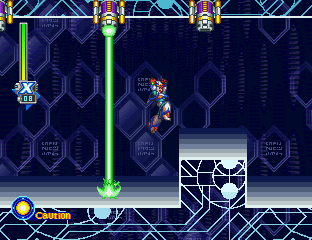
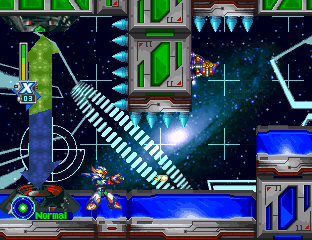
Zero Virus Stage 1:
The first Zero
Virus stage is the most difficult. For most of the stage you'll have to
dodge past laser beams that extend a green beam right across the screen when
you pass them. If you touch a beam, you'll be instantly vaporized. It'll be
very tricky and will take you a lot of practice to get through, the
Speedster part will help you out a lot here, but the best way to get through
is by using the Dark Hold weapon. Both X and Zero have this, and also having
the W-Energy saver part really helps as well. When you reach the top of the
area that you have to drop down to dodge the lasers, activate the weapon and
when you drop, they won't fire! Rush through as fast as you can before the
weapon runs out and you'll easily get through safely, only you'll now have
to face the Shadow Devil at the end of this stage.
Zero Virus Stage 2:
The second Zero
Virus stage will have more enemies to bother you with. Fairly
straightforward, whenever you encounter one of the large green robots, blast
them with the Tri-Thunder of the E-Blade to destroy them quickly. Try to not
get hit by too many of the Zero Virus drones, there'll be a few of them so
watch out. If you have the Falcon Armor, once you reach the huge hole with
all the moving platforms, you can just fly up the cliff easily, otherwise
climb the platforms carefully. The Falcon Armor's charged shot can break
through the green robot's shields, so keep firing at them even if they raise
it. Once you reach the top of the large tower, the boss room will be to the
right, jump up onto the ledge pictured here and walk left through the wall
to find a hidden energy capsule which can greatly help you out. Enter the
room on the right to fight the boss.
Zero Virus Stage 3:
The third stage
will have a lot of spike traps. Remember, this is the stage where you find
the Ultimate Armor/Black Armor capsule, if you want the Ultimate Armor,
you'll have to use normal X without any special armor. Once you reach the
large hole with the pole, you'll need to some fancy dodging to avoid the
moving spike enemies on the pole. Go through the spiked area with the moving
platforms, then you'll reach the hole with the capsule below. Keep going and
you'll reach another large hole. Proceed across the platforms to reach the
end of the stage where you fight Zero or X depending on who you're using.
Zero Virus Stage 4:
Very
straightforward and easy to get through, at the end of the stage you'll
reach the room with the eight teleport pods leading to the eight bosses. At
the start, drop down the large hole and you'll land on the ground below.
Head right and make your way through the spiked tunnels, just make sure you
don't touch any of them. Once you reach the large open area with the floor
covered in spikes, jump over the platforms and whack the green robots. Once
you destroy the second robot, jump down and you'll land on safe ground. Go
right and you'll find the hole leading to the teleport pods. Jump over it to
find an extra life and an energy capsule. Once you beat all eight bosses,
enter the gold teleport pod. You'll now be in a new area. Head right and
eventually you'll reach a large hole. Black blocks will slowly appear in
mid-air, jump on each one and head right as they appear and you'll
eventually reach the end of the stage where you will have the final showdown
with Sigma.

Grizzly Slash:
Guide: Grizzly
Slash will drop into the large rocky room to confront X. Once the battle
begins, he'll whip out three small yellow blades which can cause damage if
they hit X. Drop down into the depressions in the ground to dodge the
blades. He'll use this attack often, so be ready for it. He'll often jump
around to each higher ground levels, duck under him and crouch down in the
depressions to dodge him. Use charged shots from the X-Buster to beat him,
his weakness is the Spike Ball, so during the next battle against him, use
that. Once his health goes down a bit, he'll jump up out of the screen. Keep
moving as he'll drop down with his drill extended and he'll drill into the
ground and disappear. He'll then either appear out of the wall and slash at
X or his head will pop up out of the ground and he'll fire off his drill.
Keep moving to dodge him. Once he jumps down and re-enters the room, he'll
use a new slash attack, in which a large yellow crescent-shaped blade will
fly towards X. Try to jump up the wall to dodge them. He'll fire off a few
before jumping around again. Keep firing charged shots at him, you shouldn't
have too much trouble beating him.
Weakness:
Spike Ball.
Weapon Received:
C-Shot.
Item Received:
Crystal Ball.
Duff McWhalen:
Guide: Duff
McWhalen will battle you in an underwater room, so you'll be able to jump
higher here. He'll appear on the right of the screen and he'll stay there
for the first part of the battle. He'll start by firing out large ice blocks
that move across the screen towards X. He'll follow X around and try to
crush him against the left wall with the ice blocks. After firing out a long
line of blocks, he'll fire out a small blue cloud that will crawl along the
blocks. Jump up to dodge it. After the cloud disappears, he'll draw the
blocks back toward him. You'll notice that the configuration will change and
large ice-spikes will also be drawn towards him. Jump up over them as they
pass underneath, and watch out for the small missile he also fires out. Use
the C-Shot to inflict heavy damage on him, each time you hit him, all the
ice blocks on-screen will explode. Once his health is almost gone, he'll
move to the left side of the screen. From here he'll fire out a sequence of
ice blocks which move very fast across the screen and plow into the spikes
on the rear wall. Make sure that you don't get stuck on one of them,
otherwise you'll lose instantly. Just keep firing at his face and you should
finish him off fairly quickly.
Weakness:
C-Shot.
Weapon Received:
Gel Shaver.
Item Received:
Hydrogen.

Squid Adler:
Guide: Squid Adler
will use heavy electric attacks during this battle. He'll begin by firing
out three electric bolts, one forward, above and below him. Once they hit a
wall or the floor, energy balls will appear and crawl along for a short
distance. He'll also often create a large electrified block in the center of
the room which will damage X if he touches it, so stay clear. If he jumps
down on the ground he'll punch down and create a long electric beam that
covers the entire floor, jump up the walls to dodge it. If he jumps up to
the side and extends his long tentacle-like beams above and below him, he'll
shoot out numerous electric beams that will fly across the screen. Stay low
and below him to dodge them. To defeat him, use the Gel Shaver. Each time
you hit him he'll be stunned for a second, he'll then most likely try to ram
into X, so be ready to move and fire again. Ignore his electric attacks and
just concentrate on hitting him. He won't take too long to beat.
Weakness:
Gel Shaver.
Weapon Received:
Tri-Thunder.
Item Received:
Energy Cart.

Izzy Glow:
Guide: Izzy Glow
will enjoy teleporting around during this battle. He'll often fire out a
missile that will home in on X, so move around it as much as possible as
after a few seconds it'll explode. He'll teleport around to random locations
so it'll be difficult to hit him at times. Use the Tri-Thunder to defeat
him. You can fire the weapon far away from him as the bolt flying up will
hit the roof and the energy ball will fly into Izzy. Once his health is
about half gone, he'll begin to use a large laser attack, where he'll create
a huge laser streaking across the screen horizontally or vertically. Try to
hit him before the beam gets too close. He'll also sometimes fire out small
energy balls that will line up on the floor. Izzy will then fly to the
opposite wall and recall the balls. Jump up the wall to dodge them. After a
few shots he'll begin to teleport like crazy, try to dodge him and wait
until he calms down and resumes his other attack patterns.
Weakness:
Tri-Thunder.
Weapon Received:
F-Laser.
Item Received:
Laser Device.

Dark Dizzy:
Guide: Dark Dizzy
will float up in one of the corners of the room for most part of this
battle. He'll often fly back and forth and up and down, so try to avoid him
as he moves. He'll also sometimes charge at X and grab him. He'll then start
sapping X's energy while replenishing his own, so try to avoid him. Dizzy
will also often create several smaller bats that fly out to annoy X, just
fire off a charged shot of the X-Buster to easily destroy them all. Defeat
him with the F-Shot. He'll move around when you fire the missile, but you
should easily be able to home in on him, he doesn't move too fast. You'll
run out of weapon energy before all his health is gone, so use the X-Buster
to finish him off. After his health is almost spent, he'll use a new attack
where he'll fire out a three large mutli-colored rings that slowly move
towards X. Duck below and jump over each one to dodge them. As soon as they
pass, he'll charge up and will release an energy field that will freeze X
for a second. Make sure that you're standing far way from him as he'll
charge at X and try to grab him.
Weakness:
F-Laser.
Weapon Received:
Dark Hold.
Item Received:
Fuel Tank.

The Skiver:
Guide: The Skiver
will battle you on the wings of a large airship. This means that you can
fall off the edge, and he'll try to use this to his advantage. As one of the
last top commanders of the remains of the Repliforce army, The Skiver will
put up a good fight. He'll often charge at X and if he hits you X will fly
back a fair way, try to keep away from the edge of the wings otherwise
you'll be knocked off the edge. He also sometimes floats up and flies down
at X, jump over him to dodge his charge attacks. He will also often fire out
a blue clone of himself that will fly out and perform the charge attack.
Jump over it to dodge it. Use the Dark Hold weapon to your advantage, it
won't damage him, but it'll freeze him so that you can get a few charged
shots off with the X-Buster. After his health is half gone, he'll often fly
up out of the screen. You'll have to be constantly moving and jumping here,
as he'll fly back from any direction to try and ram X. Make sure that he
does not hit you when he flies straight up, otherwise you'll be knocked off
the edge instantly. Once he reappears, he'll float above the wings and will
shoot out large whirlwind projectiles that will damage and push X further
back. Stay under him and fire off a shot when the whirlwind passes. This
boss is tough, but with a little practice you should beat him.
Weakness:
Dark Hold.
Weapon Received:
Wing Spiral.
Item Received:
Orbiter Wing.

Mattrex:
Guide: Mattrex will
make a firey entrance before the battle begins. He'll mainly use strong fire
attacks here, so you'll have to be fast on your feet. He'll often make short
jumps across the screen, if he corners you, just dash under him when he
jumps. He'll also often fire out a fire bouquet that lands a short distance
away from him. Make sure it doesn't hit you. Use the Wing Spiral to defeat
him. You'll need to stand right next to him to hit him successfully, or you
could use the charged shot to hit him from a distance. As his health goes
down, he'll start using stronger attacks. He'll often roll over and charge
straight at you, try to jump up a wall to dodge him. If he jumps up on a
wall he'll either charge down at you or fire out smaller but faster fire
projectiles. If he drops down to one of the corners, he might perform a
stronger charge attack that leaves behind large fire blasts flying up from
the ground. Jump up into a corner to dodge him. He might also sometimes fire
out a huge barrage of fireballs, jump up the opposite wall to dodge it. This
boss will be tough to beat, you'll have to persist right to the end, but
with practice you should beat him quickly.
Weakness:
Wing Spiral.
Weapon Received:
Ground Fire.
Item Received:
Booster.

Axle The Red:
Guide: Axle The Red
will enter the room surrounded by a large rose. He'll taunt you at first,
then attack. He'll jump around often, and he'll also create a clone of
himself which will also jump around and try to hit you. Dash under him if he
gets too close. He'll also sometimes whip out a large spiked ball that'll
bounce around the room. Try to stay out of its way. Use the Ground Fire to
inflict heavy damage on Axle. Once his health is half gone, he'll begin to
create another clone that will jump around the room. Try to stay up in the
corners to dodge them. Axle might also shoot a red petal up out of the
screen, then several other petals will float down from above. They move down
in a pattern, so you should easily be able to dodge them. Be very careful
now, as Axle will stand in a corner and whip out a long spike whip. If you
touch it, X will be trapped and his health will gradually go down. You'll be
stuck for several seconds, so make sure this doesn't happen. The clone might
also use the whip attack, so be careful. Be persistent and keep hitting him
as he lands from his jumps. A tough boss, but easily defeated with the
Ground Fire.
Weakness:
Ground Fire.
Weapon Received:
Spike Ball.
Item Received:
Orbiter Engine.

Dynamo:
The First Battle:
After beating two bosses you'll have to face Dynamo for the first time.
He'll fight you in a small room, and you'll lose one hour for fighting him,
but don't worry about that. He'll often use his purple whip-type weapon,
he'll throw it towards you and after a few seconds it'll return to him. Jump
up the wall to dodge the whip. He'll also try to block your shots when you
fire at him, so try to hit him just as his whip returns. If he jumps up
across the screen, once he gets close to X he'll whip out a large attack
which is difficult to dodge from below, so try to jump up the wall and then
over him to dodge it. To defeat him, use the X-Buster. Keep firing off
charged shots at him, the plasma blasts should inflict further damage on
him. Always jump up the wall to dodge his whip, and be ready to move when he
jumps over.
The Second Battle:
Once you beat six
bosses Dynamo will return for his final battle. You'll fight him above the
Space Shuttle, and he'll use the same attacks as in the previous battle but
he'll also have a new stronger technique, as well as more health. He'll
punch the ground and create huge energy beams that consume about half of the
screen, try to dodge it by staying to the side and keep dashing around
before the beams appear. To defeat him, use the Wing Spiral. He'll be on the
ground often, a good time to hit him is when he throws out his whip. Jump
down next to him while the whip flies below and blast him quickly before it
returns. Using the charged-shot will infect further damage and you'll be
able to hit him from further away. He shouldn't be too difficult to beat.
Weakness:
Wing Spiral.

Shadow Devil:
Guide: Remember
that annoying cyclops boss also known as the Shadow Devil in Mega Man and
Mega Man 3? Well, the crazy creature has returned in X5 and he's stronger
and harder than ever. Once the battle begins, his pieces will start flying
in from the left. there are three different variations in the order that
each block flies in, your biggest threat are the two lower blocks. Stay
right at the edge up against the wall that the blocks are moving to and try
to jump over the lowest block and duck under the second lowest. You will
need a lot of practice before you can successfully dodge the blocks. Once
the creatures reforms, he'll open his red eye and fire out two red energy
balls, one at a time. They can be easily dodged. Once he breaks up into
blocks again, he'll create a green outline of himself where he was standing,
whatever you do, don't touch it otherwise you'll take heavy damage. The
blocks will then slide over and reform on the other side of the room.
Sometimes two columns of the blocks will move across and stay on one side,
so that two columns are up against each wall. The two lowest blocks will
then slide across at the same time, and will then continue up. Jump and duck
under them to easily dodge them. He'll also sometimes become a large
skull-type vehicle and will slide across the floor to a wall. Jump up the
wall and use a mid-air dash to dodge him. He'll then jump back a short
distance and extend spikes from his underside. Dash under him to dodge it.
Once he lands he'll open his eye to look around. He'll jump around a few
more times before breaking up again. To defeat him, use the Tri-Thunder.
When he opens his eye, shoot it with a bolt to heavily damage him. Also when
he becomes a skull and opens his eye, use that chance to hit him as you'll
get heaps of hits in before he breaks up. This boss is extremely difficult
to beat and will take you a long time to defeat, but it is possible so don't
get disheartened.
Weakness:
Tri-Thunder.
Rangda Bangda 2:
Guide: This boss is
similar to the wall boss in the first Mega Man X game, but will be harder to
beat. It has three different eyes, a green, red and blue one. The green one
will shoot out heaps of small blue projectiles that can be very annoying,
use the C-Shot to destroy the green eye quickly. The red eye will fire out
two long energy beams that will spin around it and cover the length of the
screen. You'll need to jump around the eye to dodge it. Use the Tri-Thunder
to destroy it quickly. The blue eye will often charge straight at you, try
to dodge it and destroy it with the Ground Fire. If two large walls close in
around you, jump up one as spikes will appear on the floor once they stop
moving. The red-orange sun-like object will come to life and move towards
you. Jump back and forth across the walls to dodge it. Destroy it with the
Gel-Shaver. Be careful, as once the sun is gone, the walls won't open again,
and sometimes spikes appear up the sides of the walls. Once all four parts
have been destroyed the wall will explode. This boss is tough, but it isn't
as hard as the Giant Blob so it shouldn't take you too long to beat.
Weakness:
Ground Fire/C-Shot/Tri-Thunder/Gel Shaver.
![]()
Zero:
Guide: You will
only fight this form of Zero if you're using X in the third final stage and
if Zero survived the Shuttle mission and didn't become a Maverick. After
arguing about each other's safety, the battle will begin. Zero will use
moves that you wouldn't normally be able to use if you're playing as Zero,
so be careful. He'll often punch the ground and cause large blue energy
bolts to fly up the screen, they will be very difficult to dodge, just try
your best. He'll also sometimes fire out two large ice-rings, then he'll
slash out his Beam Saber which will shoot out a green beam which flies
straight at you. Jump up the wall to dodge it. Your special weapons won't
cause any damage to Zero, so you'll have to use the X-Buster. Charged Shots
are a must, and try to have full energy tanks as you'll definitely need
them. If you have the Ultimate Armor, use it, as the Nova Strike will help a
lot. Constantly use the Nova Strike attack back and forth across the screen
and you should beat him fairly quickly.
Weakness:
X-Buster.

Maverick Zero:
Guide: You'll only
have to fight Maverick Zero if the Shuttle mission failed and Eurasia's
pieces fell down on Earth. Zero will become a Maverick, and you'll have to
fight him in the third final stage. He'll use the same attacks as if he was
normal described above, but he'll be a lot stronger. Again, the Nova Strike
attack will almost guarantee you victory, so the Ultimate Armor is a must.
You'll need full energy tanks, don't hesitate to use them if your health is
low. Zero is labeled as a Maverick here but its uncertain if he actually was
a Maverick, the big "W" in the background looks rather suspicious, doesn't
it? Zero is very difficult and will take a while to beat, but he won't be
much of a challenge if you have the Ultimate Armor. Just make sure that you
don't waste any time in beating him, try to defeat him as quickly as
possible as in this form he can perform a huge relentless attack with his
Beam Saber where he'll fire out two huge green plasma waves that streak
across the screen and are impossible to dodge. You can escape getting hit by
using the Nova Strike, but it's instant death if you're hit once and Zero
will keep slashing out the waves until you're dead, so make sure you don't
give him a chance to use it. Once you defeat him he'll return to normal
before sacrificing himself to save X from Sigma.
Weakness:
X-Buster.

Sigma:
Guide: Sigma will
confront you at the end of the final stage in his spiffy-looking new body.
He'll taunt you as usual, then the battle begins. He'll toss his cloak away
and attack. He'll often charge straight at you and will then jump up the
walls and then down again. Jump right up to the top of one of the walls to
dodge him. If he lands in a corner and stops, he'll shoot out small energy
balls that bounce towards you. Jump up the wall to dodge them. Once he fires
out two balls at a time, the attack will end. Use this break to attack him.
Use the X-Buster/Nova Strike or the Tri-Thunder to damage him. The Nova
Strike will help a lot, but the Tri-Thunder will also do fine. Try to hit
him when he's standing still, once he jumps up the walls, hit him from
behind and jump over him as he comes down to land and hit him in the back.
Once half his health is gone, he'll stand still and will create four
floating Sigma virus drones that will float around him as he jumps up the
walls. Try to destroy them as quickly as possible as they will damage X
instead of infecting him. Sigma will also disappear and reappear on the
right often. Once he reappears, he'll fire out a huge blue energy wave that
causes heavy damage, so be ready dodge them. If he fires out two, jump up to
the middle part of the wall so they fly past. He'll then start jumping up
the walls again. This form of Sigma is much more difficult to beat than his
previous forms, you'll need practice and skill to defeat him. The Nova
Strike attack works very well, but you'll need to stay aware of his attacks,
as he can easily beat you if you're not careful. Once you beat him his final
form will attack.
Weakness:
Tri-Thunder.

Sigma's Final Form:
Guide: Sigma's
final form is a gigantic humanoid-shaped body, so large that all you see of
it is his head and upper chest. He'll taunt you a final time, then he'll
attack. Two large hands will appear at the bottom two corners of the screen
and will use several attacks. Often one or both of the hands will open and
they'll fire out a large purple energy blast. Stay on the ground and duck to
dodge it. They will also try to crush X and will move up and down the
screen. If you try to attack the main body while the hands are active, it'll
just disappear to dodge your attack. Don't touch the spiked knuckles as they
also cause damage. One good way to destroy them is to stand on one and fire
off charged shots at the other, sometimes they drop energy capsules once you
destroy them. Once the hands leave the screen, the main body will attack.
Four blue energy balls will appear from Sigma's forehead and will line up on
the ground. After a second, they'll fly at X one at a time. Jump up the left
wall and jump to the right once they start moving to dodge most of them.
They'll charge one more time before disappearing, so get ready to move once
you land. The main body will also sometimes create a very large purple
energy block that takes up a quarter of the screen. The block will try to
appear over X, keep moving to dodge it before it becomes solid. The block
will then move to try and hit X, it should be easy to dodge. One of the
hands might also come down the top of the screen and fire out huge orange
energy beams down on X. Try to get out from under it before it fires. Once
it fires, it'll move around a bit so jump up a wall to dodge the beams. Once
the main body's attacks stop, the two hands will return and resume their
attack pattern. To destroy him, use the Spike Ball or the Nova Strike. Blast
the two hands as quickly as possible with charged X-Buster shots, and use
the Spike Ball when the main body attacks. Jump up the wall and hit the red
gem on Sigma's forehead to damage him. Keep dodging his attacks while
firing, but if you use the Nova Strike, just jump up the wall and fly across
his forehead, and keep flying back and forth to heavily damage him. This is
the toughest form Sigma's ever had in any of the X games, and he'll be
extremely difficult to beat. With practice and skill, you should manage to
destroy him, just remember that the Nova Strike makes it so much easier.
Weakness:
Spike Ball.
CONGRATULATIONS!!!
You finished Mega Man X5 with X.
Grizzly Slash:
Guide: You'll
have to hit Grizzly in his chest, so it might be hard to hit him at times.
Try to stay down in the depression below him, stand next to him and rip away
with the Beam Saber, you should be able to get in a few hits before he jumps
up. Once he jumps out of the screen, keep moving and try to get in a hit as
he flies down. Once he appears out of the wall or floor, stand back and rip
into him before he disappears. Once he lands and starts firing out the large
crescent shots, try to dodge them and concentrate on hitting him. You
shouldn't have too much trouble beating Grizzly.
Weakness:
Twin Dream.
Technique Learned:
C-Sword.
Item Received:
Crystal Ball.
Duff McWhalen:
Guide: Use the C-Sword to beat
Duff McWhalen. You'll easily be able to hit him, just jump and fire to
perform the spin attack. Each time you hit him the ice blocks he fires out
will disappear so you shouldn't have trouble dodging his attacks. After
plenty of hits, he'll move across to the other side of the screen. Try to
dodge him as he moves across. Once he reappears, you'll have to be very
careful, as if you get caught on the blocks he fires out you'll be thrown
into the spikes on the rear wall. Stay far away enough so you can dodge the
blocks, you can also jump up the wall above him and jump down while
attacking his head. Avoid the blocks and you should beat him fairly easily.
Weakness: C-Sword.
Technique Learned: F-Splasher.
Item Received:
Hydrogen.
Squid Adler:
Guide: You'll need to be fast to
dodge Squid's attacks. Try to dodge around his electric bolts, they'll be
difficult to get around, but its better than just standing around. Use the
F-Splasher attack to defeat him. Get close to him, then jump up and use the
mid-air dash. Zero will fly through him and cause heavy damage to Squid.
Once he regains his balance, he'll most likely charge at Zero, so get ready
to move. Keep blasting him with the dash-attack, but try to dodge him as
best as you can. Staying up the walls will help you to dodge most of the
electricity.
Weakness: F-Splasher.
Technique Learned: E-Blade.
Item Received:
Energy Cart.
Izzy Glow:
Guide: Izzy Glow will be hard to
hit without taking damage. You'll need to be quick to dodge his teleport
attacks, and play around with the missile he fires so it blows before it can
reach you. Use the E-Blade to destroy him. You'll notice that when Zero
performs this attack, he won't fly directly up, he'll move to the side a
bit, so perform the attack when you're standing a short distance from Izzy,
otherwise you'll go too far and hit him, taking damage yourself. When he
starts firing out the large laser blast, quickly hit him before it gets too
close. His teleporting will be annoying but just wait until he stops moving
before attacking again.
Weakness: E-Blade.
Technique Learned: C-Flasher.
Item Received:
Laser Device.
Dark Dizzy:
Guide: Dark Dizzy will be easy to
hit no matter where he is during this battle. Don't wait for him to start
attacking, just start hacking away with the Beam Saber. Also use the
C-Flasher, it'll inflict heavier damage on him. The bats he fires out can
easily be destroyed with the C-Sword. If you run out of the C-Flasher, if he
or the bats hit you, the damage you take will restore its energy, so you can
fire off a few more shots. You'll be able to hit him from any position in
the room with the C-Flasher. If he fires out the large rings, jump over and
duck under them to dodge them, and stay away from him when he performs his
freeze attack. You shouldn't have much trouble beating Dizzy.
Weakness: C-Flasher.
Technique Learned: Dark Hold.
Item Received:
Fuel Tank.
The Skiver:
Guide: After questioning Zero
about his battle with Colonel, The Skiver will attack. You'll need to be
fast on your feet to dodge The Skiver's charge attacks. Once the battle
begins, use the Dark Hold to freeze him. Hack away at him, you'll be able to
cause a lot of damage to him before the weapon runs out. Once he starts
moving again, by very careful, as he'll probably perform his sky dash
attacks. If he punches you while he flies up, you'll get knocked of the
ship, so jump and move around when he's not on-screen. Also use the C-Sword
to get in shots from a short distance. If he fires out the large tornadoes,
stay under him and hack away between each attack. A tough boss, you'll need
skill to beat him successfully.
Weakness: Dark Hold.
Technique Learned: W-Shredder.
Item Received:
Orbiter Wing.
Mattrex:
Guide: Mattrex will be tough to
beat, you'll need to be quick to dodge most of his attacks. He'll use a lot
of fire attacks, most of them will be fairly strong, so its worth trying to
dodge them. Use the W-Shredder to damage him heavily. Each time you hit him
he'll be stunned for a few seconds. It'll take a while for him to stop
flashing, don't fire again until he does. He'll probably try to get an
attack in before you can perform the attack, so get ready to dodge him
again. If he jumps up on a wall you won't be able to hit him with the
W-Shredder, so use the C-Sword to damage him as much as possible. If he
fires out a huge fire ball or charges at you, do a double-jump and you
should be able to dodge him. Another tough boss, you'll need to be fast and
skilled to hit him properly and dodge enough of his attacks.
Weakness: W-Shredder.
Technique Learned: Quake Blazer.
Item Received:
Booster.
Axle The Red:
Guide: Axle The Red will use
strong attacks during this battle, so be aware of what's going on. He'll
start by jumping around, so try to stay away from him when he lands. Try to
jump up the walls if he fires out the bouncing spiked balls. Use the Quake
Blazer to inflict heavy damage. You'll need to stand right next to Axle so
that you can get the shot in down on his head. Once you hit him he'll be
stunned for a few seconds so stand back until he stops flashing. His jumps
will be annoying, wait until he lands before performing the attack. Make
sure that you don't perform the attack right on top of him, otherwise you'll
land on his head and take damage yourself. Once he starts creating the clone
of himself, be persistent and keep hitting the real Axle, this way he won't
get a chance to attack you with his vine whip. A tough boss, but you should
be able to beat him easily with practice.
Weakness: Quake Blazer.
Technique Learned: Twin Dream.
Item Received:
Orbiter Engine.
Dynamo:
The First Battle:
After two bosses are defeated you'll have to fight Dynamo. After making his
entrance the battle will begin. He'll use his whip attack where he throws
the whip out across the screen, which then returns to him. He'll also often
jump up and fire out two small energy blasts either side of him. After the
first two, he'll drop down and fire off another two. Stay low then jump up
the walls to dodge them. Use the Beam Saber's normal attacks and the C-Sword
to beat him. Keep hitting him as much as possible, but stay away when he
attacks with his whip and energy bolts. Be persistent and you should beat
him fairly quickly.
The Second Battle:
Dynamo will be
tougher to beat this time around. He'll use the same attacks as he did in
the previous battle, but he'll also use the large beam energy attack. Try to
stay between the beams to dodge them. Use the W-Shredder attack to inflict
heavy damage on Dynamo. He'll stay in the corners of the room for most of
the time, so you shouldn't have too much trouble hitting him successfully.
He'll probably attack once he regains his balance, so get ready to move. Use
the C-Sword when he jumps up, you can also use the three-hit combo attack
when he lands. A little tougher than the previous battle, Dynamo shouldn't
be too hard to beat, but don't underestimate his abilities.
Weakness: F-Splasher.
Shadow Devil:
Guide: The Shadow Devil will be
more difficult to beat with Zero than with X. You can try to use the E-Blade
to hit the eye, but it's too risky, so just use the C-Sword. Jump over, hit
the eye and quickly fall back before you land on top of him. Take advantage
when he becomes a skull and hack away at the eye when it appears. The
C-Sword attack will help you a lot during this battle, as most of the time
you'll have to jump up to hit the eye. Learn the block movements and you
should get the hang of dodging them. Don't hesitate to use an energy tank,
just remember, whatever you do, don't touch the blob or the green outline it
creates, otherwise you'll take massive damage. Again, this boss will be very
challenging and will take you a while to beat.
Weakness: E-Blade.
Rangda Bangda 2:
Guide: Rangda Bangda will be
tough to beat. If the walls close, wait until the sun object returns to its
position and the walls open again, this way you can fight the eyes easily.
Use the E-Blade on the red eye, try to hit it as many times as possible even
if you do get hit, it'll take only a few shots to destroy it. Use the Quake
Blazer on the blue eye, attack it once it stops moving, and if it gets too
annoying, just use the C-Sword. Finish off the green eye with the C-Sword,
keep slashing at it when it fires to easily destroy it. Leave the sun object
to last, once it attacks, try to use the F-Splasher when it moves towards
you. If you find that too difficult, just use the C-Sword. A tough boss, but
it shouldn't be as difficult as with X, but try to have energy tanks with
you just in case.
Weakness: E-Blade/F-Splasher/Quake
Blazer/C-Sword.
![]()
X:
Guide: You've probably never
thought that this would happen, but here he is, Mega Man X listed as a boss.
No, don't worry, he's not Maverick when you fight him, X and Zero just have
their little argument that turns into a fight. Once the battle begins, he'll
activate the Ultimate Armor, but thankfully he won't use the Nova Strike. X
will use the X-Buster and the special weapons from X4, mainly using the
charged shot attacks. He'll be constantly charging up the X-Buster, he'll
fire off heaps of shots and will be very fast with the special weapons. The
Double Cyclone attack will be the same, with two large cyclone beams flying
out on both sides, jump up the walls to dodge them. If he uses the Soul Body
attack, he'll stand still and the clones will fly out straight at you, but
they should be easy to dodge. He'll also use the charged Frost Tower, stand
far back to dodge the ice blocks falling from above. If you're familiar with
X's Weapons from X4 you should know what to expect. Not looking from Sigma's
point of view, but X does have a weakness - Quake Blazer. Jump down on him
and use the attack to cause heavy damage. Keep persisting with the attack,
but stand back if he starts using heavy attacks. After beating Sigma more
than three times and crushing many of his Mavericks, this is the first
battle that X will truly lose. Once you defeat him Zero will defend X from
Sigma's following attack.
Weakness: Quake Blazer.
Sigma:
Guide: Sigma's two forms will be
extremely difficult to beat with Zero. You'll have to build up your skill
and practice what attacks work well against him, but believe me, it will
take a long time to beat him, just don't lose hope. Once the battle begins,
get ready to jump up the walls once he charges. A good time to hit him is
when he flies down a wall to land on the ground. Stand in the center of the
room and jump up as he passes underneath, then fire to use the C-Sword to
cause damage to Sigma without taking any yourself. Jump up the opposite wall
when he fires out the energy balls, after the third round passes, jump down
and whack him before he charges. His weakness is the E-Blade, when you hit
him he'll show electric damage and take more damage than from the Beam
Saber. A good time to hit him is also when he jumps down, time it right so
that you jump up high, whacking him as he flies under you. This way you
should be up above him as he passes, so once you land you'll miss colliding
with him. Once he starts creating the Sigma virus drones, you should easily
be able to destroy them with sustained whacking with the C-Sword. If he
appears on the right and fires out the huge blue plasma waves, stand on the
left of the room and dodge them, wait until he reappears before attacking
again. Remember, start the battle with two full energy tanks and don't use
one during this part of the battle, after some practice, you should be able
to beat this form without having to use one. If you need more energy, if you
lose a life you'll be able to pick up a large energy capsule outside his
room which fills a quarter of an energy tank. Save the two for the final
battle. Once you defeat him his final form will appear.
Weakness: E-Blade.
Sigma's Final Form:
Guide: Sigma's final form will be
incredibly difficult to beat. It will help if you have Zero's Black Armor
here, you'll inflict more damage with the Beam Saber and receive less damage
from his attacks. First, when the battle begins, jump up on one of the hands
and pelt away at it with the three-combo strike. You'll still be able to hit
it while standing on top, keep hacking and you should destroy one quickly.
If the other one still pesters you, destroy it as well, but remember to stay
on top of one and don't stand on the ground between them. Once the main body
attacks, you'll have to be very quick on your feet. His weakness is the Twin
Dream, once the hands leave, switch to the weapon and active it. Jump up and
attack, make sure the clone hits his forehead to cause damage. He'll fire
out the four energy balls, jump up the left wall and wait until they begin
to move, then jump way over to the other wall and jump over any other energy
balls coming at you. Once they start moving again, dash quickly to the left
and jump over the remaining ones. If the large purple block starts to
appear, move around as much as you can until it becomes solid, then it
should be easy to dodge. Keep attacking Sigma as much as you can, and switch
back to the normal Beam Saber when the hands reappear. If the hand comes
down from above, try to dodge it before it fires out the energy beams, once
it does, stay away from it until it leaves. This is by far the most
difficult battle you will ever have in any of the MMX games, Sigma will take
you ages to beat, but practice makes perfect, so don't worry if you keep
losing, at least you'll be getting used to his attacks. Keep trying, and
remember, if you need to use the energy tanks, use them. If you lose, you
can keep losing to his first form so that you can slowly build up your
energy tanks again with the energy capsule outside his room. Even if you get
the game over screen, you'll still have your energy tanks full if you
continue. Keep persisting, and never give up.
Weakness: Twin Dream.
CONGRATULATIONS!!!
You finished Mega Man X5 with Zero.
Armor Parts
Locations:
Falcon Armor Parts
Locations:
![]() Leg Part -
Found in Grizzly Slash's stage.
Leg Part -
Found in Grizzly Slash's stage. The Leg
upgrade is found in Grizzly Slash's stage. Just after you enter the cave
area after the trucks, you should see an opening in the roof. Jump up
through here and you'll easily find this capsule. The leg part of the Falcon
Armor will allow X to fly through the air, he'll also be invincible while
flying, and can destroy any enemies that strike him.
The Leg
upgrade is found in Grizzly Slash's stage. Just after you enter the cave
area after the trucks, you should see an opening in the roof. Jump up
through here and you'll easily find this capsule. The leg part of the Falcon
Armor will allow X to fly through the air, he'll also be invincible while
flying, and can destroy any enemies that strike him.
![]() Arm Part -
Found in Izzy Glow's stage.
Arm Part -
Found in Izzy Glow's stage.
 The
X-Buster upgrade is found in Izzy Glow's stage. You need the C-Shot or
C-Sword to find this one. Not long after you enter the area with the
auto-defense systems, you should see an opening in the roof just above one
of the purple energy barriers. Jump up the wall on the right and you'll see
one of the large cannons to the left, blocking an opening. Destroy it and
continue on to find the capsule. The X-Buster upgrade will give X a new and
stronger charged shot, the blast can also fly through solid objects.
The
X-Buster upgrade is found in Izzy Glow's stage. You need the C-Shot or
C-Sword to find this one. Not long after you enter the area with the
auto-defense systems, you should see an opening in the roof just above one
of the purple energy barriers. Jump up the wall on the right and you'll see
one of the large cannons to the left, blocking an opening. Destroy it and
continue on to find the capsule. The X-Buster upgrade will give X a new and
stronger charged shot, the blast can also fly through solid objects.
![]() Body Part -
Found in Duff McWhalen's stage.
Body Part -
Found in Duff McWhalen's stage.
 The Armor
upgrade is found in Duff McWhalen's stage. At the very end of the sunken
ship area, you'll easily see the capsule hiding behind a wall. You'll need
the Gel Shaver to reach it. Charge up the weapon, then release it. The large
ice blocks will strike the small bomb next to the wall which will blow and
take the wall with it, opening the way to the capsule. The armor upgrade
will enhance X's defense power, effectively doubling his overall life
energy. It will also allow X to use the Falcon Armor's Giga Attack, which
can damage all enemies on-screen.
The Armor
upgrade is found in Duff McWhalen's stage. At the very end of the sunken
ship area, you'll easily see the capsule hiding behind a wall. You'll need
the Gel Shaver to reach it. Charge up the weapon, then release it. The large
ice blocks will strike the small bomb next to the wall which will blow and
take the wall with it, opening the way to the capsule. The armor upgrade
will enhance X's defense power, effectively doubling his overall life
energy. It will also allow X to use the Falcon Armor's Giga Attack, which
can damage all enemies on-screen.
![]() Helmet Part -
Found in Squid Adler's stage.
Helmet Part -
Found in Squid Adler's stage.
 The Helmet
upgrade is found in Squid Adler's stage. At the start of the stage during
the Jet Bike part, you'll need to grab all eight of the small energy balls,
so that once you reach the end of the Jet Bike area, you can destroy the
door that blocks the way to the room containing the capsule. You'll need a
few tries to get all eight energy balls, they won't be easy to get, but with
practice, you should eventually get them all. The helmet part will allow X
to use less energy to fire his special weapons.
The Helmet
upgrade is found in Squid Adler's stage. At the start of the stage during
the Jet Bike part, you'll need to grab all eight of the small energy balls,
so that once you reach the end of the Jet Bike area, you can destroy the
door that blocks the way to the room containing the capsule. You'll need a
few tries to get all eight energy balls, they won't be easy to get, but with
practice, you should eventually get them all. The helmet part will allow X
to use less energy to fire his special weapons.
Gaea Armor Parts
Locations:
![]() Leg Part -
Found in Axle the Red's stage.
Leg Part -
Found in Axle the Red's stage.
 The Boots
upgrade is found in Axle The Red's stage. You need the Falcon Armor to reach
this one. During the second area of the stage where you climb along the
green pole above the large hole, you should eventually see an opening in the
roof just before the end of the pole. Jump and fly up into the opening to
find the capsule. The boots part will allow X to safely walk on any spike
trap in the game without losing a life or sustaining damage.
The Boots
upgrade is found in Axle The Red's stage. You need the Falcon Armor to reach
this one. During the second area of the stage where you climb along the
green pole above the large hole, you should eventually see an opening in the
roof just before the end of the pole. Jump and fly up into the opening to
find the capsule. The boots part will allow X to safely walk on any spike
trap in the game without losing a life or sustaining damage.
![]() Arm Part -
Found in Mattrex's stage.
Arm Part -
Found in Mattrex's stage.
 The
X-Buster upgrade is found in Mattrex's stage. You'll need the Falcon Armor
to reach this. Just below the final door to Mattrex's room to the right of
the lava will be the capsule sitting in the corner of the room. Fly over to
reach it. The X-Buster upgrade will allow X to fire off a special but weaker
shot that can destroy the blocks with a "V" on them. It will also allow X to
grab onto a wall and hold tight instead of sliding down.
The
X-Buster upgrade is found in Mattrex's stage. You'll need the Falcon Armor
to reach this. Just below the final door to Mattrex's room to the right of
the lava will be the capsule sitting in the corner of the room. Fly over to
reach it. The X-Buster upgrade will allow X to fire off a special but weaker
shot that can destroy the blocks with a "V" on them. It will also allow X to
grab onto a wall and hold tight instead of sliding down.
![]() Body Part -
Found in The Skiver's stage.
Body Part -
Found in The Skiver's stage.
 The Armor
upgrade is found in The Skiver's stage. You'll need the Falcon Armor to
reach this one. Once you reach the open area with the platform that rises up
to the right, jump up and fly straight up to eventually find the capsule
sitting on a ledge. The armor part will enhance X's defense power and will
allow X to perform the special Giga Attack which will damage enemies in
front of X.
The Armor
upgrade is found in The Skiver's stage. You'll need the Falcon Armor to
reach this one. Once you reach the open area with the platform that rises up
to the right, jump up and fly straight up to eventually find the capsule
sitting on a ledge. The armor part will enhance X's defense power and will
allow X to perform the special Giga Attack which will damage enemies in
front of X.
![]() Helmet Part -
Found in Dark Dizzy's stage.
Helmet Part -
Found in Dark Dizzy's stage.
 The Helmet
upgrade is found in Dark Dizzy's stage. Right at the end of the stage just
before Dark Dizzy's room, you'll notice a hold in the floor. Jump down to
see the capsule. This one will be very difficult to reach, as you'll need to
fire an F-Shot and direct it through the small tunnels to the room with the
capsule. Once you get the shot through, direct it up to the blue wall to
destroy it and open the way to the capsule. The helmet part of the Gaea
Armor will allow X to move the special blocks with a "V" printed on them by
dashing into them.
The Helmet
upgrade is found in Dark Dizzy's stage. Right at the end of the stage just
before Dark Dizzy's room, you'll notice a hold in the floor. Jump down to
see the capsule. This one will be very difficult to reach, as you'll need to
fire an F-Shot and direct it through the small tunnels to the room with the
capsule. Once you get the shot through, direct it up to the blue wall to
destroy it and open the way to the capsule. The helmet part of the Gaea
Armor will allow X to move the special blocks with a "V" printed on them by
dashing into them.
Ride Armor
Locations:
Ride Armor - Assist in battle - Found in
Mattrex's stage.

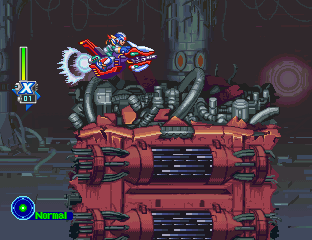
Raiden Armor:
The Raiden Armor is found in Mattrex's stage. This carrier can walk through lava and can withstand many blows before it explodes. It has three forms of attacks, a standard drill-punch attack, a large swipe attack which deals out more damage, and a charge attack which can drill through most enemies. Hold fire to perform the drill attack.
Jet Bike
Locations:
Jet Bike - Allow to drive fast - Found only
in Squid Adler's
stage.

The Jet Bike is used only in Squid Adler's stage. X or Zero will be riding the bike for the first part of this stage. This vehicle can jump, fire an energy weapon and execute a devastating dash attack where a beam of energy from the bike's underside will destroy anything that touches it. A dash-jump can be made as well as being able to perform the dash attack once the bike jumps. This can also enable the bike to glide over large pits and holes.
Heart Tank
Locations:
Heart Tank - Increase the energy bar - Found in all 8 stages.

This first heart is found in Dark Dizzy's stage. In the second area with the pillars that reverse the roof and floor of the area, once you reach the fourth one, jump back into it so that the room reverses a second time. Keep going and you should see the heart visible up on a ledge.

The second heart is in The Skiver's stage. When you reach the large platform that rises up the tunnel leading to The Skiver's room, jump into the second large opening in the wall on the right and proceed down the hallway to find this heart in the corner.

The third heart is in Mattrex's stage. When you reach the area where the lava flies across the screen, consuming everything in its path, stand next to the hole in the floor and wait until the lava stops. Once it leaves, quickly jump down and head left. Drop down the hole in the far corner and quickly grab the heart to the right. Jump back up the wall as fast as you can and rush back to the right to avoid the lava.

The fourth heart is found in Grizzly Slash's stage. You'll need the Gaea Armor to reach this one. When you proceed through the larger truck near the center of the first area, you should notice that between two of the carriages you can climb up the side of the two. Climb up and jump onto the roof of the carriage on the right. Continue across the spikes and you'll eventually find this heart.

The fifth heart is found in Squid Adler's stage. You'll need the Gaea Armor to find this heart. Just before Squid Adler's room, you should notice that there is an electric lock and a door to the left of the final two locks guarding the door to Squid Adler's room. Open the single lock and jump up through the opening. You should now see three v-blocks stacked up on the right. Destroy two of them and dash into the third one to move it to the right. Keep pushing it until you come within firing reach of the lock on the right. Jump up and fire at the lock to eventually open the next door, then head into the small room to find the heart.

The sixth heart is in Izzy Glow's stage. Again, you'll need the Gaea Armor here. Right at the beginning of the stage, drop down the large hole with the bridge that you can shoot down. Land on the spikes below and head right to find the heart.

The seventh heart is in Duff McWhalen's stage. You will need the Falcon Armor to reach this one. When you beat the second part of the U-555 and enter the sunken ship, head over to the end of the area where the spikes line the wall on the right of the hole you need to drop down to continue the stage. At the top of the hole, you should see an opening in the roof. Jump up and hover into the opening and you'll enter a secret room. Head right to eventually find the heart.

The eighth heart is in Axle The Red's stage. You need the Gaea Armor to find this one. Just as you enter the area near the start of the stage where you need to climb up the green vines to proceed through the stage, you should notice at the base of the cliff a v-block. Destroy it and continue to the right. Once you reach three blocks stacked on top of each other, jump over them and push the block up on the ledge to the right so that it drops down into the hole in the ground below to straighten out the terrain. Jump down and fire back to the left to destroy the block under the ledge and the bottom block of the stack. Destroy the second one so only one block remains. Go to the left of the single block and push it to the right up to the edge of the hole. Use it to jump across to reach the ledge on the right that has the heart waiting on top.
Sub-Tank Locations:
Sub-Tank - Stores health - Found in Grizzly Slash's and Dark Dizzy's
stages.
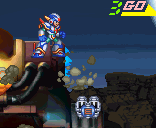
The first
energy tank is in Grizzly Slash's stage. Right at the front of the second
auto-exploding truck, you should see the tank sitting below the nose of the
truck. Quickly jump down to grab it and jump to the right before the truck
blows.

The second energy tank is in Dark Dizzy's stage. You need the Falcon Armor to reach this, or the C-Sword with Zero. Right at the end of the first area with the moving platform, you'll see the tank in plain sight sitting up on a ledge. Hover up to reach it or double-jump to reach it.
Weapon Tank Locations:
 Weapon Tank - Stores weapon energy - The Skiver's stage.
The weapon
tank is in the Skiver's stage. When you reach the area with the platform that
slowly moves down the large tunnel, once it breaks through the third floor, jump
down and grab the tank before the platform comes down.
Weapon Tank - Stores weapon energy - The Skiver's stage.
The weapon
tank is in the Skiver's stage. When you reach the area with the platform that
slowly moves down the large tunnel, once it breaks through the third floor, jump
down and grab the tank before the platform comes down.
EX Tank Locations:
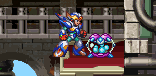 EX Tank - More lives per continue - Izzy Glow's stage.
The EX tank is
in Izzy Glow's stage. Near the beginning of the stage just after the first two
moving spike platforms, you should see the tank above the ceiling. You'll need
to use the Ground Fire to destroy the wooden blocks above so that you can reach
the tank.
EX Tank - More lives per continue - Izzy Glow's stage.
The EX tank is
in Izzy Glow's stage. Near the beginning of the stage just after the first two
moving spike platforms, you should see the tank above the ceiling. You'll need
to use the Ground Fire to destroy the wooden blocks above so that you can reach
the tank.
The Sigma Virus -
Infects with virus - Every stage.
Not really an item, but these Sigma Virus drones will appear in certain areas of each stage. If it hits you, your virus meter in the bottom left corner of the screen will change. Normal is when you're unaffected, Caution and Danger are warnings then Virus means your character has been infected. X will slowly lose health when infected, but Zero will become invincible (???). After some time the virus will wear off.
Captured Maverick Hunters - Rescue them - Izzy Glow's stage.

These captured Maverick Hunters are scattered throughout certain stages and need your help. Touch them to help them get back to HQ. They'll restore part of your health when you save them and they'll also give you an extra life! Its definitely worth rescuing them.

![]()
X Regular Armor:
X's basic armor. No
special powers. Much weaker than all of X's other armors.

![]()
Force Armor:
A reproduction of
the armor from X4. If you start the game with X you get it automatically.
Otherwise it's impossible to get. Gives you the power to hover, air-dash,
and plasma shot, but the Nova Strike and infinite weapon energy capabilities
from Mega Man X4 are missing.

![]()
Falcon Armor:
New armor. Very
light and nimble. Pressing the jump button in the air lets X fly for a
short time. The powered shot is a small but powerful laser. No air-dash
ability, but makes X generally faster. You can use boss weapons while in
it, but can't power them up like you could with the Fourth Armor. Nova
Strike replaced with Falcon Strike ability.
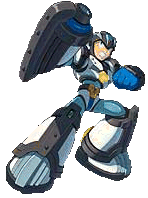
![]()
Gaea Armor:
Also a new
armor. It's basically the opposite of Falcon, in that it makes X
slower but much more powerful and defensive. It, however, also does
not have an air-dash. Clinging to the wall lets you stick there
instead of sliding off. X can also walk on spikes without any damage
coming to him, and his powered shot is much more powerful than the
Nova. Unfortunately, it's impossible to use boss weapons in the
armor, and it makes X more sluggish. Nova Strike replaced with the
Gaea Strike ability.
![]()
Ultimate Armor:
This is
a hidden armor, both ways you could possibly get it. It includes
the same abilities as the Ultimate Armor from X4, in that it's
exactly like the Fourth Armor, only allowable to do the Nova
Strike infinite times. Of course, in this game the Fourth Armor
doesn't allow X to do the Nova Strike at all, but the Ultimate
Armor still does allow him to do it infinite times.
Parts:
Once you defeat
a boss, you'll notice that you can choose between a Weapon +
Life or a Weapon + Energy. The "Life" option will give your
character an extra life heart, the "Energy" option will give you
more weapon energy for each of the special weapons. These two
parts will be completed once you beat another stage after
choosing them. The parts system is more complicated. You can
have up to eight parts in the game, chosen from a total of 16.
When the part option displays Weapon + Life/Energy +, it means
that you'll also receive a special item you can equip to certain
armor suits. The Life and Energy options will give you different
parts, so each boss has a maximum of two to choose from, but you
won't know exactly what you're getting, so this guide will help
you. To get the extra "+" to get a special part, you must fight
a boss which is at least on level 8. To be able to get all
possible eight items in the game, you'll need to waste time at
the start by deliberately losing lives and returning to the
Stage Selection screen to lose an hour off the timer. As the
levels of the bosses rise as the timer lowers, this is the only
way you can do it. When playing as Zero, start fighting the
bosses when there's 11 hours left (it'll change to 10 once you
enter the first boss' stage). When using X, enter the first
stage when there's 10 hours left (it'll change to 9 when you
enter the stage). This will be cutting it very close if you go
on to fight all eight bosses, once you start fighting the bosses
do not waste any time otherwise you won't make it.
A part will be completed once you go through two stages. The
boss' levels don't change on Easy mode, so you only be able to
get the parts on the Normal and Xtreme modes. Once you have an
item, on the Stage Selection screen, press L1 to reach the part
equip screen. You can equip parts for the following suits: X,
Zero, Fourth Armor, Ultimate Armor, Falcon Armor. The Gaea Armor
can't have any parts equipped. X and Zero can have four parts
equipped at a time, the other armor suits can have only two. If
you have Zero's Black Armor, he'll already have three specific
parts equipped, so make sure that you don't equip them again -
this way Zero's Black Armor can technically have up to seven
parts equipped! You can get up to eight extra hearts or eight
extra weapon up parts from defeated bosses. Listed below are all
the possible parts and which bosses and Life/Energy option has
them.
All Bosses:
![]()
Life Up:
This part will give your current character an extra energy heart.
![]()
Energy Up:
This will increase your maximum special weapon energy by a small amount.
Grizzly Slash:
![]()
Shock Buffer:
When your character takes damage, they won't be stunned for as long as they normally are.
![]()
Hyper Dash:
When you dash, you'll go further than normal, it also allows you to perform longer jumps.
Duff McWhalen:
![]()
Super Recover:
You'll receive more energy when you pick up an energy capsule, it'll also fill up your energy tanks faster than normal.
![]()
W-Energy Saver:
This part halves the energy use of any special weapon, allow you to use a weapon for much longer than normal.
Squid Adler:
![]()
Quick Charge:
X: This allows X to charge his weapon faster than normal, it greatly helps when heaps of enemies are around.
![]()
Z-Saber Extend:
Zero: Zero's Beam Saber can reach out a little further than normal. Slash out and you'll notice the small yellow beam extension.
Izzy Glow:
![]()
Burst Shots:
X: X can fire many more shots than normal. You'll be able to shoot off a maximum of five shots at a time, giving X a much better rapid fire rate.
![]()
Shot Eraser:
Zero: Zero can block energy beams with his Beam Saber. When an enemy fires an energy bolt, slash at it to destroy it.
Dark Dizzy:
![]()
Anti-Virus Guard:
This increases your defense against the infection of the Sigma virus. You'll need to be hit by eight drones before you get infected instead of four.
![]()
Virus Buster:
This will allow you to destroy the Sigma virus drones with the X-Buster/Beam Saber.
The Skiver:
![]()
Jumper:
You can jump much higher than normal, very useful when fighting Sigma.
![]()
Speedster:
This increases the speed of your character's movement. You'll move around about 50% faster than normal.
Mattrex:
![]()
Speed Shot:
This increases the flying speed of energy blasts from the X/Z-Buster - they'll fly across the screen faster.
![]()
Buster Plus:
This increases the damage caused by the X/Z-Buster, useful against strong enemies and bosses.
Axle The Red:
![]()
Ultimate Buster:
X: Every time you press fire, X will fire off a charged shot automatically.
![]()
Z-Saber Plus:
Zero: Zero's Beam Saber will be stronger and can cause more damage to enemies and bosses.
![]()
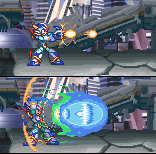
X-Buster:
You have the X-Buster from the start of the game. Every
armor suit for X will have a different version of the
X-Buster, each which have their own special abilities. The
standard X-Buster in X's normal and Fourth armor can fire
off the usual small energy blasts as well as the heavier
charged-up shot. Unlike previous X games, the X-Buster
cannot shoot through solid objects. The Falcon Armor has a
special charged shot which is stronger than the normal
X-Buster and the blasts can fire through walls. The Gaea
Armor uses a shorter-range but powerful energy blast which
can destroy certain blocks.
![]()
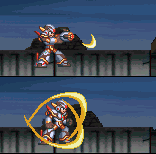
C-Shot:
The C-Shot is gained once you defeat Grizzly Slash. This
weapon fires out a small boomerang-shaped blade which will
fly away from X in a straight or diagonal path. The blade
can slice through most enemies, inflicting heavy damage. The
charged shot will create an energy barrier around X which
can protect him from enemies, any target striking the field
will be damaged or destroyed. The field doesn't use up
continuous energy while in use.
![]()
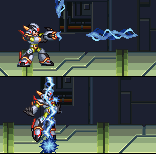
Tri-Thunder:
The Tri-Thunder is gained once you defeat Squid Adler. This
weapon will shoot out three electric bolts, one forward,
above and below X. Once they strike a wall, ceiling or
floor, large energy balls will appear and crawl along the
terrain for a short distance. This is very useful for
striking any enemies surrounding X as if the bolts miss
them, the energy balls could easily catch an enemy off
guard. The charged shot will create huge lightning bolts
that fly down the screen at given intervals. The positions
of each bolt is random, and you won't be able to switch to
another weapon until they all fly down.
![]()
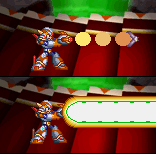
F-Laser:
The F-Laser is gained once Izzy Glow is defeated. This
weapon can fire out a small missile projectile which you can
direct around with the D-pad. When fired, you won't be able
to move X until to missile blows, so be careful and make
sure X is safe before firing it. This is useful for hitting
enemies that move around often, you can easily track them
down and destroy them without much effort. The charged shot
will fire out a massive energy beam that reaches to the edge
of the screen. The beam will remain active for a few seconds
so that you can easily direct it toward an enemy.
![]()
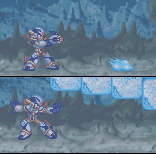
Gel
Shaver:
The Gel Shaver (aka Goo Shaver) is gained once Duff McWhalen
is defeated. This weapon fires out a small blue cloud-like
projectile which will crawl along the floor and walls until
it strikes a target. This is useful for hitting enemies
attached to walls. The charged shot will create eight
massive ice blocks, four on each side of X will fly out and
come crashing down, destroying any enemies below or near X.
![]()
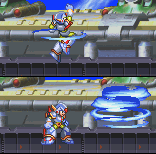
Wing Spiral:
The Wing Spiral weapon is gained once The Skiver is
defeated. This weapon will create a large tornado-shaped
projectile which will fly up above X. This is useful for
striking any enemies above him. You can also direct the
whirlwind around a bit by holding left or right when you
fire. You'll have to stand near an enemy on the ground to
hit them with this weapon. The charged-up shot will create a
much larger tornado that will fly out and up a diagonal path
away from X. This shot can easily hit any enemy in front of
X.
![]()
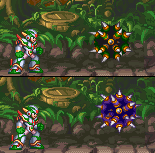
Spike Ball:
The Spike Ball is gained once Axle The Red is defeated. This
fires out a large green spiked-ball which has limited range
but is very powerful. Once the ball stops moving, it will
stay still for a few seconds before disappearing. This can
be useful for inflicting further damage on stationary
targets. The charged shot will fire out another large spiked
ball, but this one will bounce around the screen and destroy
any enemies that move into its path. The ball will bounce
around a few times before disappearing.
![]()

Dark Hold:
The Dark Hold weapon is gained once you defeat Dark Dizzy.
This weapon only has a primary fire, once used, all enemies
and moving objects on-screen will be temporarily frozen.
This can help X to navigate through areas infested with
enemies easily. You'll notice that when the weapon is
active, its energy will be continuously draining, so make
sure you deactivate it before it runs out if you want to
keep using it. Go into the weapon selection screen and
select another to deactivate the weapon. Also note that some
enemies and most bosses will be unaffected by this weapon.
![]()
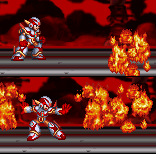
Ground Fire:
The Ground Fire weapon is gained once you defeat Mattrex.
This weapon fires out a large bouquet of flames which will
fly out a short distance and then land on the ground. Once
it lands, smaller flames will randomly fly straight out of
the fire and can damage any enemy that touches them. This
weapon can also burn away certain wooden blocks. The charged
shot will create two huge flame-bars which will fly out
either side of X and can easily destroy any enemies in front
or behind him.

Z-Saber and Z-Buster:
This time Zero can use his trusty Z/Beam Saber and his new
Z-Buster (you can only use the Z-Buster if you choose Zero
as the main character). The Beam Saber has the same moves as
in X4, Zero can perform a single or three-strike attack. The
three-strike combo attack can be stopped if you press down
while Zero swings. You can also swing the Beam Saber while
Zero crouches. The Z-Buster can fire off a small but strong
energy blast which is very useful for striking enemies at a
far distance. You won't be able to charge the Z-Buster, it
only has a primary fire mode.

Crescent-Sword (Mikazukizan):
Once you jump up, press jump again to perform a double-jump.
Press fire while jumping to perform this special attack.
The C-Sword is gained once Grizzly Slash is defeated. This
technique allows Zero to perform a double-jump and also the
special spin attack in the air, which also creates a stronger
beam around Zero to inflict further damage on any enemy around
him.
E-Blade (Denjin):
While standing still, press up and then the fire button
(Beam Saber) to perform this attack.
The E-Blade is gained once Squid Adler is defeated. This
technique allows Zero to jump straight up while releasing a
huge electric beam which can heavily damage any enemy in
front of Zero. You'll need to stand near an enemy on the
ground to hit them, higher enemies are easier to hit.
C-Flasher (Messenko):
While on the ground, press the Giga Attack button to perform
this attack.
The C-Flasher is gained once you defeat Izzy Glow. This
technique allows Zero to punch the ground and release
several purple energy bolts that will fly out in separate
directions, covering the entire screen. Any enemy nearby
will be either heavily damaged or destroyed.

F-Splasher (Hisuisho):
After jumping up, press the dash button to perform this
attack.
The F-Splasher is gained once you defeat Duff McWhalen. This
technique will allow Zero to dash while in mid-air, but it
will also create an ice-barrier around Zero which will
protect him from most enemies and can damage any target
striking him.
W-Shredder (Shipuu):
While dashing on the ground, press the fire button (Beam Saber)
to perform this attack.
The W-Shredder is gained once The Skiver is defeated. This
technique allows Zero to create a temporary clone of himself
which will fly out while Zero dashes and can damage any enemy
standing in front of Zero. Make sure that you dash further away
from the target so that there is enough room for the clone to
hit them.

Twin Dream (Sogenmu):
Select the weapon and press fire (Beam Saber) to activate
it.
The Twin Dream is gained once you defeat Axle The Red. This
weapon also creates a clone of Zero, but this one will
remain active for about ten seconds or until an enemy hits
Zero. The clone will stand in front of Zero and will perform
the same moves Zero does, if you hack away with the Beam
Saber, it'll do the same, causing heavy damage to any
enemies nearby.
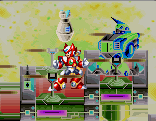
Dark Hold:
Select the weapon and press fire (Beam Saber) while standing
still to perform the attack.
The Dark Hold is gained once you defeat Dark Dizzy. This
weapon has the same effect as X's version, it freezes all
enemies on-screen. Again, the weapon will slowly drain,
select another weapon or de-select it to deactivate it. Some
enemies and bosses won't be affected by this weapon's
freezing effect.
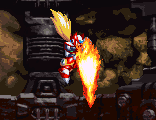
Quake Blazer (Danchien):
While falling from a jump, press down and fire (Beam Saber)
to perform this attack.
The Quake Blazer is gained once Mattrex is defeated. This
weapon allows Zero to use a fire-attack to crash down above
an enemy and severely damage them. Once Zero lands, several
explosions will appear for a few seconds, inflicting further
damage. Make sure you come down to the side of an enemy,
otherwise you'll take damage by touching them.


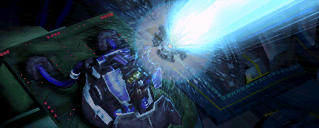


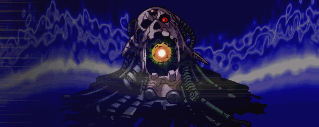


![]()
X's Ultimate
Armor:
While in the character select screen, make sure X is highlighted
and press up twice, and down nine times. X will start with his
Ultimate Armor, which is exactly like his Fourth Armor except
that it lets him use the Nova Strike an unlimited amount of
times.

Zero's Black
Armor:
While in the character select screen, make sure Zero is
highlighted and press down twice, and up nine times. Zero will
start with his Black Armor. This gives him better defensive
ability, and a more powerful purple saber with the ability to
dispel the Sigma Virus.
The Ninth
Capsule: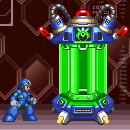
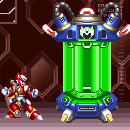
If you want to acquire the Ultimate Armor and Black Armor
without using a code, go to the third Zero Virus stage. As
X, you have to enter without your Fourth Armor. At a small
platform that's out of place, go down the left wall and
slide down it, then jump to the right wall. Sliding down it
will open a small alcove with the ninth capsule. As
unarmored X he gives you the Ultimate Armor. As Zero he
gives you the Black Armor. If you get one, you can die and
come back as the other character to acquire both.
![]()