






| Here is a complete guide for Mega Man Xtreme. Choose the tab you want in order to view its content. |

|
Release Date: |
Developer: |
|
Systems: |
Genre: |
Intro: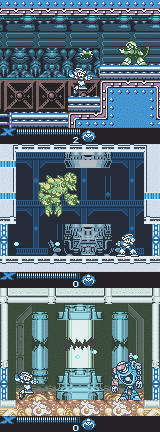
Mega Man Xtreme is the first X game to appear on a hand-held system, the Game
Boy Color. You'll be taking command of X on this side-quest to the main series,
battling resurrected Mavericks and hoards of enemies, using new weapons, items
and special Zero techniques, while visiting familiar areas from the past.
Game Specs:
You'll take control of X to guide him through the eight stages, each one
contains a Maverick from one of the first three Mega Man X games, their moves
and weaknesses will be similar to the first time, so if you've played through
the first three you shouldn't find much difficulty in battling them. This game
has three settings, a normal and hard game setting containing a continuing
storyline, and an extreme mode which is designed just for battle. The hard mode
will have a new storyline continuing where normal mode ended, you'll also have
the option of starting hard mode with all the items and weapons that you gained
in normal mode. The normal and hard mode games will have new items, weapons,
stages and upgrades available. X will need to fight his way into the core of the
Mother Computer, where the final showdown will occur...



Mega Man X:
Mega Man X returns to action, this time he volunteers to enter the Maverick
Hunter HQ's Mother Computer to remove the virus that is causing the computer
to act strangely. This time though, X must relieve his past as he battles
against the first Mavericks he fought and defeated long ago. With help from
Zero and Middy, X is determined to reach the core and defeat the source of
the virus - most likely Sigma. As always, X's strong sense of justice and
unending dedication to maintaining peace will see him through this mission.

Zero:
Zero also returns, this time assisting X but not taking much part in the
action. Zero stays at HQ, leaving X to enter the computer and defeat the
virus alone. Meanwhile, Zero clears away the Mavericks who have emerged
during the confusion caused by the virus, and he helps Middy maintain X's
status and position in the computer. The reality of Zero's past and creation
take a break during this game.

Dr. Light:
Dr. Light plays his usual role, waiting in the hidden capsules for X to
find. He'll give X new upgrades to help him survive in the heat of battle.
The usual four upgrades will be available - as well as a hidden capsule
containing two special moves.
![]()
Dr. Cain:
Dr. Cain makes a few appearances during the game. Usually with Middy, Dr.
Cain follows X's status in the computer and assist X by providing him with
information and hints to further X's progress.

Middy:
Middy is a new Reploid designed to work with computers, and after some time,
he became a well-known genius at his work. Allowing X to enter the Mother
Computer, Middy maintains X's status and helps him make his way through the
heavy data files. Always willing to help the Hunters, Middy has proved to be
a reliable and trustworthy ally, although he does have secrets of his own...

Techno:
Techno is working with the Mavericks Zain and Geemel to hack into the Mother
Computer to cause chaos. He was originally Middy's twin brother, but he was
infected with the Maverick Virus and began working for evil. He is under
Zain and Geemel's command, and will unquestioningly destroy Middy if he has
to. Hidden well within the Maverick's hideout, Techno is well protected, but
as all Mavericks, he underestimates X's true power.

Geemel:
Geemel, along with Zain, has managed to hack into the Maverick Hunter's
Mother Computer, infecting it with a virus which causes complete chaos and
confusion. Using this to their advantage, the two Mavericks have built up a
small force of Mavericks and are beginning to attack the world. Too
overconfident for their own good, Zain and Geemel are about to find out why
Vile, Agile, Serges, Violen, Bit, Byte and several forms of Sigma have all
lost against one reploid - Mega Man X.

Zain:
Zain is a powerful Maverick working along with Geemel to attempt to succeed
where Sigma and many Mavericks before him have failed. A strong and skilled
fighter, Zain is eager to battle X and is confident that he can match X's
power and crush him, but he underestimates X's power, the usual flaw of the
Maverick virus. Zain will battle X more than once before X can reach the
core of the Mother Computer.

Sigma:
Sigma returns in his first original form, re-constructed from the past data
from the Mother Computer. As the core of the virus causing riot in the
computer, Sigma has almost complete control over the system, managing to
access Maverick data and effectively revive his long-dead Maverick soldiers.
Not the core leader of the operation, Sigma can only remain inside the
computer and wait for X to confront him, where he hopes to crush X once and
for all. Sigma's only disadvantage is that he has no new bodies or moves,
he'll re-use the same tactics that he used during their first battle in the
original Mega Man X.
Normal Mode Bosses:

Storm Eagle:
Guide: You
will find Storm Eagle waiting for you on the Maverick's ship. He will often
use wind attacks against you, including his storm tornado gun which can be
avoided by jumping over or dashing through. He will also often flap his
wings which will cause X to move back. Make sure you don't fall off the ship
by dashing toward the Eagle and firing at him all the time. He will
occasionally fly up into the air and spit out an egg in which four bird-like
creatures will hatch from and fly towards X. If he flies right up out of the
screen, dash in one direction as he will swoop down out of the sky and try
to hit X. You'll need to use the X-Buster to defeat Storm Eagle, try to use
charged shots often.
Weakness:
X-Buster.
Weapon
Received:
Storm Tornado.
![]()
Flame Stag:
Guide: Flame
Stag will be jumping around a lot during this battle. He will begin by
jumping up the walls and will slowly jump back down to try and hit X. He
will also often charge at X on the ground and if he grabs you he will throw
you against the wall and use an uppercut to throw X straight up and will
then slam him into the ground. He will also often shoot out two blue or red
fireballs. When he charges at you and jumps up the walls, try to dodge him
by jumping away from the direction he is going to evade him. To defeat him,
use the Storm Tornado. Each time you hit him he will either fire two
fireballs or jump at you, so dodge the fireballs by jumping up the wall and
then over them and fire again or dashing under him as he jumps over. Shoot
him when he lands and jump over him as he jumps on the wall.
Weakness:
Storm Tornado.
Weapon
Received:
Speed Burner.
![]()
Chill Penguin:
Guide: Chill
Penguin will begin by firing out four mini ice blocks one at a time. He will
also sometimes use a dash and slide attack, where he will slide across the
floor attempting to slam into X. Often he will fire ice blocks at you and
will sometimes blow out cold air which freezes X if it hits him. Chill will
then jump up to the ceiling and pull on a lever which will cause a huge
blizzard and will blow X against the wall, causing damage. To defeat Chill
Penguin, use the Speed Burner. Try to hit him before he fires any ice
blocks, and if he jumps up to the top of the screen, shoot him down.
Continue this and he won't survive much longer.
Weakness:
Speed Burner.
Weapon
Received:
Shotgun Ice.

Spark Mandrill:
Guide: When
you face Spark Mandrill, he will probably charge and try to punch you. He
will use this attack often, so be careful. He will also often fire out large
spark spheres which fly out across the floor and up the walls and can cause
heavy damage. His charges can also cause major damage. If he jumps to the
top of the screen, he'll climb across the roof and drop down when you're
under him, so be ready to dodge him as he falls. Use the Shotgun Ice to beat
him. When he charges at you, fire once and he will freeze for a few seconds.
Wait for him to break out of the ice and when he stops flashing, fire again.
Keep doing this until he runs out energy.
Weakness:
Shotgun Ice.
Weapon
Received:
Electric Spark.

Zain (First Time):
Guide: You'll
have the option of fighting Zain in Flame Stag's stage. He'll be up in the
room above the first lava cavern, in the same room where the X-Hunter's room
was in Mega Man X2. He'll jump at X often, bringing his sword down to try
and crush X with. After a few jumps, he'll land and spin around, slashing
his sword around himself. To defeat him, use the Shotgun Ice. When he jumps,
dash under him and fire at the wall. The ice block will rebound off the wall
and hit Zain in the back. If you have time, you can also hit him directly in
the back. You can't shoot him from the front, he'll just block your shot.
Stay away from him when he spins around. Keep hitting him from behind and he
won't last long.
Weakness:
Shotgun Ice.

Zain (Second Time):
Guide: Zain
will use moves similar to those during his first battle with X, but he'll be
stronger and will move around faster. After jumping three times, as he lands
after his fourth jump, he'll use his spin attack but will move around the
screen at the same time. Jump up the walls to dodge it. Use the Shotgun Ice
to defeat him. Fire at him from behind each time he jumps for the first two
jumps, when he lands, go near him, as he'll jump low on his third jump. Go
up the walls after his fourth jump as he'll use his spin attack. Repeat this
through each of his attack cycles to eventually finish him off.
Weakness:
Shotgun Ice.
![]()
The Spider:
Guide: After
battling Zain, the next boss will be a large mechanical spider. It will
remain at the top of the screen most of the time, and you will notice before
it attacks, several horizontal lines will slide across in the background and
join together the parallel vertical poles. These poles indicate a path the
spider can take to try to climb down and slam into X. It will also often
spit out an egg in which four small spiders hatch and crawl across the
screen. When the spider reaches the bottom, a large red eye will open on its
back. Make sure you constantly charge up your X-Buster to full power, so
that when the red eye appears, shoot it with the fully powered blast to
damage the creature. This is the only way you can damage it, but repeat the
sequence and it should be defeated fairly quickly.
Weakness:
X-Buster.

Serges:
Guide: Serges
returns! He will battle you in the large vehicle above a large bed of
spikes. There will be three moving platforms for you to stand on. Serges
will enter in a large vehicle which has four gun turrets on the front. Each
turret will fire out a different energy weapon when Serges moves up and down
and fires one. To defeat him, shoot each gun turret with the X-Buster until
they explode. When you destroy one, the vehicle will move forward and
destroy one of the moving platforms. When you destroy all of them, The front
part of the vehicle will explode and Serges will be exposed. Stay on the
moving platforms and shoot at Serges with the Speed Burner as he rises up
the vehicle to finish him off. Try to dodge the small energy balls he fires
and keep away from the spikes.
Weakness:
Speed Burner.

Sigma:
Guide: Sigma,
as usual, is difficult to beat, as he can cause massive damage to X. He will
fight you with his old light saber-type sword. When he attacks, he will
charge at you swinging his sword. If he hits you about a third of your
health will disappear, so you must make sure that you have full sub tanks
before fighting him. He will often jump across the room off the walls and
charge into you. To defeat him, use the Electric Spark. You will find that
if you shoot at him when he's standing still, he'll block your shots. Jump
up the wall and charge your weapon to full power. When he jumps up the walls
and is opposite you, release the Electric Spark and you'll shoot out two
spark walls which will fly through him and cause a lot of damage. Drop to
the ground before he hits you and continue the process until you destroy
him. If you are low on health do not hesitate to use a sub tank.
Weakness:
Electric Spark.

Sigma's Final Form:
Guide: When
you face Sigma the second time, his head will appear at the bottom of the
screen and rise up into the head of a huge machine which is set into the
wall. The final form of Sigma will be difficult to destroy. First, its
attacks include the head of the machine firing a huge Fire Wave across the
screen which causes huge damage if it hits you. Avoid it by staying against
the left or right walls. The head will also fire out Electric balls which
also cause huge damage. Dodge them by dashing through the gaps between each
ball. The two floating claws next to the machine will often shoot energy
beams above and below themselves. To defeat the boss, wait for a claw to
open and shoot energy beams. If it opens again straight after closing from
an attack, it will fly down to X and try to hit him. The fully charged
X-Buster will inflict the only damage you can to Sigma. Jump on top of the
claw and make sure you have charged your X-Buster to full power. As it rises
back to its original position, jump off it and fire your weapon onto Sigma's
head. You will have to do this several times. Try to stay up in the top
right or left corner, From there you can easily fire off shots at Sigma
while not having to worry about his Fire Wave and Electric Spark attacks.
Remember to use sub tanks if your energy is low. Eventually you will destroy
Sigma, finish the normal mode game and gain access to the hard mode!
Weakness:
X-Buster.
Hard Mode Bosses:
![]()
Armored Armadillo:
Guide: Armored
Armadillo's main attack is a rolling attack in which he will fly across the
room and bounce off the walls in an attempt to crush X. He will also often
fire energy beams out of his forehead. You will find that if you shoot him
with the X-Buster, he will block most of your shots with his shield. You can
still defeat him this way, but if you use the Electric Spark, he will be
electrocuted and his shield will fall off, leaving him open for attack.
Continue shooting him with the Electric Spark while dodging his energy beams
and you will eventually defeat him.
Weakness:
Electric Spark.
Weapon
Received:
Rolling Shield.

Morph Moth:
Guide: Morph
Moth will begin the battle as a small object hanging from the ceiling. It
will swing around the room and release pieces of junk which will damage X if
they hit you. He will also often drop to the floor and spin across the room
throwing junk everywhere. He will then jump back up to the roof and will
spin junk around the room. To dodge the junk, jump up the wall and then over
him to dodge it. You will notice the object will begin to grow as the junk
is flying around. He will continue this loop a few times before becoming the
next form. To destroy him, use the Speed Burner. When you have taken his
health down to about half, The shell will break open and the roof will open.
The larger form of Morph Moth will now enter. It will fly around the room
and release a pollen weapon which will cause damage when it touches you. He
will also often fire out an energy beam at you so don't stop moving. Defeat
him by shooting him with the Speed Burner.
Weakness:
Speed Burner.
Weapon
Received:
Silk Shot.

Magna Centipede:
Guide: Magna
Centipede will teleport around the room often during this battle. He will
often fire out three small razor blades which will fly towards you. Dodge
them by jumping over them. He will also shoot his tail out and it will home
in on you and eventually strike. Dash to the left or right to dodge it. He
will sometimes jump up to the roof and attack from there. If he draws you
towards himself, dash away quickly as he will grab you and disable your
weapon so that you won't be able to fire any charged shots. To defeat him,
use the Silk Shot. When you shoot him with it, his tail will fall off and he
won't be able to use his tail attack. When you shoot him he will disappear
and reappear in a different location. If he appears on the roof, face away
from him and shoot the Silk Shot so that the projectile will fire up towards
him.
Weakness:
Silk Shot.
Weapon
Received:
Magnet Mine.
![]()
Wheel Gator:
Guide: You
will fight Wheel Gator in a room full of engine oil. He will begin by diving
under and will fire out a metal wheel which will fly up the wall and down
the other side. If you stay on the oil, he will jump up out of it and try to
bite X and will cause a lot of damage if he hits you. He will also often
charge up his shoulders and fire two metal wheels at the wall. Jump up the
wall to dodge them. He will also sometimes jump up and charge against the
wall. To defeat him, use the Magnet Mine. When he jumps out of the oil,
shoot him with the Magnet Mine before he fires any wheels. Stay high up on
the wall to dodge him as he jumps out and continue shooting him when he
appears.
Weakness:
Magnet Mine.
Weapon
Received:
Spin Wheel.

Geemel (First
Time):
Guide: You'll
have the option of fighting Geemel in Wheel Gator's stage. He'll be up in
the room above the long tunnel with spikes on the walls. He'll use a strange
boomerang-type weapon during the battle, he'll mainly be throwing it at X to
try and hit him. Geemel will also often jump up and disappear, he'll then
reappear above X and drop down, so make sure that you're always moving. Use
the Speed Burner to defeat Geemel. When you fire at him, get ready to jump
up one of the walls to dodge his weapon. Try to hit him as he jumps down
from above to get some extra hits in. He shouldn't be too hard to beat.
Weakness:
Speed Burner.

Geemel (Second
Time):
Guide: Geemel
will use moves similar to those during his first battle with X, but he'll be
stronger and will use a new move. He'll call a large platform which he'll
ride around in, and he'll fly around and fire down his weapon at X. Try to
hit him as soon as possible with the Speed Burner if he jumps up on his
platform. Make sure you stay in the corners of the room to dodge his flying
movements. Dodge his other attacks and keep firing when he's open for
attack, but try to not get hit as he causes heavy damage. Geemel shouldn't
take too long to beat.
Weakness:
Speed Burner.
![]()
The Spider:
Guide: After
battling Geemel, the next boss will be a large mechanical spider. It will
remain at the top of the screen most of the time, and you will notice before
it attacks, several horizontal lines will slide across in the background and
join together the parallel vertical poles. These poles indicate a path the
spider can take to try to climb down and slam into X. It will also often
spit out an egg in which four small spiders hatch and crawl across the
screen. When the spider reaches the bottom, a large red eye will open on its
back. Make sure you constantly charge up your X-Buster to full power, so
that when the red eye appears, shoot it with the fully powered blast to
damage the creature. This is the only way you can damage it, but repeat the
sequence and it should be defeated fairly quickly.
Weakness:
X-Buster.

Serges:
Guide: Serges
returns! He will battle you in the large vehicle above a large bed of
spikes. There will be three moving platforms for you to stand on. Serges
will enter in a large vehicle which has four gun turrets on the front. Each
turret will fire out a different energy weapon when Serges moves up and down
and fires one. To defeat him, shoot each gun turret with the X-Buster until
they explode. When you destroy one, the vehicle will move forward and
destroy one of the moving platforms. When you destroy all of them, The front
part of the vehicle will explode and Serges will be exposed. Stay on the
moving platforms and shoot at Serges with the Speed Burner as he rises up
the vehicle to finish him off. Try to dodge the small energy balls he fires
and keep away from the spikes.
Weakness:
Speed Burner.

Sigma:
Guide: Sigma,
as usual, is difficult to beat, as he can cause massive damage to X. He will
fight you with his old type-type sword. When he attacks, he will charge at
you swinging his sword. If he hits you about a third of your health will
disappear, so you must make sure that you have full sub tanks before
fighting him. He will often jump across the room off the walls and charge
into you. To defeat him, use the Electric Spark. You will find that if you
shoot at him when he's standing still, he'll block your shots. Jump up the
wall and charge your weapon to full power. When he jumps up the walls and is
opposite you, release the Electric Spark and you'll shoot out two spark
walls which will fly through him and cause a lot of damage. Drop to the
ground before he hits you and continue the process until you destroy him. If
you are low on health do not hesitate to use a sub tank.
Weakness:
Electric Spark.

Sigma's Final Form:
Guide: When
you face Sigma the second time, his head will appear at the bottom of the
screen and rise up into the head of a huge machine which is set into the
wall. The final form of Sigma will be difficult to destroy. The hard mode
form will fire down single fireballs that will fly toward X and stick to the
ground. He will also fire out several electric balls that will hit the
ground and fly up the screen as large energy bolts. It will also have the
two floating claws that attack with energy beams as well. To defeat him, use
the Rolling Shield. Jump up the left wall and stay up in the corner while
firing your weapon at Sigma's head. Stay up in the corner and you'll find
that beating Sigma will be rather easy, just make sure you don't get hit by
the fireballs. Once you beat him you'll have completed hard mode and will
gain access to the Extreme game mode!
Weakness:
X-Buster.
CONGRATULATIONS!!!
You finished Mega Man Xtreme.
Armor Parts and
Item Locations:
 Leg Upgrade -
Allows X to wall dash - Found in Chill Penguin's stage.
 The boots
upgrade is the easiest to find. In Chill Penguin's stage, you will
eventually come across the capsule pictured here and receive the upgrade.
The boots will allow X to jump off walls at longer distances, and will also
allow him to break certain blocks by jumping off them.
The boots
upgrade is the easiest to find. In Chill Penguin's stage, you will
eventually come across the capsule pictured here and receive the upgrade.
The boots will allow X to jump off walls at longer distances, and will also
allow him to break certain blocks by jumping off them.
 Arm Upgrade - Allow X to fire a more powerful X-Buster shot -
Found in Spark Mandrill's stage.
 The
X-Buster upgrade is found in Spark Mandrill's stage. You will need the
helmet upgrade to reach this one. When you get to the second area where the
room becomes dark and the moon-robot flies across the screen, look at the
roof as you go through the large corridor. You should notice two large
blocks on the roof that stand out from the rest of the roof. Jump up and
head-butt the blocks to destroy them, then climb up the opening to find the
capsule. The X-Buster upgrade will allow X to charge up a third charged
shot, and will also allow him to charge up the special weapons gained from
defeated bosses.
 Body Upgrade - Raise X defense - Found in Flame Stag's stage.
 The Armor
upgrade is found in Flame Stag's Stage. You'll need the boots upgrade to
find this one. In the first large lava cavern just below Zain's room, you
should notice a long ledge over the lava. Go to the left of the lava pit,
and use the ledges there to jump off them to reach the ledge. You'll find
the capsule just at the end of the ledge. The armor upgrade will allow X to
take half as much damage from enemies than he normally does.
 Helmet Upgrade - Allow X to break certain bricks - Found in
Storm Eagle's stage.
 The helmet
upgrade is found in Storm Eagle's stage. You'll need the boots upgrade to
find this one. After the long open area with the moving platforms that you
have to jump across, there will be a high metal wall. Jump up to the top and
jump down the other side of it. Jump up to a ledge where there are fuel
tanks and destroy them. Continue on and you will find the capsule. The
helmet upgrade will allow X to break some blocks above him with a head-butt.
Zero Extreme Programs:
![]() Zero
Scramble: Dash - Zero
attacks - Found in Armored Armadillo's stage.
Zero
Scramble: Dash - Zero
attacks - Found in Armored Armadillo's stage.
 The Dash
program is found in Armored Armadillo's stage. At the end of the stage when
you ride on the cart that takes you out into the open, as the cart flies up
towards the wall on the right, jump off it and climb up the wall to find an
opening. Enter the cave to find the capsule. This upgrade will allow you to
call Zero and he'll perform a strike attack in the direction you're facing.
![]() Zero Scramble: Rising -
Zero attacks - Found in Wheel Gator's stage.
Zero Scramble: Rising -
Zero attacks - Found in Wheel Gator's stage.
 The Rising
program is found in Wheel Gator's stage. Near the start of the stage just
before the room with spikes on the floor that you ride on a platform over,
you should see an opening in the roof just before the drop-off down to the
spikes. Jump up the wall on the right and then jump over to grab the wall on
the left. Jump up the opening to find the capsule. This attack will cause
Zero to appear at the bottom of the screen and fly up while slashing with
his Beam Sabre. This can cause heavy damage to enemies as well as bosses.
![]() Zero Scramble: Earth Gaizer
- Zero attacks - Found in
Morph Moth's stage.
Zero Scramble: Earth Gaizer
- Zero attacks - Found in
Morph Moth's stage.
 The Earth
Gaizer program is found in Morph Moth's stage. You'll need the Spin Wheel
weapon to find this one. Just after you enter the large building at the
start of the stage, to the right of the auto-save pillar, shoot out a wheel
at the base of the small ledge to break open a hole in the floor. Keep
firing wheels to break down the rest of the floor, then drop down to find
the capsule. This attack will cause Zero to pound the ground, causing heavy
damage to all enemies on-screen.
![]() Zero Scramble: Final -
Zero attacks - Found in Magna Centipede's stage.
Zero Scramble: Final -
Zero attacks - Found in Magna Centipede's stage.
 The Final
program is found in Magna Centipede's stage. When you reach the room with
the moving cross-hair and falling blocks, climb up the wall in the center of
the room and you should notice two blocks in the roof above it. Break the
blocks with a head-butt and climb up the opening to find the capsule. This
attack will call Zero to perform a stronger strike attack.
Heart
Tanks locations:
Heart Tank -
Increase the energy bar - Found in all the maverick's stages.

The first heart can be found in Storm Eagle's stage. When you reach the area where the green platforms rise up and down over a large pit, destroy the gun turret on top of the first one and jump on top of the platform. Wait for it to rise up, then jump onto the platform to the left. Hidden behind the blue wall is the heart, just walk to the left to pick it up.

The second heart is in Flame Stag's stage. Having the boots upgrade will help you reach this one. When you get to the area where the lava rises up quickly beneath you and you have to climb up the tunnel to avoid it, once you reach the top of the tunnel you should see the heart to the left on a ledge. Jump over to it and quickly blast the wall that blocks your way. Grab the heart and jump up the tunnel to avoid the lava.

The third heart is in Chill Penguin's stage. You'll need the Speed Burner to get this one. Just after you reach the wall that is too high for the armored carrier to jump over, leave the carrier, continue on and jump up the wall. Go out into the open and jump up the slope, then jump back to the left to get on top of the roof of the enclosed area you were just in. Walk left and destroy the second igloo-shaped building with the Speed Burner to uncover the heart.

The fourth heart is in Spark Mandrill's stage. You'll need the boots upgrade to reach this one. Some time after you beat the mini-boss of this stage, you'll find an open area with a ladder leading down in the corner of the room. Jump up the wall on the right and you'll see the heart sitting on a ledge. Jump off the wall and around the ledge, you should be able to grab onto it and climb up to reach the heart.

The fifth heart is in Armored Armadillo's stage. When you drop down a long shaft, you will land behind the large bulldozer-type enemy, who will charge forward and break down the rock walls in front of it until it falls into the spikes. To find the heart, you must destroy the bulldozer before it reaches the area where the heart is, otherwise it will destroy the wall and you won't be able to reach it. Once you destroy it, jump up the wall to find the heart.

The sixth heart is in Morph Moth's stage. At the start of the stage just outside the large building, jump up the wall and climb up onto the roof. Climb up the edge to find the heart.

The seventh heart is in Magna Centipede's stage. You will need the Speed Burner and X-Buster upgrade to reach this. At the start of the level where there are two of the yellow spotlights covering an area, dodge the lights so that the gun turrets will not fall down. You will notice that the second turret of this area is below an opening in the roof. Use the charged-up Speed Burner to grab onto the right side of the turret and then scale the wall to find this heart.

The eighth
heart is in Wheel Gator's stage. Just after you climb up the ladder after
using the armored carrier and making your way under the tank, you will see
this heart up on ledge which has spikes on the wall. You will need the Speed
Burner and X-Buster upgrade to reach this. Stand on the raised platform to
the right of the heart and then charge up the Speed Burner. Before releasing
fire, jump up as high as you can to the left and then release fire. X will
fly across the screen towards the heart.
Sub-Tank
locations:
Sub-Tank -
Stores health - Found in Storm Eagle's, Spark Mandrill's, Armored
Armadillo's and Magna Centipede.

The first sub-tank is in Storm Eagle's stage. You'll need the boots upgrade to reach this one. At the start of the stage, when you reach the highest point on the moving platforms, you'll need to slide down the left edge of it, then use the side of it to jump off to the left so that you can reach the ledge down on the left. Once you manage to land on it, the sub-tank will be waiting for you there.

The second sub-tank is in Spark Mandrill's stage. Near the start of the stage, you'll see a ladder leading down just before the end of the area with the electric sparks in the floor. Go down the ladder and you should see the sub-tank hidden behind a wall of large blocks. Jump up the wall and jump off the blocks to destroy the blocks (you'll need the boots upgrade) to reach the sub-tank.

The third sub-tank is in Armored Armadillo's stage. When you drop down a hole and the bulldozer starts to pursue you, keep going until it falls into the spikes and explodes. Go back to where it began its rampage and there will be a sub-tank waiting there.

The fourth sub-tank is in Magna Centipede's stage. You will need the Speed Burner and X-Buster upgrade for this. In the area where the large blocks move around, go to the last part where three rows of two blocks will fall down and stack on top of each other. Dash past them before they all fall and charge up your weapon. When you get to the opening in the roof, go over to the blocks on the left, then jump off the side of them towards the wall and release fire to fly over to the wall. Jump up the opening in the roof to find the sub-tank.

![]() X-Buster:
X-Buster:
You'll begin
the game with the X-Buster. As the standard weapon, most enemies can be
defeated from sustained fire or a few charged shots. You'll need to
X-Buster to proceed through the stages, but you'll need special weapons
gained from defeated bosses to inflict heavier damage on certain bosses
- the X-Buster will only slightly damage the bosses.
Normal Mode Weapons:
![]() Storm
Tornado:
Storm
Tornado:
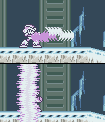
The Storm
Tornado weapon is gained once you defeat Storm Eagle. This weapon's
primary fire will shoot out a long gust of wind which can strike through
targets and cause more damage than a regular shot. The blast will either
completely destroy the target or damage it and blow it further away from
X. The charge-up fire will create a huge swirling vortex of wind around
X and will destroy any targets above or below him.

![]() Speed
Burner:
Speed
Burner:
The Speed
Burner is gained when you defeat Flame Stag. This weapon will fire out a
large flame-ball which will scorch any targets it strikes. The
charged-up state is useful, as it will cause X to fly straight ahead a
small distance while flaming red, so that any enemies he strikes will be
destroyed. This can also be used to reach items normally out of reach or
in a dangerous area.
![]() Shotgun
Ice:
Shotgun
Ice:
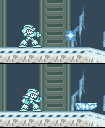
The Shotgun Ice
weapon is gained after you defeat Chill Penguin. This weapon's primary
fire is an ice block which can either damage targets or sometimes freeze
enemies. If the block hits an obstacle such as a wall, the block will
break and smaller projectiles will reflect back off the wall. The
charged state of the weapon creates a platform which X can ride. Once
the platform is created it will slide forward for a limited time.
![]() Electric
Spark:
Electric
Spark:
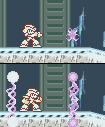
The Electric Spark weapon is gained once you defeat Spark Mandrill. The
weapon's primary fire will shoot out an electric spark-ball which can
damage or electrocute targets. The charged state of this weapon will
fire out two giant walls of electricity either side of X and can destroy
any targets they strike through.
Hard Mode Weapons:

![]() Rolling
Shield:
Rolling
Shield:
The Rolling Shield is gained after you defeat Armored Armadillo. The
primary fire of this weapon shoots out a large blue ball that bounces
across the screen until it hits a target. If it hits a wall, it will
reflect off it and continue on in the opposite direction. The charged-up
state will create a defensive shield around X. This will protect him
against any enemies who try to strike X. Energy projectiles will be
deflected, but if a strong solid object strikes the shield it will turn
off.
![]() Silk
Shot:
Silk
Shot:
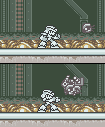
The Silk Shot is gained once Morph Moth is defeated. This weapon will
fire a small ball-shaped projectile which will land on the ground in
front of X and shoot out four smaller projectiles in diagonal
directions. This can hit any enemy normally out of reach. The charged-up
state will attract a large amount of junk towards X, which will fly out
and spread projectiles across the screen once fire is released.
![]() Magnet
Mine:
Magnet
Mine:
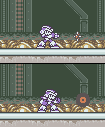
The Magnet Mine is gained once you defeat Magna Centipede. This weapon
will fire a small mine-projectile which will continue flying straight
forward until it hits something. When it attaches itself so an object,
it will detonate after a few seconds. The charged-up fire will shoot out
a small energy ball which will continue to fly through targets once it
hits them and cause more damage than a normal shot.
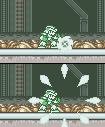
![]() Spin
Wheel:
Spin
Wheel:
The Spin Wheel is gained once Wheel Gator is defeated. This weapon will
fire out a small metal wheel which will slowly launch away from X and
roll through any enemies and cause damage, as well as being able to
destroy certain walls. The charged-up shot will fire out eight energy
beams that will fire away from X in a circular fashion.

The Shotokan/Haduken
Capsule:
The Shotokan Capsule will give you both the Haduken move from Mega Man X
and the Shuryuken move from Mega Man X2. To get it, go to the second
Shadow Hunter stage. At one point there will be two ladders. One will
lead downward into the rest of the stage. The other will lead upward.
Take the upward ladder by maneuvering the floating platform toward it.
Once up there, use the Dash-Jumps and wall clings until you come to a
complicated set of spikes. Charge your Speed Burner weapon and Dash Jump
toward the spikes, then turn around quickly and let loose the charged
Speed Burner. You should be safe now, so cling to the wall and let it
lead down to the capsule. Remember that the capsule will only appear if
you've gotten all the items and upgrades available to you, whether it be
Normal, Hard, or Extreme mode.